Ubuntu 14.04 Trusty Installation Steps on VirtualBox
The Tutorial shows you Visually and Step-by-Step How to Install Ubuntu 14.04 Trusty Tahr Unity Linux Desktop on Oracle VirtualBox 7.3.X.
Ubuntu 14.04 Trusty Come with only Some New Features:
- Qt 5.2
- GRUB 2.02
- Torrents Searching from Ubuntu Dash
To the Ubuntu 14.04 Trusty Installation Guide Bottom Link to Guest Additions Installation for Ubuntu 14.04 Desktop.
-
Download Ubuntu 14.04 Trusty Desktop
-
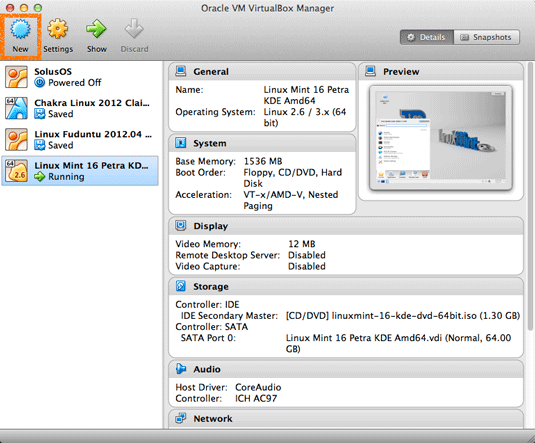
Create a New Virtual Machine.
-
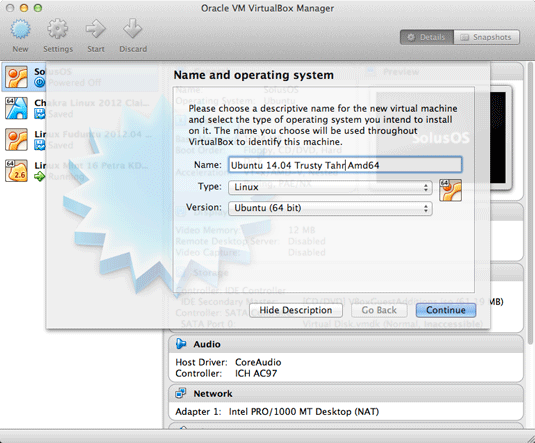
Set Name and OS Type.
-
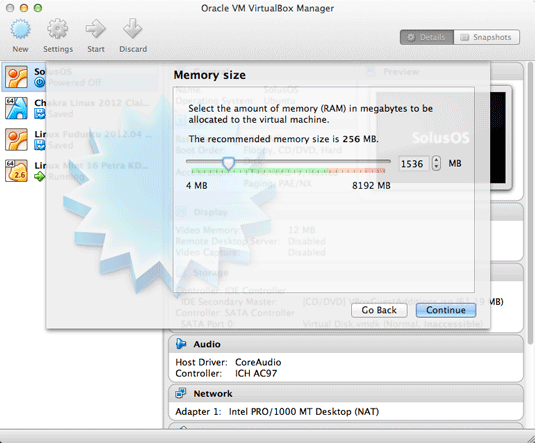
Set RAM Size.
If Possible leave At Least 1,5Gb…
-
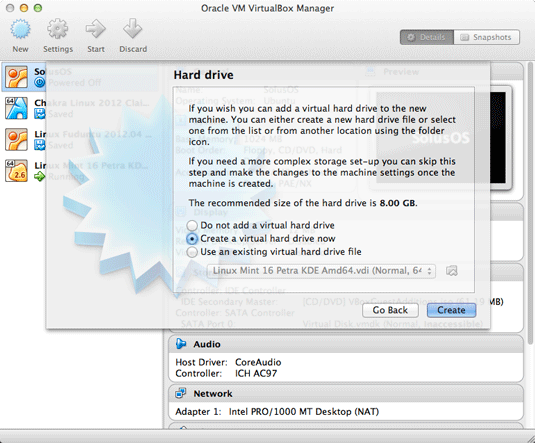
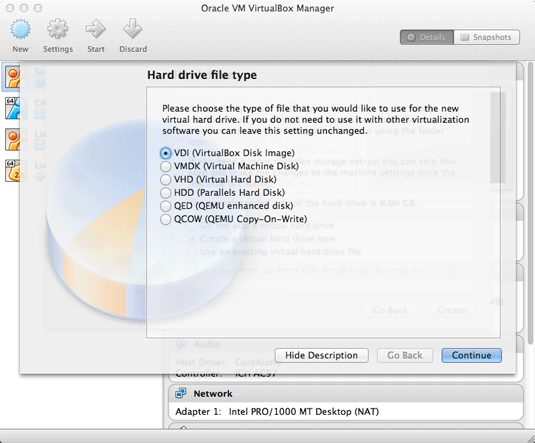
Create a New Virtual Disk.
-
Default VDI Format Should be Just Good.
-
Choose the Allocation Type.

-
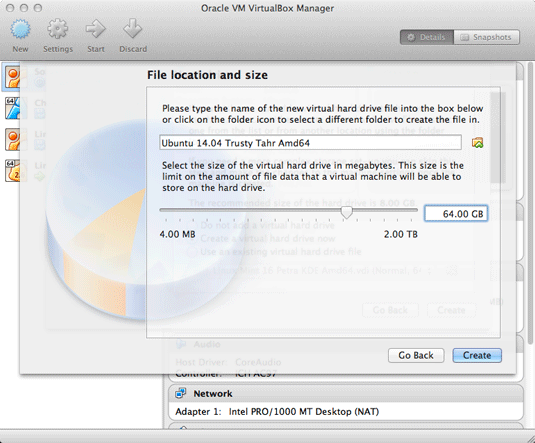
Set the Disk Size.
-
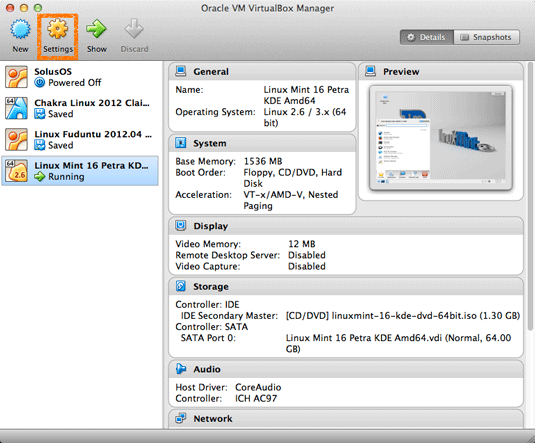
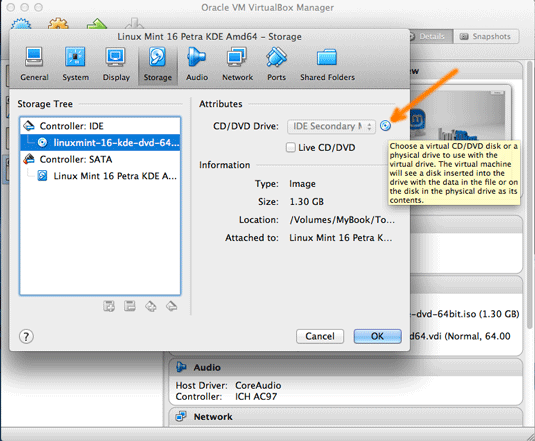
Check if ISO is Loaded.
Possibly Browse for the ISO Location…
-
Starting the Virtual Machine.

-
Starting Ubuntu 14.04 Trusty Installation.

-
Prepare for Installation.

Possibly Select the Third Party Software installation.
-
Here you can Simply Take the Defaults.

Or Opt for a LVM SetUp…
-
Setting Up Country and Time Zone.

-
Select the Keyboard Layout.

-
User SetUp.

-
Possibly Log-In on Ubuntu One.

Ubuntu One is Good for Synchronizing your Stuff on All the Ubuntu Devices…
-
Then Start the Installation and Auto-Configuration.

-
Once done ReBoot into the Ubuntu 14.04 Trusty Desktop!.

If the Re-Boot is Lagging then Select Re-Start from the VMs Menu…

-
How to Install Guest Additions for Ubuntu 14.04 Trusty Desktop
Guest Additions Installation Guide