Postfix MySQL Virtual Domains/Aliases Setup
Hi! The Tutorial shows you Step-by-Step How to Quick Start with Postfix and MySQL Mail Verser for Multi-Domains/Aliases Management on Ubuntu 15.04 Vivid Vervet i386/amd64 GNU+Linux Server/Desktop.
With Mail Virtual Domains we do Not Need System Account in /etc/passwd for each and every Mail Account.
This provides us a way to handle thousands of mail accounts very easily in our mail server system.

-
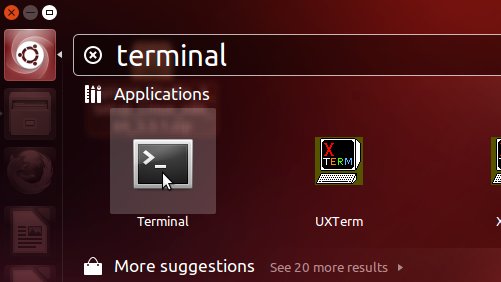
Open a Shell Session
Ctrl+Alt+t on Desktop
(Press “Enter” to Execute Commands)
In case first see: Terminal QuickStart Guide.
-
How to Enable the MySQL Postfix Support.
-
Login as Super-User.
sudo su
-
Edit Virtual Alias Maps.
nano /etc/postfix/mysql_virtual_alias_maps.cf
Append:
/nuser = postfixadmin
password = [postfixadminMySqlPass]
hosts = 127.0.0.1
dbname = postfixadmin
table = alias
select_field = goto
where_field = address
Remenber to Change the ‘postfixadminMySqlPass‘ Entry!
Ctrl+x to Save & Exit from nano Editor :) -
Edit Virtual Domain Maps.
nano /etc/postfix/mysql_virtual_domains_maps.cf
Append:
/nuser = postfixadmin
password = [postfixadminMySqlPass]
hosts = 127.0.0.1
dbname = postfixadmin
table = domain
select_field = domain
where_field = domain
#additional_conditions = and backupmx = '0' and active = '1'
Remenber to Change the ‘postfixadminMySqlPass‘ Entry!
-
Edit Virtual MailBox Maps.
nano /etc/postfix/mysql_virtual_mailbox_maps.cf
Append:
/nuser = postfixadmin
password = [postfixadminMySqlPass]
hosts = 127.0.0.1
dbname = postfixadmin
table = mailbox
select_field = maildir
where_field = username
#additional_conditions = and active = '1'
Remenber to Change the ‘postfixadminMySqlPass‘ Entry!
-
Edit Virtual MailBox Limit Maps.
nano /etc/postfix/mysql_virtual_mailbox_limit_maps.cf
Append:
/nuser = postfixadmin
password = [postfixadminMySqlPass]
hosts = 127.0.0.1
dbname = postfixadmin
table = mailbox
select_field = quota
where_field = username
#additional_conditions = and active = '1'
Remenber to Change the ‘postfixadminMySqlPass‘ Entry!
-
Edit Relay Domains Maps.
nano /etc/postfix/mysql_relay_domains_maps.cf
Append:
/nuser = postfixadmin
password = [postfixadminMySqlPass]
hosts = 127.0.0.1
dbname = postfixadmin
table = domain
select_field = domain
where_field = domain/nadditional_conditions = and backupmx = '1'
Remenber to Change the ‘postfixadminMySqlPass‘ Entry!
-
Setting Up Ownership & Permissions.
Changing Scripts Group ownership:
chgrp postfix /etc/postfix/mysql_*.cf
To make the file readable by the group:
chmod 640 /etc/postfix/mysql_*.cf
-
Creating vmail User
This Virtual User is the Virtual Owner of All the Virtual Mail Boxes :)groupadd -g 5000 vmail
useradd -m -g vmail -u 5000 -d /home/vmail -s /bin/bash vmail
-
Configuring Postfix to Use MySQL Maps.
nano /etc/postfix/main.cf
Firstly Append:
# Virtual Mailbox Domain Settings

virtual_alias_maps = mysql:/etc/postfix/mysql_virtual_alias_maps.cf
virtual_mailbox_domains = mysql:/etc/postfix/mysql_virtual_domains_maps.cf
virtual_mailbox_maps = mysql:/etc/postfix/mysql_virtual_mailbox_maps.cf
virtual_mailbox_limit = 51200000
virtual_minimum_uid = 5000
virtual_uid_maps = static:5000
virtual_gid_maps = static:5000
virtual_mailbox_base = /home/vmail
virtual_transport = virtual

# Additional for quota support

virtual_create_maildirsize = yes
virtual_mailbox_extended = yes
virtual_mailbox_limit_maps = mysql:/etc/postfix/mysql_virtual_mailbox_limit_maps.cf
virtual_mailbox_limit_override = yes
virtual_maildir_limit_message = Sorry, the your maildir has overdrawn your diskspace quota, please free up some of spaces of your mailbox try again.
virtual_overquota_bounce = yes
Then Change these Lines too:
#Remains blank since we are going to host virtual domains
mydestination =
#Remains blank unless you are going to use your ISP's SMTP server mail sending out mails.
relayhost =
And Finally, Append these lines:
/nalias_maps = hash:/etc/aliases/nalias_database = hash:/etc/aliases
myorigin = /etc/mailname
mynetworks = all
mailbox_size_limit = 0
recipient_delimiter = +/ninet_interfaces = all
Save
Then Check the Setup Restarting the Postfix MTA Serviceservice postfix restart
Troubleshooting Postfix /etc/mailname Not Found.
-
Logout from Super-User Shell Session
exit
-
How to Manage a Multi-Domain Mail Server with PostfixAdmin.
