$schemamarkup = get_post_meta(get_the_ID(), 'schemamarkup', true); if(!empty($schemamarkup)) { echo $schemamarkup; }

How to Install Latest MySQL Server/Client on CentOS 6.X Linux Easy Guide

March 11, 2014 | By the+gnu+linux+evangelist.

Install the Latest MySQL 5.7+ on CentOS 6 32/64-bit


The Tutorial shows you How to Get Always Freshly Installed the Latest MySQL 5.7.X on CentOS 6.x Desktop/Server Linux i686/x8664.

Take Note: for a Production Environment it is Suitable to Use Instead, the Distro Packages!

To Get Constantly Installed the Latest MySQL Server/Client Release on CentOS you will Need to Download from Oracle the Latest MySQL Community Edition Package.

An Important Step to Take into Account After Installation is to Secure the MySQL Server Installation by the Proper Tool.

Install the Latest MySQL on CentOS 6.x - Featured
  1. Download Latest MySQL Bundle for Red Hat Linux

    Here Latest MySQL .rpm.tar 32/64-bit
    Link to Download the Latest MySQL Release for Red Hat Like Systems
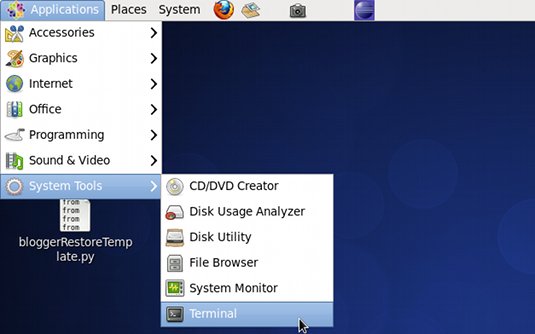
  2. Open a Shell session
    (Press “Enter” to Execute Commands)

    Install the Latest MySQL on CentOS 6.x - Open Terminal

    In case first see: Terminal QuickStart Guide.

  3. Extract MySQL Rpm.

    Copy
    sudo su

    If Got “User is Not in Sudoers file” then see: How to Enable sudo

    Copy
    cd /[path/2]/mysql*.rpm-bundle.tar
    Copy
    tar xvf mysql*.rpm-bundle.tar
  4. Installing MySQL Rpm’s.

    Copy
    sudo yum install mysql*.rpm
  5. Strongly Recommended MySQL Server Secure SetUp

    Here MySQL Secure Server SetUp
    Link to Guide on Post-Installation Secure SetUp of MySQL on Linux/Unix
  6. Starting the MySQL Server.

    Copy
    systemctl start mysqld
  7. Testing MySQL root Access.

    Copy
    exit
    Copy
    mysql -uroot -p

    Troubleshooting Access Denied for User root

    Here Resetting MySQL root Password
    The linked guide show how-to surely reset the root user pass.