September 9, 2014 | By the+gnu+linux+evangelist.
Install CentOS 7 GNOME desktop on VMware Fusion 7
The Tutorial shows you Visually and Step-by-Step How to Install CentOS 7 GNOME 3 Linux desktop on VMware Fusion 7.
VMware Fusion 7 come with the ability to Run Hypervisor Applications such as VMware Workstation inside the virtual machine.
So you can install VMware Workstation on CentOS 7 virtual machine, and then for Example use Workstation to create a nested Windows Virtual Machine.
CentOS 7 New Features:
- Kernel updated to 3.10.0
- Support for Linux Containers
- Open VMware Tools and 3D graphics drivers out of the box
- OpenJDK-7 as default JDK
- In Place Upgrade from 6.5 to 7.0 (as already mentioned)
- LVM-snapshots with ext4 and XFS
- Switch to systemd, firewalld and GRUB2
- XFS as default file system
- iSCSI and FCoE in kernel space
- Support for PTPv2
- Support for 40G Ethernet Cards
- Supports installations in UEFI Secure Boot mode on compatible hardware

-
Download CentOS 7 GNOME Live desktop
Select the CentOS 7 Linux Live Release.
-
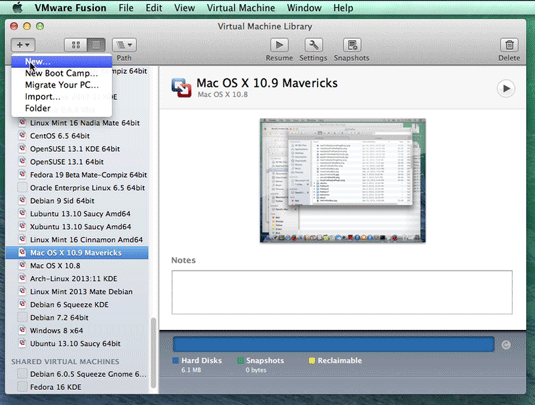
Create a New Virtual Machine.
-
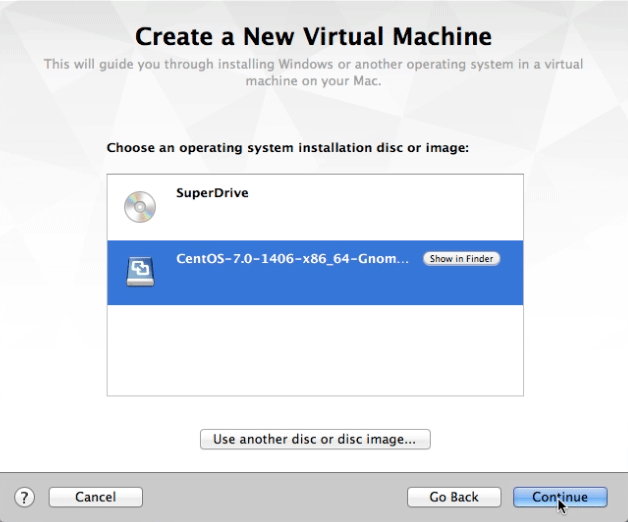
Load CentOS 7 GNOME Live ISO Image.
-
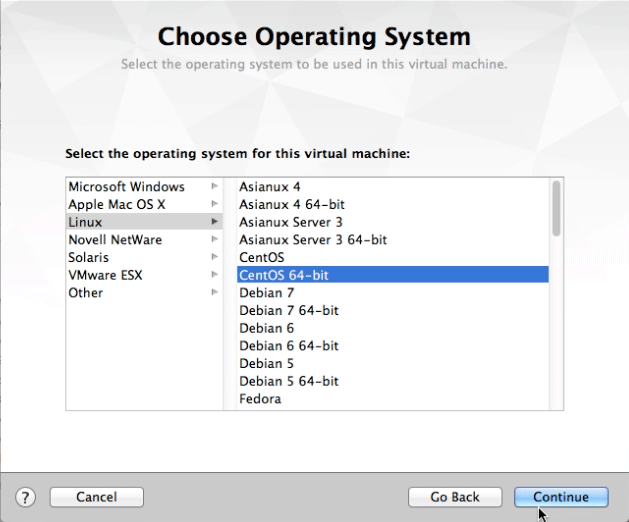
Choose the Operating System Type.
-
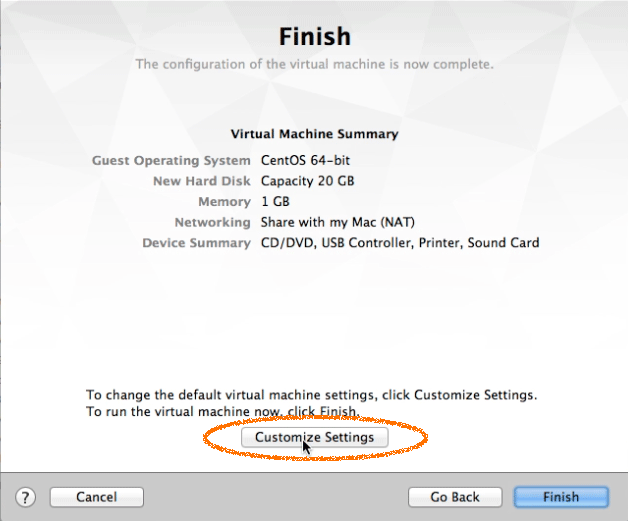
Click on Customize Settings.
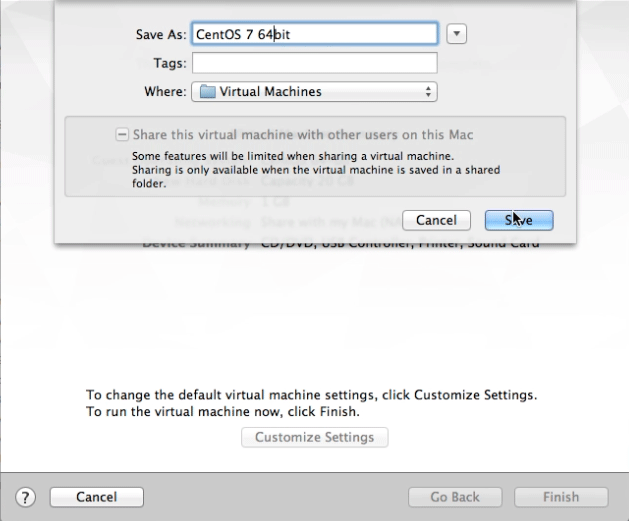
Set the Name.
-
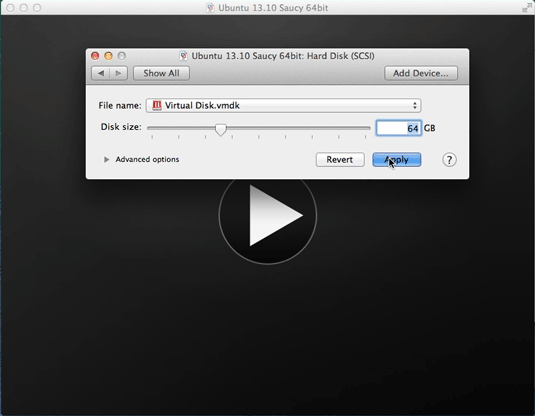
Then Set the Disk Size to At Least 64Gb.
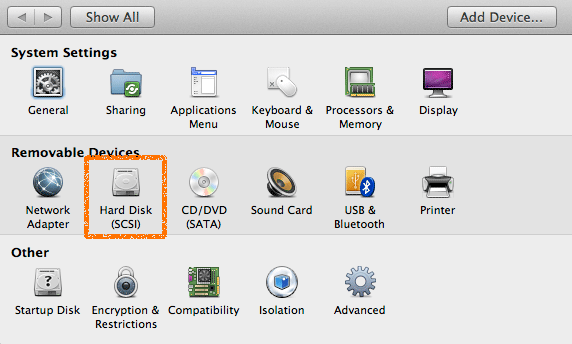
Take Note: The Disk then will be Auto-Growing and 64Gb here it’s Just the Upper Limit!
-
Start the CentOS 7 VM.

-
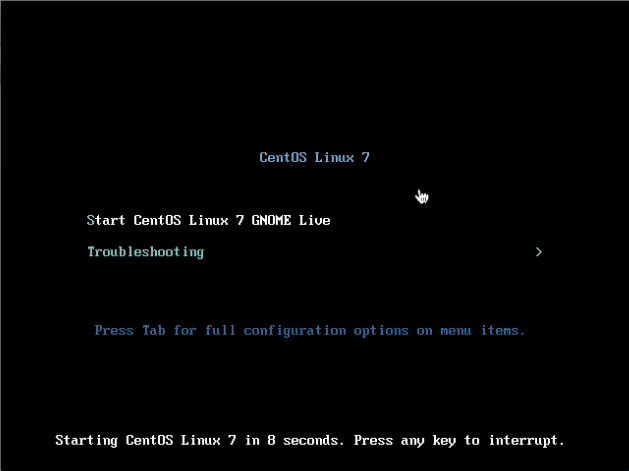
Start CentOS GNOME3 Live.
-
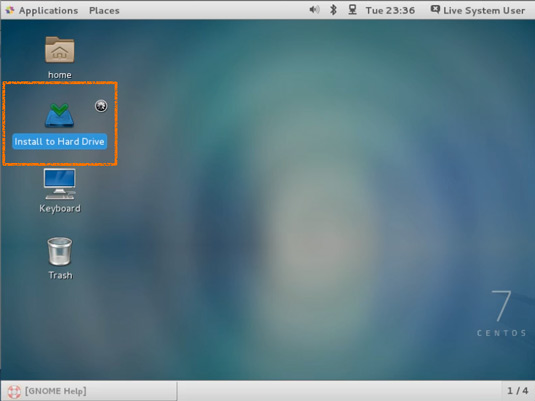
Double-Click on “Install to Hard Drive” on desktop.
-
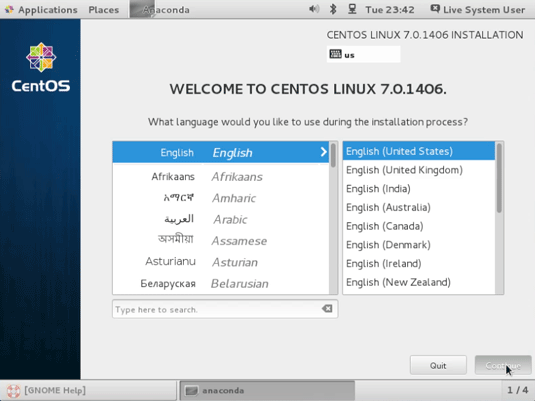
Select the Language
-
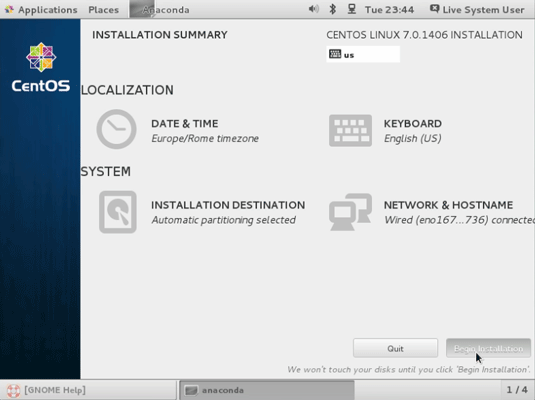
Set the Installation Destination
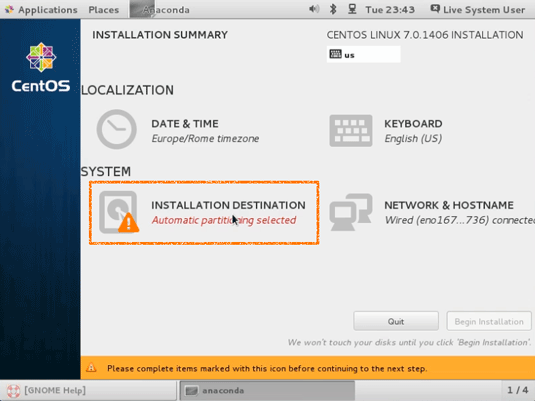
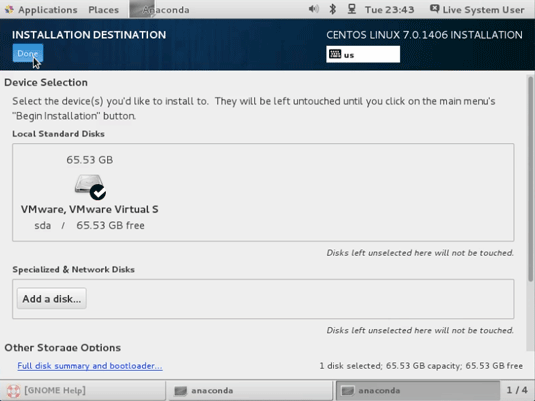
Re-Select the Hard Drive and Possibly Make a Custom Partitioning…
-
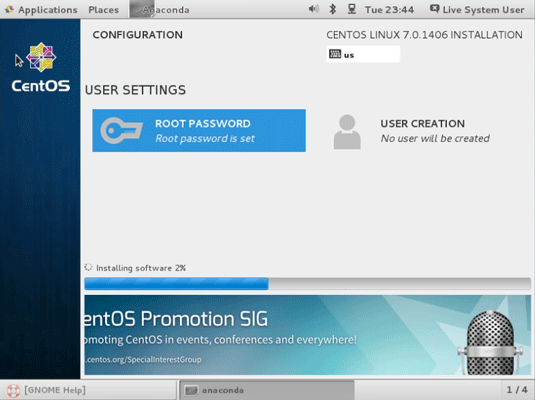
Begin the Installation
-
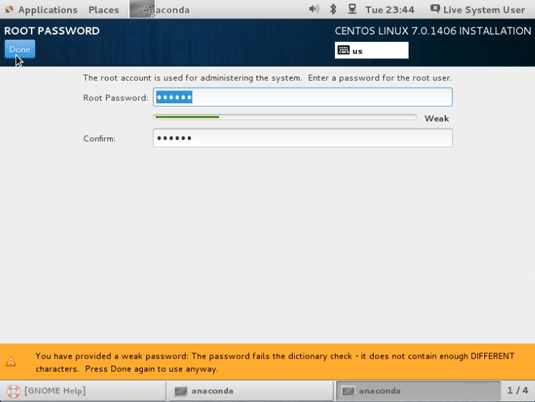
Set the Root Password
-
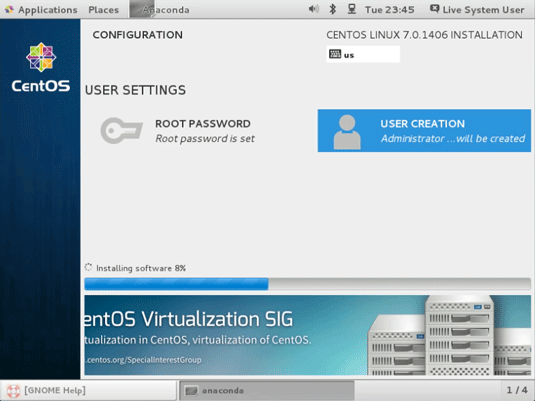
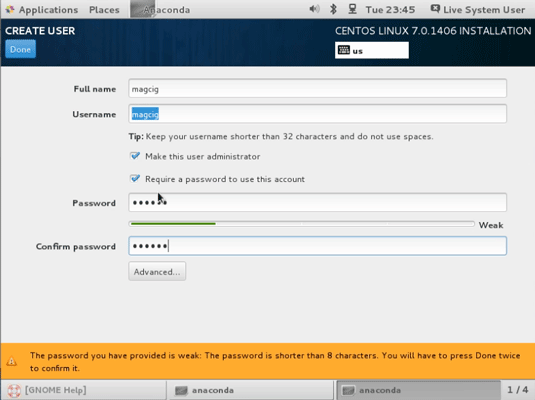
Create a User
-
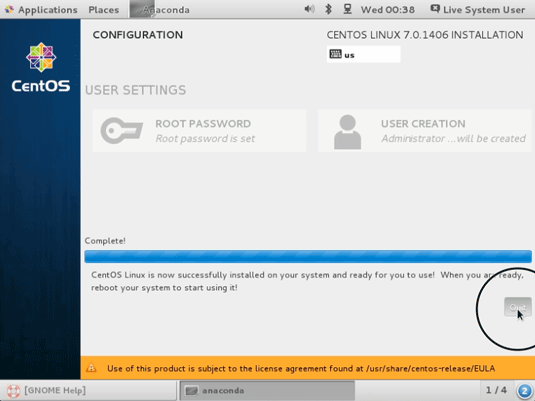
Quit to Reboot
-
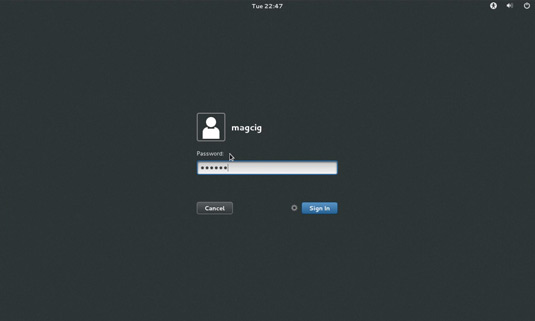
Login into CentOS GNOME 3 desktop
-
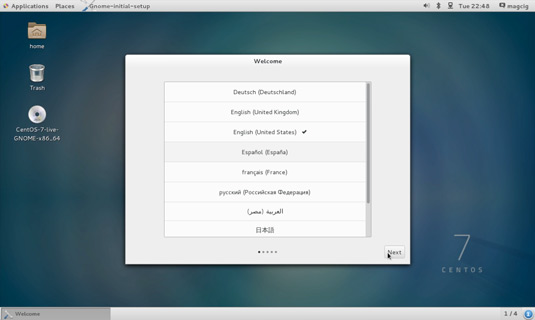
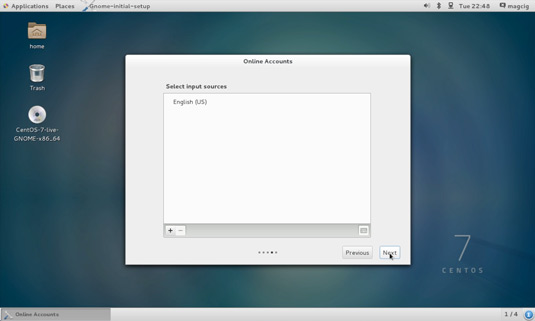
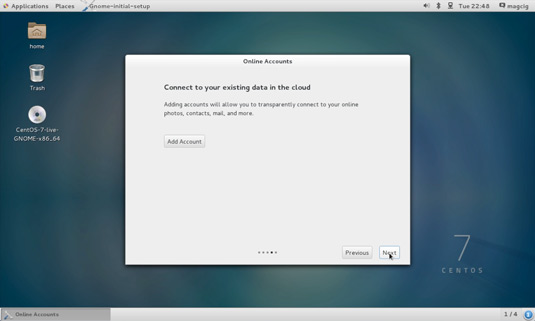
First, Configuration
-
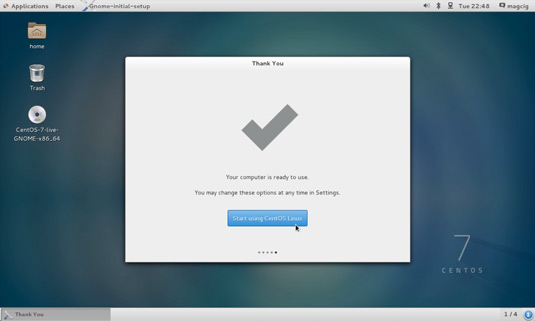
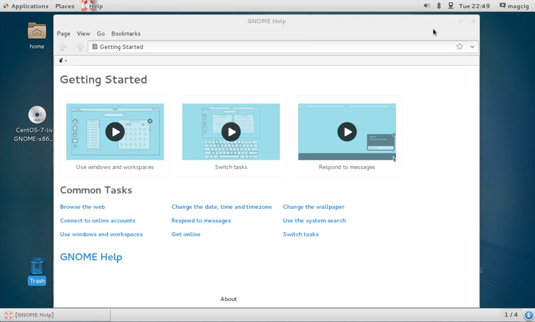
Enjoy your New CentOS 7 GNOME desktop
How to Install CentOS 7 GNOME Linux desktop on VMware Fusion 7 Easy Visual Guide
CentOS, CentOS 7 GNOME, CentOS desktop, Guide, How-to, Install, install CentOS 7 GNOME,/ninstall CentOS vmware fusion, Linux, Linux desktop, Tutorial, vmware fusion 7, vmware mac os x,
how-to, visual-guide
Install CentOS 7 GNOME desktop on VMware Fusion 7
The Tutorial shows you Visually and Step-by-Step How to Install CentOS 7 GNOME 3 Linux desktop on VMware Fusion 7.
VMware Fusion 7 come with the ability to Run Hypervisor Applications such as VMware Workstation inside the virtual machine.
So you can install VMware Workstation on CentOS 7 virtual machine, and then for Example use Workstation to create a nested Windows Virtual Machine.
CentOS 7 New Features:
- Kernel updated to 3.10.0
- Support for Linux Containers
- Open VMware Tools and 3D graphics drivers out of the box
- OpenJDK-7 as default JDK
- In Place Upgrade from 6.5 to 7.0 (as already mentioned)
- LVM-snapshots with ext4 and XFS
- Switch to systemd, firewalld and GRUB2
- XFS as default file system
- iSCSI and FCoE in kernel space
- Support for PTPv2
- Support for 40G Ethernet Cards
- Supports installations in UEFI Secure Boot mode on compatible hardware

-
Download CentOS 7 GNOME Live desktop
Select the CentOS 7 Linux Live Release.
-
Create a New Virtual Machine.

-
Load CentOS 7 GNOME Live ISO Image.

-
Choose the Operating System Type.

-
Click on Customize Settings.

Set the Name.

-
Then Set the Disk Size to At Least 64Gb.

Take Note: The Disk then will be Auto-Growing and 64Gb here it’s Just the Upper Limit!

-
Start the CentOS 7 VM.

-
Start CentOS GNOME3 Live.
-
Double-Click on “Install to Hard Drive” on desktop.
-
Select the Language
-
Set the Installation Destination

Re-Select the Hard Drive and Possibly Make a Custom Partitioning…

-
Begin the Installation
-
Set the Root Password
-
Create a User
-
Quit to Reboot
-
Login into CentOS GNOME 3 desktop
-
First, Configuration
-
Enjoy your New CentOS 7 GNOME desktop
Try for Free VMware Workstation 10 on CentOS Linux
Install VMware-Workstation 10 CentOS
Try for Free VMware Workstation 10 on CentOS Linux
Install VMware-Workstation 10 CentOS
How to Install CentOS 7 GNOME Linux desktop on VMware Fusion 7 Easy Visual Guide
CentOS, CentOS 7 GNOME, CentOS desktop, Guide, How-to, Install, install CentOS 7 GNOME,/ninstall CentOS vmware fusion, Linux, Linux desktop, Tutorial, vmware fusion 7, vmware mac os x,
how-to, visual-guide
Install CentOS 7 GNOME desktop on VMware Fusion 7
The Tutorial shows you Visually and Step-by-Step How to Install CentOS 7 GNOME 3 Linux desktop on VMware Fusion 7.
VMware Fusion 7 come with the ability to Run Hypervisor Applications such as VMware Workstation inside the virtual machine.
So you can install VMware Workstation on CentOS 7 virtual machine, and then for Example use Workstation to create a nested Windows Virtual Machine.
CentOS 7 New Features:
- Kernel updated to 3.10.0
- Support for Linux Containers
- Open VMware Tools and 3D graphics drivers out of the box
- OpenJDK-7 as default JDK
- In Place Upgrade from 6.5 to 7.0 (as already mentioned)
- LVM-snapshots with ext4 and XFS
- Switch to systemd, firewalld and GRUB2
- XFS as default file system
- iSCSI and FCoE in kernel space
- Support for PTPv2
- Support for 40G Ethernet Cards
- Supports installations in UEFI Secure Boot mode on compatible hardware
-
Download CentOS 7 GNOME Live desktop
Select the CentOS 7 Linux Live Release.
-
Create a New Virtual Machine.

-
Load CentOS 7 GNOME Live ISO Image.

-
Choose the Operating System Type.

-
Click on Customize Settings.

Set the Name.

-
Then Set the Disk Size to At Least 64Gb.

Take Note: The Disk then will be Auto-Growing and 64Gb here it’s Just the Upper Limit!

-
Start the CentOS 7 VM.

-
Start CentOS GNOME3 Live.
-
Double-Click on “Install to Hard Drive” on desktop.
-
Select the Language
-
Set the Installation Destination

Re-Select the Hard Drive and Possibly Make a Custom Partitioning…

-
Begin the Installation
-
Set the Root Password
-
Create a User
-
Quit to Reboot
-
Login into CentOS GNOME 3 desktop
-
First, Configuration
-
Enjoy your New CentOS 7 GNOME desktop
Try for Free VMware Workstation 10 on CentOS Linux
Install VMware-Workstation 10 CentOS


