Linux Mint Eclipse Java FX 8 Quick Start
How to Getting Started with Java FX 8 Development on the Eclipse IDE with Hello-World Example for Linux Mint 16-Petra/17-Qiana-LTS/17.1-Rebecca-LTS Mate/Cinnamon/KDE/Xfce desktop.
JavaFX is Java’s next-generation graphical user interface (GUI) toolkit that allows developers to rapidly build rich cross-platform applications.
The goal of JavaFX is to be used across many types of devices, such as embedded devices, smartphones, TVs, tablet computers, and desktops.
To Getting Started with JavaFX 8 on Linux an Oracle JDK 8 Installation is Needed on the System.

-
How to Install Eclipse for Java Developers on Linux Mint:
-
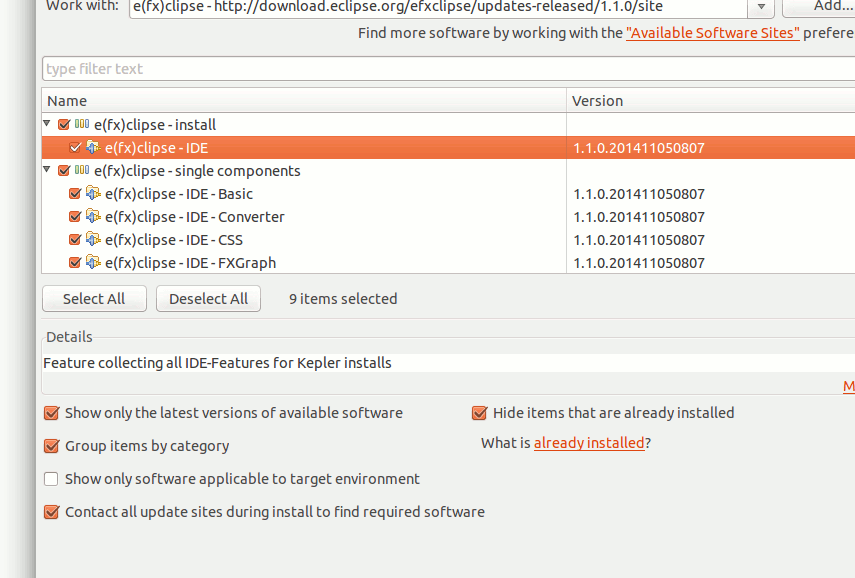
How to Install Eclipse Java FX Enviroment Plugin
-
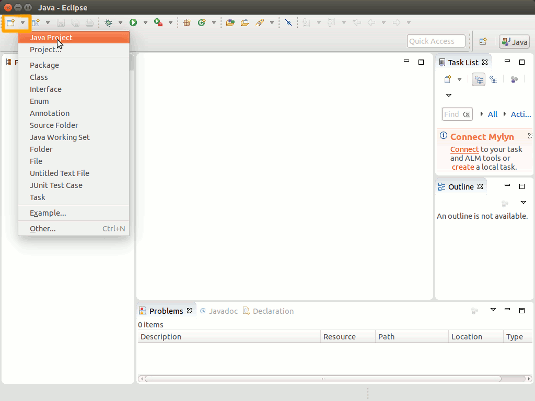
Create a New Java Project.
-
Name it as HelloWorld.
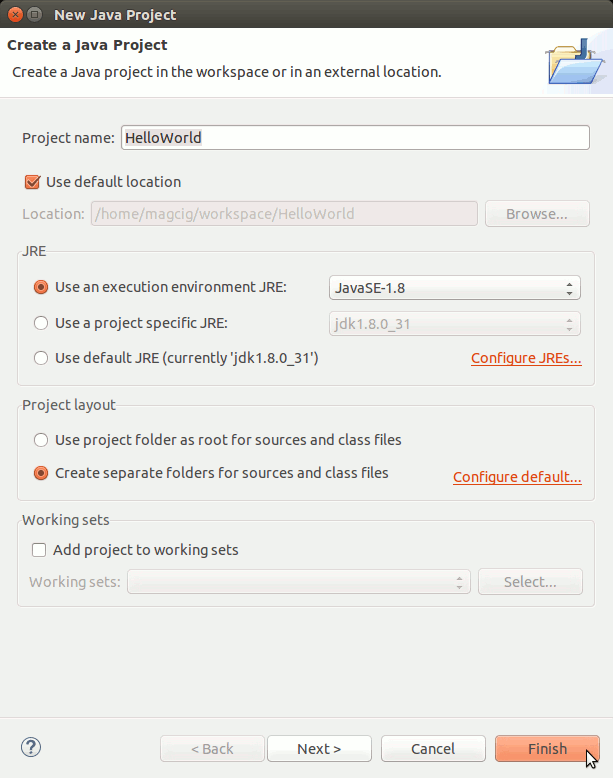
Then Click on Finish.
-
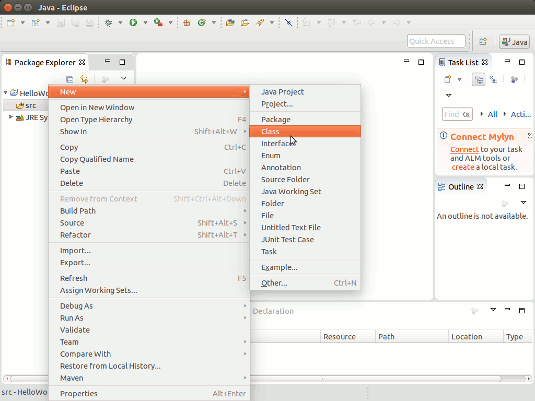
Create a New Java Class.
Right-Click on src on the Package Explorer >> New >> Class
-
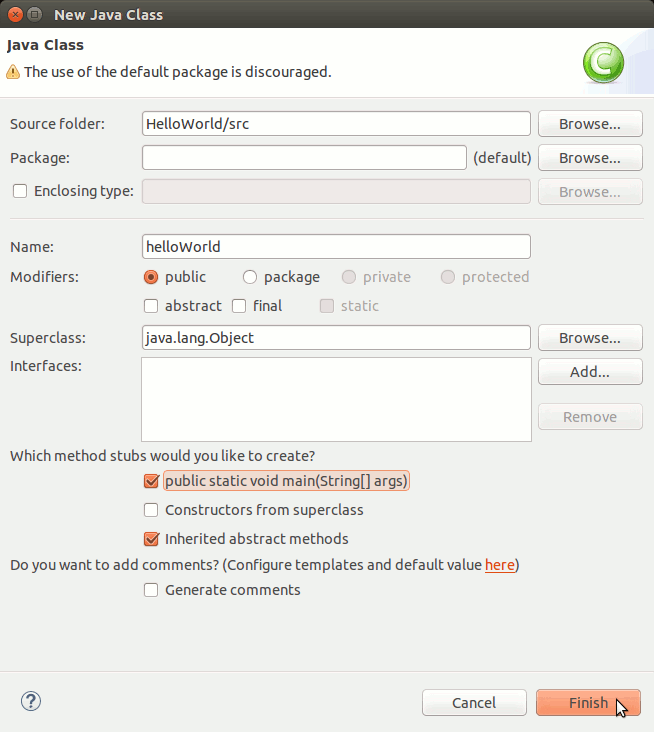
Name it as helloWorld and Check for main Method Creation.
-
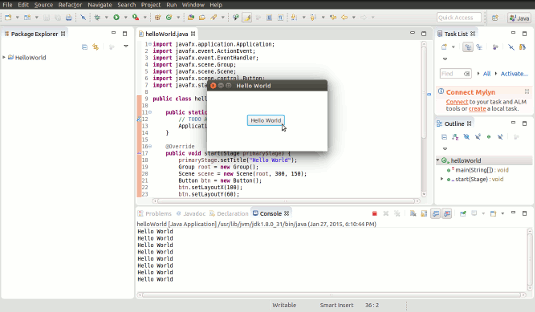
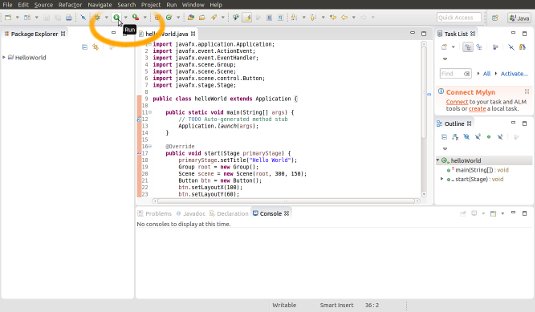
Generate a Java FX Window with Hello-World Button.
Enter this Content on the Created Java Class:
/nimport javafx.application.Application;/nimport javafx.event.ActionEvent;/nimport javafx.event.EventHandler;/nimport javafx.scene.Group;/nimport javafx.scene.Scene;/nimport javafx.scene.control.Button;/nimport javafx.stage.Stage;

public class helloWorld extends Application {

public static void main(String[] args) {
// TODO Auto-generated method stub
Application.launch(args);
}

@Override
public void start(Stage primaryStage) {
primaryStage.setTitle("Hello World");
Group root = new Group();
Scene scene = new Scene(root, 300, 150);
Button btn = new Button();
btn.setLayoutX(100);
btn.setLayoutY(60);
btn.setText("Hello World");
btn.setOnAction(new EventHandler() {
public void handle(ActionEvent event) {
System.out.println("Hello World");
}
});
root.getChildren().add(btn);
primaryStage.setScene(scene);
primaryStage.show();

}

}
Ctrl+s to Save :)
-
Save & Run Java FX Hello-World.
-
Click on the “Hello World” Button
to Print “Hellow World” greeting on the Eclipse Console.