Epson WF-7510 / WF-7511 / WF-7515 Printer Quick Start for Ubuntu
How to Download and Install Epson WF-7510 / WF-7511 / WF-7515 InkJet Printer Driver, Printer Utility and Scanner Driver+Software on Ubuntu 16.04 Xenial Xerus LTS GNU/Linux desktop – Step by step Tutorial.
Using the Epson Printer Utility Software, you can Check Ink Levels, View Error and other Status… on WF-7510 / WF-7511 / WF-7515 Printer.
To Get the WF-7510 / WF-7511 / WF-7515 Printer Installed on Ubuntu Linux you need to Download and Install the Epson Proprietary Driver.
Then to Get the Scanner Working on Ubuntu Linux Follow the Guide on Getting Started Easily with Image Scan Software on Ubuntu Linux.

-
Download Epson WF-7510 / WF-7511 / WF-7515 Printer in Linux Ubuntu
Epson WF-7510 / WF-7511 / WF-7515 Printer Linux DriverGet the Epson WF-7510 / WF-7511 / WF-7515 Series Printer on Ubuntu.
-
Open a Terminal Shell emulator window
Ctrl+Alt+t on desktop
(Press “Enter” to Execute Commands)
-
Update Ubuntu Repo.
sudo apt-get update
-
Then Double-Click on the Epson Printer Driver Package
Or Select open with Ubuntu Software on Firefox Prompt.
After Click on Install to Start the Setup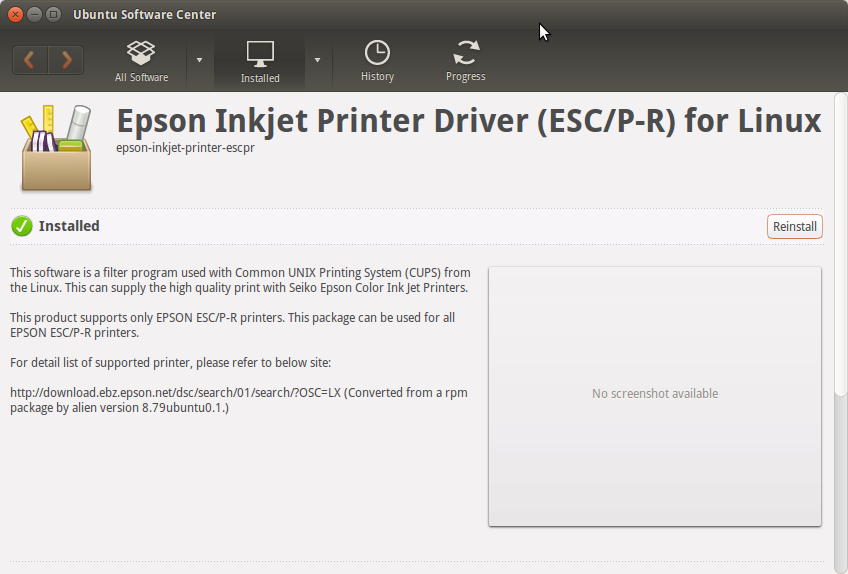
-
Finally, Go on System Settings to Add Printer
And the Printer will be Recognized and Installed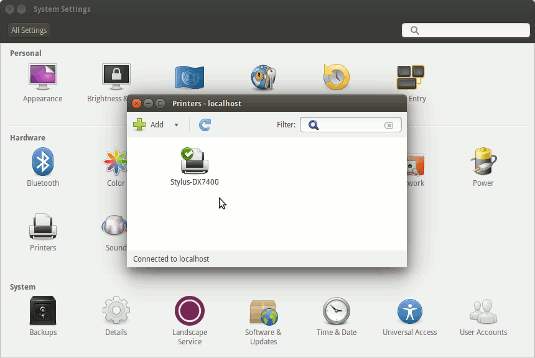
-
Download Epson WF-7510 / WF-7511 / WF-7515 Printer Utility for Linux Ubuntu
Epson WF-7510 / WF-7511 / WF-7515 Printer Utility .debGet the Epson Printer WF-7510 / WF-7511 / WF-7515 Series Utility for Ubuntu.
-
Double-Click on the Epson Printer Utility Package
Or Select open with Ubuntu Software Center before Downloading.
After Click on Install to Start the Setup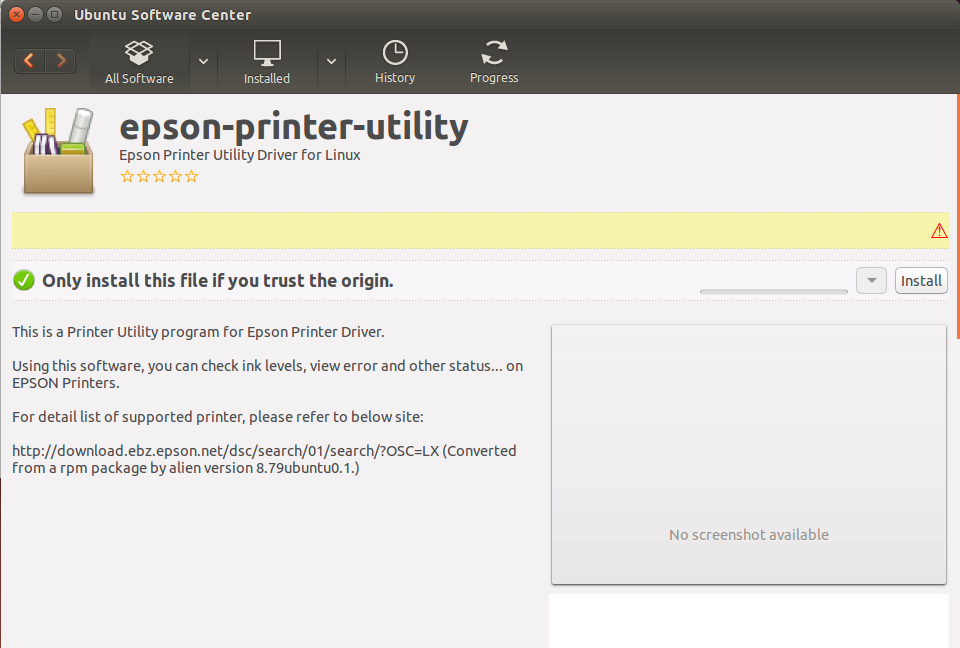
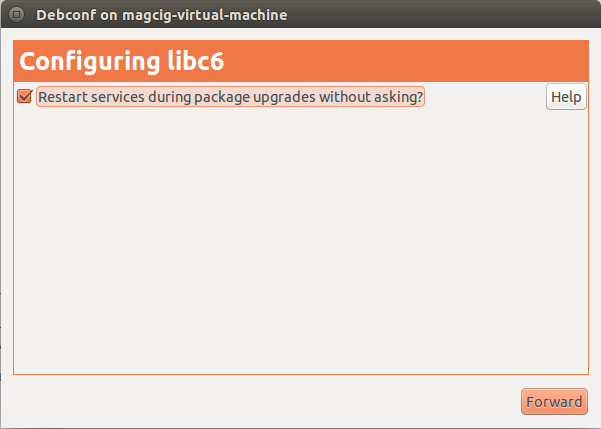
And Confirm to Restart Services Automatically!
-
How to Get Started with Epson Scanning on Ubuntu
How to Install Adobe Reader for Ubuntu
Setup Adobe Reader for Ubuntu.