Nagios Linux Mint 18 Install
Welcome, Mint User! Install Nagios 4.x on Linux Mint 18.x Sarah/Serena/Sonya/Sylvia desktops.
First, Latest Nagios for Mint is a Powerful Monitoring System that enables Organizations to Identify and Resolve IT Infrastructure Problems before they affect Critical Business Processes.
Moreover, the Nagios Workflow Management Features are:
- Monitoring: IT staff configure Nagios to monitor critical IT infrastructure components
- Alerting: Nagios sends alerts when critical infrastructure components fail and recover
- Response: IT staff can acknowledge alerts and begin resolving outages and investigating security alerts immediately
- Reporting: Reports provide a historical record of outages, events, notifications, and alert response for later review
- Maintenance: Scheduled downtime prevents alerts during scheduled maintenance and upgrade windows
- Planning: Trending and capacity planning graphs and reports allow you to identify necessary infrastructure upgrades before failures occur.

-
First, Open a Shell Terminal emulator window
(Press “Enter” to Execute Commands)
In case first see: Terminal QuickStart Guide.
-
Then Install the Required Packages
Logins as SuperUser to make shorter the others commmands:sudo su
If Got “User is Not in Sudoers file” then see: How to Enable sudo
So to Install the Packages:apt install php7.0-gd libgd2-xpm-dev build-essential /napache2 libapache2-mod-php7.0
-
After to Add nagios User and Groups
Create the nagios User:useradd nagios
Make the nagios Group:
groupadd nagios
Add the nagios user to the group:
/usr/sbin/usermod -G nagios nagios
Create a new nagcmd group for allowing external commands to be submitted through the web interface:
groupadd nagcmd
Add both the nagios & apache users to the Group:
usermod -a -G nagcmd nagios
usermod -a -G nagcmd www-data
Last Achieve the SuperUser Session:
exit
-
Download Latest Nagios Core Linux Source
-
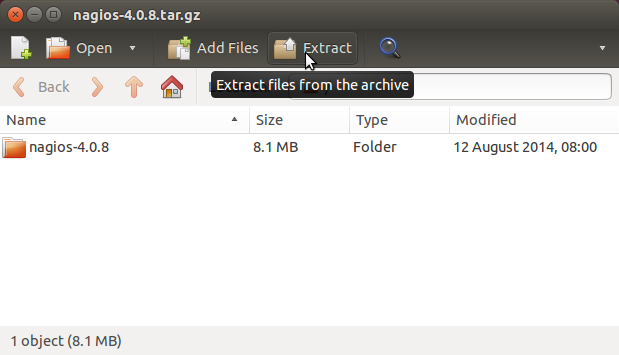
Then Double-Click and Extract Nagios Core into /tmp.

Or from Command Line:
tar zxvf ~/Downloads/nagios*.tar.gz -C /tmp/
-
Moreover, to Compile and Install Nagios Core for Linux.
cd /tmp/nagios*
./configure --with-command-group=nagcmd
make all
sudo su
If Got “User is Not in Sudoers file” then see: How to Enable sudo
make install
make install-init
make install-config
make install-commandmode
-
Follow Installing Nagios Core Web Interface
First, Make the needed directory:mkdir -p /etc/httpd/conf.d/nagios.conf
And then Install it:
make install-webconf
-
After make the Post-Installation Configuration.
cp -R contrib/eventhandlers/ /usr/local/nagios/libexec/
chown -R nagios:nagcmd /usr/local/nagios/libexec/eventhandlers
-
Again to Check Nagios Installation.
/usr/local/nagios/bin/nagios -v /usr/local/nagios/etc/nagios.cfg
-
And to Enable the Web Interface on Apache.
/usr/bin/install -c -m 644 sample-config/httpd.conf /etc/apache2/sites-enabled/nagios.conf
a2enmod cgi
service apache2 restart
-
Finally, to Start up Nagios.
/etc/init.d/nagios start
-
Again to Create a nagiosadmin Web User with Pass.
htpasswd -c /usr/local/nagios/etc/htpasswd.users nagiosadmin
Take Note of the Password!
exit
-
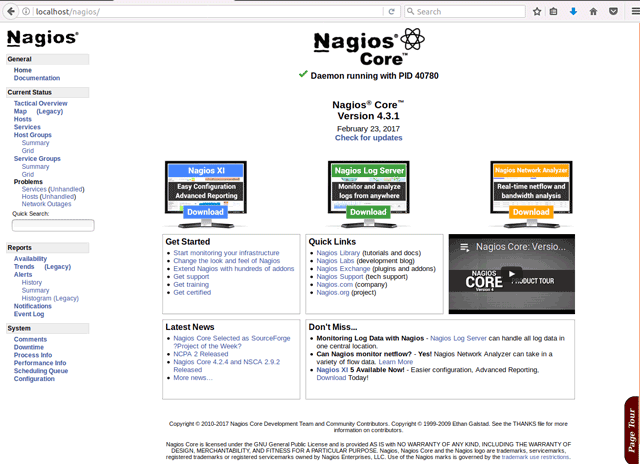
And to Access the Nagios Web Interface.
http://localhost/nagios
User: ‘nagiosadmin’
Pass: That you Setup Before -
Download and Install Nagios Plugins
