Zabix Getting Started for Ubuntu 16.04
How to Install Zabbix 7.x Ubuntu 16.04 Xenial Xerus LTS GNU/Linux with MySQL Database.
First, the Zabbix Installation on Ubuntu is Easy it’s enough to Download & Install the Zabbix Packages.
And Zabbix is the Ultimate Enterprise-Level Software Designed for Real-Time Monitoring of Servers, Virtual machines and Network Devices.
Especially relevant: Zabbix is Open Source and comes at No Cost!

Finally, the Zabixx main Features are:
- Performance monitoring
- Agents for all platforms
- Agent-less monitoring
- Availability and SLA reporting
- Collection of any data
- Great graphs and network maps
- Up-to 100,000 monitored devices
- Up-to 1,000,000 of metrics
- Thousands of checks per second
- Small to large distributed setups
- Easy maintenance
-
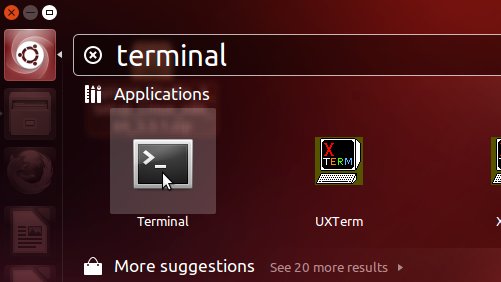
First, Open a Terminal Shell emulator window
Ctrl+Alt+t on desktop
(Press “Enter” to Execute Commands)
-
Then Login as SuperUser
Just to make easier the comands series:sudo su
-
Add Zabbix Repo for Ubuntu 16.04
-
So to Install Zabbix for Ubuntu
Server with MySQL DB:apt install zabbix-server-mysql
Then Agent:
apt install zabbix-agent
And the Frontend PHP:
apt install zabbix-frontend-php
Finally, you need to Install the Web Frontend like here Below…
-
Again Creating Zabbix MySQL Database.
mysql -uroot -p[root_password]
Login with your [root_password].
Then Make the Database:create database zabbix character set utf8 collate utf8_bin;
And Grant the Privileges to the ‘zabbix’ User:
grant all privileges on zabbix.* to zabbix@localhost identified by '[zabix_password]';
Set a Custom [zabbix_password] for the zabbix User.
Finally, to Quit:quit;
-
And also Edit Zabbix Server Configuration File.
nano /etc/zabbix/zabbix_server.conf
Set the password the same one you choose before:
DBHost=localhost
DBName=zabbix
DBUser=zabbix
DBPassword=[zabix_password]
Ctrl+x to Save & Exit from nano ;)
-
To Start the Zabbix Server.
service zabbix-server start
To make it Started at boot:
update-rc.d zabbix-server enable
-
And so for Starting the Zabbix Agent.
sudo service zabbix-agent start
-
Follow Editing Zabbix PHP Frontend Config File
Need to Uncomment the “date.timezone” setting:nano /etc/zabbix/apache.conf
Uncomment this line like:
php_value date.timezone Europe/Paris
Set the Right time zone for you…
-
How to Install Zabbix PHP Web Frontend
-
Finally, to Achieve the SuperUser Session.
exit
-
Moreover, see the Zabbix Quick Start Guides