$schemamarkup = get_post_meta(get_the_ID(), 'schemamarkup', true); if(!empty($schemamarkup)) { echo $schemamarkup; }

How to Install GlassFish 5.0 on Ubuntu 17.10 Artful Step By Step

October 23, 2017 | By the+gnu+linux+evangelist.

Install Glassfish 5.0 Ubuntu 17.10 Artful

Hi! The Tutorial shows you Step-by-Step How to Install Glassfish 5.0 in Ubuntu 17.10 Artful GNU/Linux Desktop/Server.

And the GlassFish 5.0 Ubuntu 17.10 Installation is Quick and Easy, involving only the execution of a few Basic Shell’s Commands.

Especially relevant: the Only Requirement is an Oracle Java JDK 8+ Installation.

The Post Include the Basic Installation’s Screenshots to make the Visualization of the whole Process Easier.

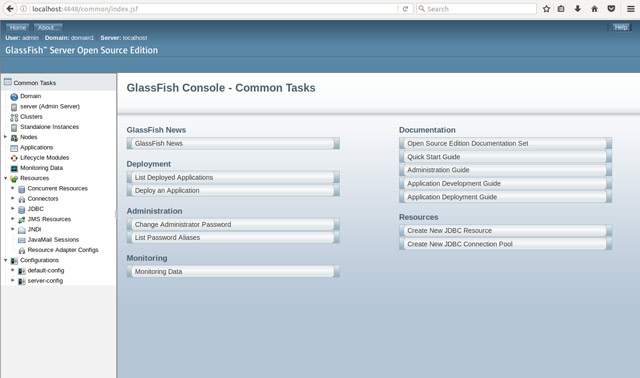
Finally, to the article Bottom you Find a Link to Quick Start with Glassfish 5.0 Java EE 8 Server.

How to Install Glassfish 5.0 on Ubuntu 17.10 Artful Step by Step - Featured

What’s the Reasons to Choose GlassFish 5 App Server between the Others Java-Servers Open Source Alternatives?.

  • GlassFish is the Java EE reference implementation
  • Support Latest version of the JEE 8 Specification
  • Commercial-Professional Support Available
  1. Download Glassfish 5.0 App Server for Linux:

    Get Glassfish 5.0 Zip

    And the Full Platform is Used rather than Web Profile.

  2. Installing Unzip Tool
    Check if already there:

    which unzip

    If not then:

    sudo apt-get install unzip

    If Got “User is Not in Sudoers file” then see: How to Enable sudo

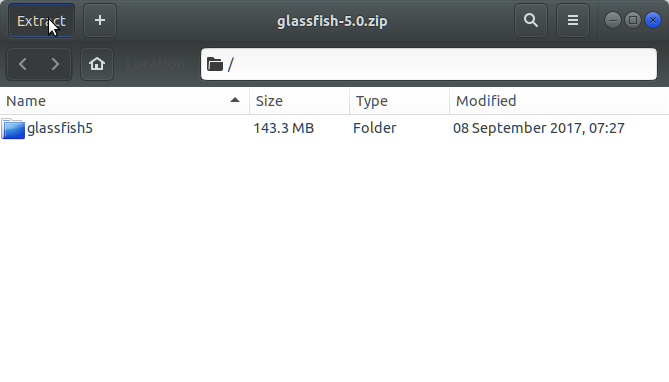
  3. Then Double-Click on Archive and Extract into /tmp

    Extract

    Or from Command Line:

    unzip -d /tmp/ $HOME/Downloads/glassfish*.zip
  4. Next Open Shell session
    Ctrl+Alt+t on Desktop
    (Press “Enter” to Execute Commands)

    How to Install Glassfish 5.0 on Ubuntu 17.10 Artful Step by Step - Open Terminal

    In case first see: Terminal QuickStart Guide.

  5. How to Install Required Oracle Java JDK 8+ on Ubuntu Linux.

    Install Oracle JDK for Ubuntu
  • Finally, to Install Glassfish 5.0 in Ubuntu
    (Here we describe a System-Wide Setup, for a Local one Just Run from Home)
    Set the SuperUser as Owner:

    sudo chown -R root:root /tmp/glassfish5

    Again, give Execution Permissions with:

    sudo chmod -R +x /tmp/glassfish5

    Again, give Execution Permissions with:

    sudo chmod -R +x /tmp/glassfish5

    And Switch contents:

    sudo mv /tmp/glassfish5 /opt/
  • Moreover, Append Glassfish into User’s Path.

    echo "export PATH=$PATH:/opt/glassfish5/bin" >> ~/.bashrc

    To Reload Path simply:

    bash
  • To Test Glassfish 5.0 Installation.

    which asadmin
  • GlassFish 5.0 Quick Start Guide for Ubuntu.

    Glassfish 5.0 Quick Start
  • Now Thanks to Oracle and the Glassfish Community you Can Fully Enjoy the JEE 8 Development on Glassfish 5.0 App Server.

    Install Glassfish 5.0 Ubuntu 17.10 Artful Step by Step - Glassfish 5.0 Browser Admin Interface