Installing
-
2. Downloading PyCharm IDE
Download PyCharm Community Ed. for Ubuntu
Select the PyCharm Community Edition for Linux.
If you are using Firefox then on Prompt Choose “Open with Archive Manager”: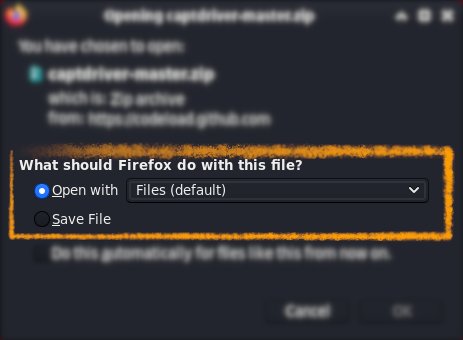
Or After try to Select the Package by the Downloads Button on Top Panel:
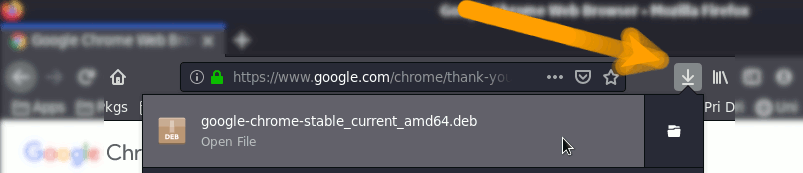
Instead, on Google-Chrome simply try to Choose the Package on the Bottom Panel:

-
3. Extracting PyCharm IDE
Then Extract PyCharm into /tmp
Or Double-Click on Archive: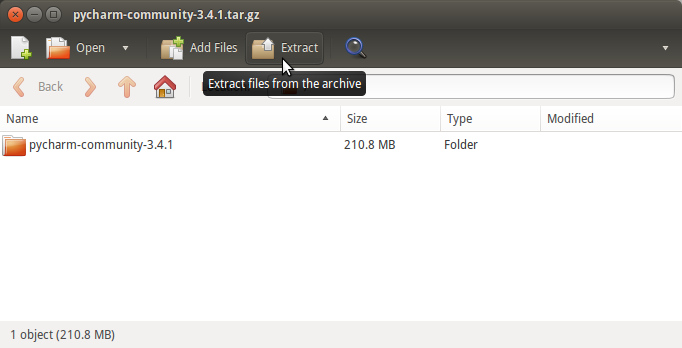
Or from Terminal:
tar xvzf ~/Downloads/pycharm-community*.tar.gz -C /tmp/
-
4. Installing PyCharm IDE
Then to Install PyCharm on Ubuntu
First, set the SuperUser as owner:sudo su -c "chown -R root:root /tmp/pycharm*"
And then switch contents:
sudo mv /tmp/pycharm-community* /opt/pycharm-community
Last, make PyCharm Symlinks:
sudo su -c "ln -s /opt/pycharm-community/bin/pycharm.sh /usr/local/bin/pycharm"
sudo su -c "ln -s /opt/pycharm-community/bin/inspect.sh /usr/local/bin/inspect"
Contents