GNU/Linux Ubuntu 18.04 Installing Oracle 12c R2 DB – QuickStart Guide
Hi! The Tutorial shows you Step-by-Step and Visually How to Install Oracle 12c R2 Database in Ubuntu 18.04 Bionic LTS 64-bit GNU/Linux Desktop/Server.
And this Oracle 12c R2 Ubuntu 18.04 Installation Guide Includes All the Essentials Commands and Basic Screenshots Process.
The Process is Extended and Tricky so it require a little patience and confidence with the Command Line shell.
Especially relevant: Ubuntu-like Systems are Not in the List of Oracle 12c R2 Database Supported OS So you should Use It At Most for Development and Not for Production.
Now Relax and Take the Time of Reading, Understanding and Executing Carefully the Instructions Contained here.

-
1. Downloading Oracle 12c R2 DB
Download Oracle 12c Database for GNU/Linux
-
2. Accessing Shell
Open a Shell Session or Terminal Emulator Window
Ctrl+Alt+t on desktop
(Press “Enter” to Execute Commands).
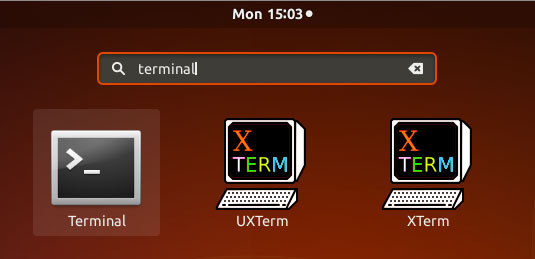
Or Login into Server Shell.
-
3. Extracting Oracle 12c DB
Then Extract Oracle 12c Database into /tmp
Possibly Double-Click/Right-Click and Open with Archive Manager:
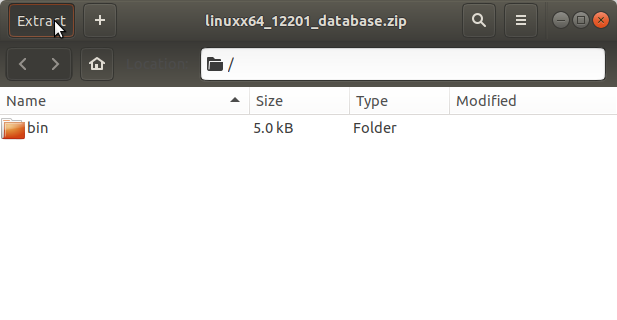
Or From Command Line:unzip -d /tmp linuxx64_122*.zip
-
4. Making Groups & User
Then Add Oracle DB Groups and User
So make the Groups as:sudo groupadd -g 502 oinstall
Authenticate with the User Admin Pass.
If Got “User is Not in Sudoers file” then see: How to Enable sudosudo groupadd -g 503 dba
sudo groupadd -g 504 oper
sudo groupadd nobody
sudo groupadd -g 505 asmadmin
And finally, the User:
sudo useradd -u 502 -g oinstall -G dba,asmadmin,oper -s /bin/bash -m oracle
Set a Password with:
sudo passwd oracle
Take Note of the oracle User Pass :)
-
5. Making Directories
Next Make Target Directories
So execute:sudo mkdir -p /u01/app/oracle/product/12/dbhome_1
Again Setup Ownership:
sudo chown -R oracle:oinstall /u01
And Permissions over it:
sudo chmod -R 775 /u01
Finally, Set also the temporary DB Ownership:
sudo chown -R oracle:oinstall /tmp/database
-
6. Making Network Setup
Next Make Network Configuration.
First, Get hostname with:
hostname
And to Get IP:
/sbin/ifconfig
You will Find it Under the lo >> inet Section.
Check if Hostname is Already into the Enabled Hosts File:
cat /etc/hosts
If It’s Not Present then Insert it with:
sudo nano /etc/hosts
Insert: [ip] [HOSTNAME] as here below.
Example for a Local Setup: ‘127.0.0.1 localhost.localdomain’
Ctrl+Shift+c to Copy from Shell.
Ctrl+Shift+v to Paste Content into nano
Finally, Ctrl+x to Save and Exit from nano Editor :)Again to Grant Connection to X Server do:
sudo xhost +[myIP]
Replace [myIP] with your actual one.
Example: # xhost +127.0.0.1.
-
7. Setting Up Parameters
Next the Parameters Configuration SetUp
First, Edit /etc/sysctl.conf file with:sudo nano /etc/sysctl.conf
Add or amend the following lines:
#### Oracle 12c R2 Kernel Parameters #### fs.suid_dumpable = 1 fs.aio-max-nr = 1048576 fs.file-max = 6815744 kernel.shmall = 818227 kernel.shmmax = 4189323264 kernel.shmmni = 4096 kernel.panic_on_oops = 1 # semaphores: semmsl, semmns, semopm, semmni kernel.sem = 250 32000 100 128 net.ipv4.ip_local_port_range = 9000 65500 net.core.rmem_default=262144 net.core.rmem_max=4194304 net.core.wmem_default=262144 net.core.wmem_max=1048576
The Values of ‘shmall‘ and ‘shmmax‘ Need to be Customized following your System Memory Size.
Here above is a Valid Setup for a 8Gb RAM Size!
If you need to Change first Check your Phisical Memory Size with:cat /proc/meminfo | grep MemTotal
Find in the Output the Current dimension.
Eg. for a 16Gb machine will be shown a:MemTotal: 16364532 kB
Then ‘shmall‘ should be Set as:
[RamKb] / 10
And instead ‘shmmax‘ as:
[RamKb] * 1024 / 2
For further Instructions See: Oracle Documentation…
Finally, Check If Exists these lines below that Gives an Error:#net.bridge.bridge-nf-call-ip6tables = 0 #net.bridge.bridge-nf-call-iptables = 0 #net.bridge.bridge-nf-call-arptables = 0
Comment out as here Above!
Again Edit /etc/security/limits.conf file:
sudo nano /etc/security/limits.conf
Add the following lines:
#### oracle User Settings 4 Oracle 12c R2 ####/noracle soft nproc 2047/noracle hard nproc 16384/noracle soft nofile 1024/noracle hard nofile 65536/noracle soft stack 10240
Finally, to Achieve this same Setup ReLoad the New Kernel Parameters:
sudo /sbin/sysctl -p
-
8. Installing Packages
Next Install Required Packages
So Execute:sudo apt update
sudo apt install alien autoconf automake autotools-dev binutils doxygen elfutils expat gawk gcc gcc-multilib g++-multilib libstdc++6:i386 ksh less libtiff5 libtiff5-dev lib32z1 libaio1 libaio-dev libc6-dev libc6-dev-i386 libc6-i386 libelf-dev libltdl-dev libodbcinstq4-1 libstdc++5 make openssh-server rlwrap rpm sysstat unixodbc unixodbc-dev x11-utils libpth-dev zlibc libglapi-mesa:i386 libglu1-mesa:i386 libpthread-workqueue0 libpthread-workqueue-dev libzthread-2.3-2 libzthread-dev libmotif-common
Again to Install Old Libraries.
First, Enable Trusty Repository with:sudo su -c "echo 'deb [trusted=yes] http://us.archive.ubuntu.com/ubuntu/ trusty main universe restricted multiverse' >> /etc/apt/sources.list.d/extra.list"
sudo apt update
Next Install these Dependencies:sudo apt install pdksh libaio-dev lsb-cxx
Again Enable Precise Repository with:sudo su -c "echo 'deb [trusted=yes] http://old-releases.ubuntu.com/ubuntu/ precise main universe' >> /etc/apt/sources.list.d/extra.list"
sudo apt update
And then Install the Remaining stuff:
sudo apt install lesstif2 lesstif2-dev libpthread-stubs0
After to Restore the Repositories again:
sudo rm /etc/apt/sources.list.d/extra.list && sudo apt update
sudo apt update
Set to Hold the Installed Libraries without Upgrading:
sudo apt-mark hold libaio-dev lesstif2 lesstif2-dev pdksh libpthread-stubs0 lsb-cxx
Finally, Make a needed Symlink:
sudo ln -s /lib/x86_64-linux-gnu/libgcc_s.so.1 /lib64/libgcc_s.so.1
-
9. Making Symlinks
Make Symlinks to Binaries and Libraries
Linking Binaries with:sudo ln -s /usr/bin/awk /bin/awk
sudo ln -s /usr/bin/rpm /bin/rpm
sudo ln -s /usr/bin/basename /bin/basename
And Link Libraries as:
sudo ln -s /usr/lib/x86_64-linux-gnu /usr/lib64
sudo ln -s /lib/libgcc_s.so.1 /lib/libgcc_s.so
sudo ln -s /lib/x86_64-linux-gnu/libgcc_s.so.1 /lib64/libgcc_s.so.1
sudo ln -sf /bin/bash /bin/sh
-
10. Setting the PATH
Next to Add Paths to oracle’s .bashrc
First, Login as the Oracle User with:su oracle
Then Edit the .bashrc file:
nano ~/.bashrc
Append:
# Oracle Settings export TMP=/tmp; export TMPDIR=$TMP; export ORACLE_HOSTNAME=[HOSTNAME]; export ORACLE_BASE=/u01/app/oracle; export ORACLE_HOME=$ORACLE_BASE/product/12/dbhome_1; export ORACLE_SID=[DBSID]; export ORACLE_UNQNAME=$ORACLE_SID; export PATH=/usr/sbin:$ORACLE_HOME/bin:$PATH; export LD_LIBRARY_PATH=$ORACLE_HOME/lib:/lib:/usr/lib:/usr/lib64; export CLASSPATH=$ORACLE_HOME/JRE:$ORACLE_HOME/jlib:$ORACLE_HOME/rdbms/jlib;
Replace [HOSTNAME] with IP and [DBSID] with SID Name
For a Local Setup as here, Respectively:HOSTNAME = 127.0.0.1.
DBSID = SID.
Finally, ReLoad the New .bashrc Settings simply as:
bash
-
11. Running Oracle 12c R2 DB Installer
So now Run the Installation Script
First, give Execution permissions:chmod -R +x /tmp/database
And then to Launch the Wizard:
/tmp/database/runInstaller
Solution for Display Not Set or Issue
-
12. Installing Oracle 12c R2 DB Software
Then Follow the Installation’s Wizard
Here is Shown in the GUI form.
Especially relevant: Confirm for Installation also on Warning about System does Not Meeting Minimum Requirements!
If you Do Not Dispose of a Subcription Uncheck Security Updates and leave Blank Support Password and Pursue!
Then Choose “Install Software Only”!
On “Installation Options” Choose if a “Single Instance” like here or instead a “Cluster”.
Then Choose the “Enterprise Edition”
Select the Installation Location.
Again for the OraInventory.
Next Confirm the Installation Groups.
Review the “Summary” and Possibly take a Copy.
Finally, Click on “Install” to Start Installation Process.Solving Oracle 12c R2 DB Libs Linking Errors on Ubuntu Bionic.
Finally, Run the Configuration Scripts
As shown on Display or Shell:
As in our Setup:sudo /u01/app/oraInventory/orainstRoot.sh
sudo /u01/app/oracle/product/12/dbhome_1/root.sh
And Finally, the Installation Should be Achieved Successfully!
-
13. Installing Oracle 12c R2 DB Instance
How to Create and Start the Oracle 12c R2 Database