Installing
-
2. Checking OpenGL Enabled
Now to Check OpenGL is Working on Display
So first Install the Required Tool with:sudo apt install mesa-utils
And then look at the Output of:
glxinfo | grep 'version'
At this time, the Required Minimum ‘OpenGL Version’ is 2!
If Not Satisfied then Search online How to Solve the Issue… -
3. Downloading libGDX for Ubuntu
Download libGDX for Ubuntu GNU/Linux
-
4. Java JDK Setup
Now, Check if Java JDK is Already Installed:
javac -version
If Yes then in the Output you should Find the Version! Otherwise See below…
How to Install Required Java JDK on Ubuntu -
5. Accessing Target
So to Access the Target Directory
First, Try:cd && cd Downloads
(But if you are in Trouble to Find it out on Terminal then See: How to Access Downloads Folder from Browser.)
To Verify it’s there List the Directory Contents with:ls . | grep gdx
-
6. Setting Up libGDX Project
Now to Setup libGDX Project run:
java -jar ./gdx-setup.jar
To Develop also for Android Devices potentially see: How to Install Android Studio on Ubuntu
Otherwise first Uncheck the Android Check Box…
Next, how you Can clearly See the Wizard dispose of Many Settings…
But now to Begin just Click on Generate!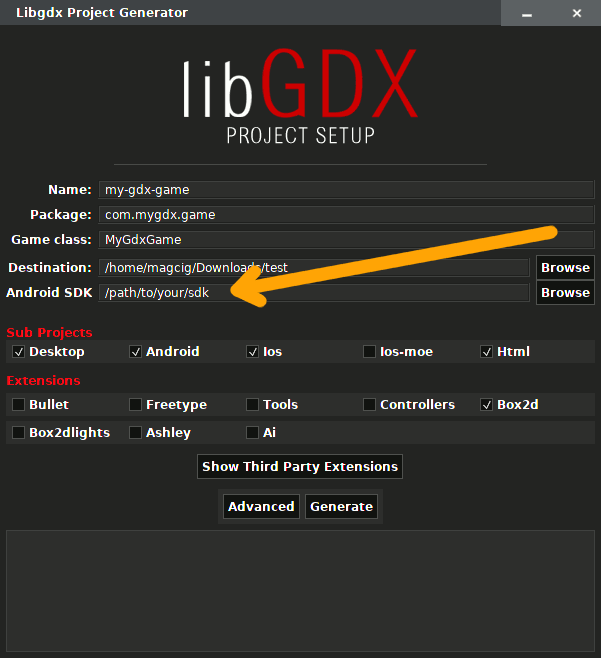
After few minutes you Find the Gradle build into the Destination Directory!
Contents