Setting Up
-
2. Downloading AppImageLauncher
Download AppImageLauncher for Ubuntu GNU/Linux
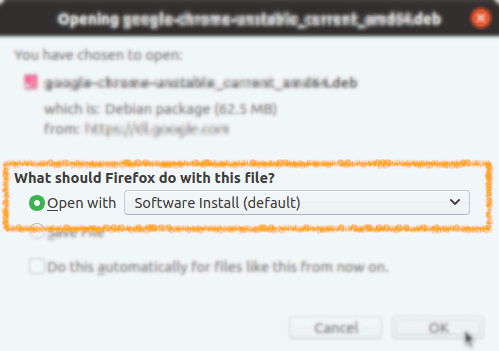
To Install it with the UI choose ‘Open with Software Install’:
-
3. Installing AppImageLauncher
(Optional) Then to Set up AppImageLauncher on Ubuntu
If Not Automatically prompted then Double-Click on the Package on the File Manager
Again Choose to ‘Install‘ it: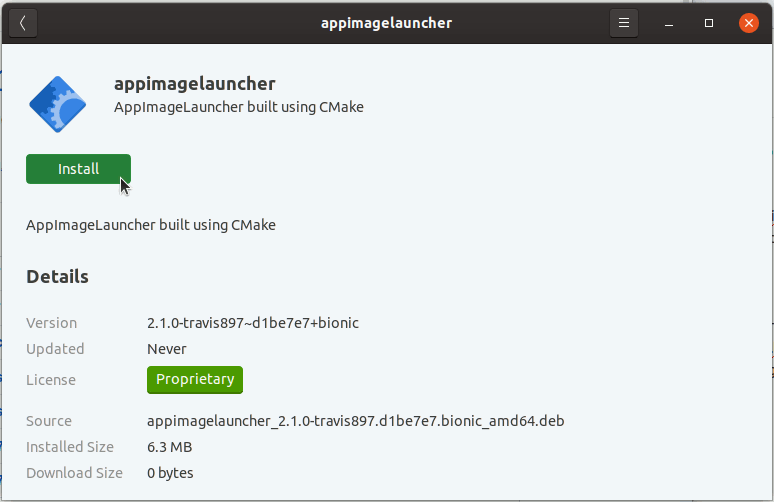
And Authenticate with the Admin Pass to Install it:

Or if you prefeer to Setup it from Command Line.
First, Access the Target, usually in the Downloads folder:
(But if downloaded with Firefox it can be instead into /tmp/mozilla*)cd && cd Downloads
To Check that there is run:
ls . | grep appimagelauncher
The grep Command Refine the output List showing only the entries Matching the Keyword.
(But if you are in Trouble to Find the Location on Terminal then See: How to Access Downloads Folder from Browser)
And to Setup AppImageLauncher:sudo gdebi ~/Downloads/appimagelauncher*.deb
If No GDebi then First, execute:
sudo apt install gdebi-core gdebi
If Got “User is Not in Sudoers file” then see: How to Enable sudo
Contents