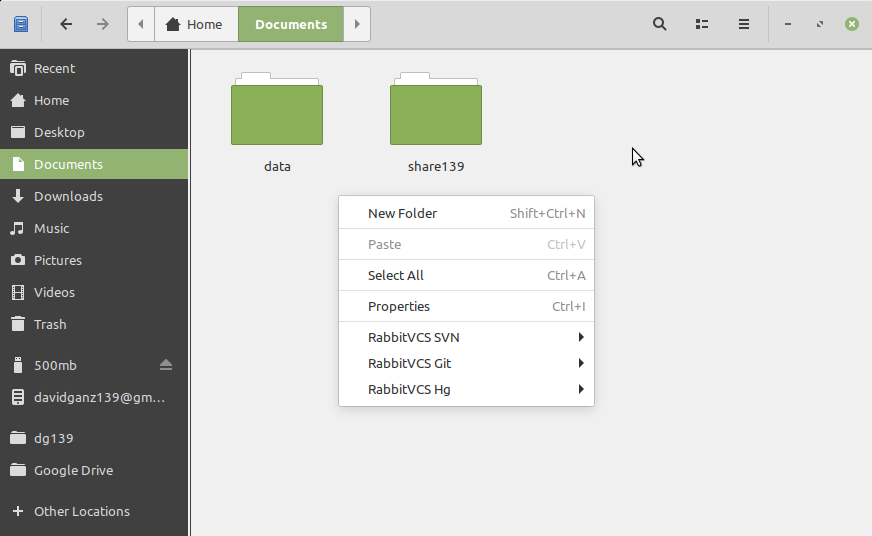
How to Install RabbitVCS on MX Gnu/Linux March 12, 2020 | By the+gnu+linux+evangelist. Getting Started 4. Launching Now, to Start RabbitVCS Nautilus Client From Command Line execute: nautilus Or Use the desktop Launcher! So Now I’m truly Happy if My Guide could Help you to Quick Start with RabbitVCS on MX Linux! Contents IntroInstallingGetting StartedPrevious page Pages: 1 2 3 Tags: Debian Install RabbitVCS, Debian Install Svn Client, Debian RabbitVCS, Debian RabbitVCS Setup, Debian Svn Client, Debian Svn Client Setup, Install RabbitVCS Debian, Install RabbitVCS MX Linux, Install Svn Client Debian, Install Svn Client MX Linux, MX Linux Install RabbitVCS, MX Linux Install Svn Client, MX Linux RabbitVCS, MX Linux RabbitVCS Setup, MX Linux Svn Client, MX Linux Svn Client Setup, RabbitVCS Debian, RabbitVCS Debian Install, RabbitVCS Debian Installation, RabbitVCS Debian Setup, RabbitVCS Install Debian, RabbitVCS Install MX Linux, RabbitVCS MX Linux, RabbitVCS MX Linux Install, RabbitVCS MX Linux Installation, RabbitVCS MX Linux Setup, Svn Client Debian, Svn Client Debian Install, Svn Client Debian Installation, Svn Client Debian Setup, Svn Client Install Debian, Svn Client Install MX Linux, Svn Client MX Linux, Svn Client MX Linux Install, Svn Client MX Linux Installation, Svn Client MX Linux Setup « How to Install RabbitVCS on Kali Gnu/Linux How to Install RabbitVCS on Deepin Gnu/Linux » Tutorial for Linux Step-by-step GNU/Linux Tutorials for Beginners