Setting Up Server
-
2. Setting Up Smb Configuration File
Download Smb Configuration File for Arch GNU/Linux
Right-Click on Page and Choose “Save as…” Naming it as “smb.conf“.
This because the Arch Linux Package Do Not include it!
Then Replace it into the Default Location with:sudo mv ~/Downloads/smb.conf /etc/samba/
Last to Fix Ownership run:
sudo chown -R root:root /etc/samba/smb.conf
-
4. Installing Samba Server
Now to Setup Samba Server on Arch
Simply play:sudo pacman -Syu samba
Next to Start the Samba Server Service run:
sudo systemctl start smb nmb
Possibly to Start it at Boot:
sudo systemctl enable smb nmb
Last, to check it’s running:
systemctl status smb
But if you use a Firewall then to Setup it check the ArchWiki Docs.
-
5. Configuring Samba Server
Then Edit the Samba Config File
With:sudo nano /etc/samba/smb.conf
To Quick enabling a generic Read Only access with No Security use:
[sharing]
comment = Sharing Directory
path = /home/[myUser]/Public
browseable = yes
read only = yes
guest ok = yes
Just Replace [myUser] with your Real username you can Check running:
whoami
This to enable the default Sharing Location in your Home Folder.
Else for a Password protected Access append:[sharing] comment = Sharing Directory path = /home/[myUser]/Public browseable = yes security = user/nencrypt passwords = yes
And to make a Writable Share set “writable = yes” in the Configuration.
Moreover, if you store sentitive Data and you have a Static IP then you should limit the allowed Hosts appending something like: “allow hosts = 127.0.0.1 192.168.1.0/24”.
Last, to Add you User to the Samba enabled Users play:sudo smbpasswd -a `whoami`
This to setup a Login for your current Username (Set a Different Password that for Admin if you Share it!)
Ctrl+x to Save & Exit from nano Editor :) -
6. Restarting Samba Server
Then Restart Samba & Winbind Services
Simply play:sudo systemctl restart smb nmb
-
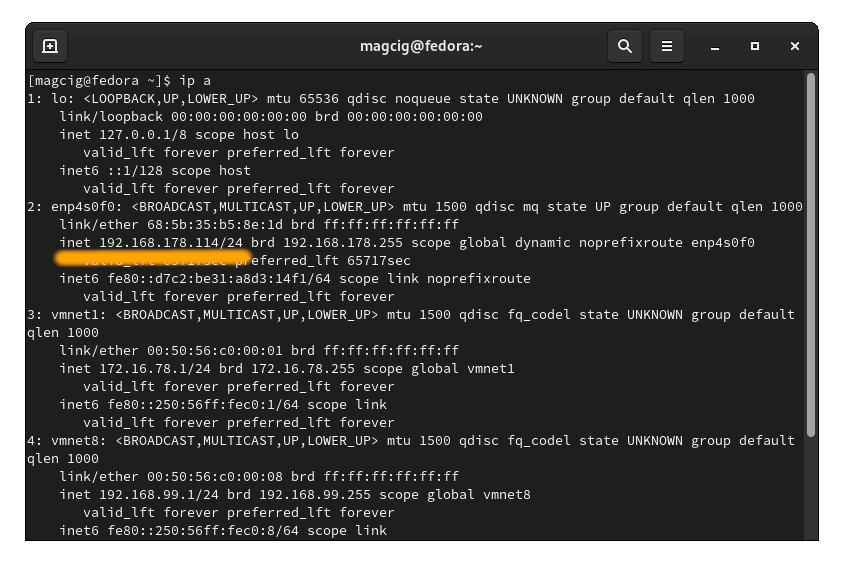
7. Looking up Server IP
Find the Server IP on Terminal.
ip a
Find the Server IP often under eth0 on the inet Line:

Contents