Installing
-
2. Downloading Oracle JDK 17
Download Oracle JDK 17 GNU/Linux Package
-
3. Installing Oracle JDK 17
Then to Setup Oracle JDK 17 on CentOS Stream 9 Linux
First, Access the Target, usually in the Downloads folder:
(But if you are in Trouble to Find it out on Terminal then See: How to Access Downloads Folder from Browser)cd && cd Downloads
Now to Confirm the Package is there do:
ls . | grep jdk
But if you are in Trouble to Find the Location on Terminal then See: How to Access Downloads Folder from Browser.
Finally, to Install JDK 17 simply:
su -c "rpm -ivh jdk-17*.rpm"
-
4. Setting Up Java
Next to Set Up Oracle Java JDK 17
You can directly Copy & Paste the Commands into Terminal..sudo update-alternatives --install /usr/bin/java java /usr/lib/jvm/jdk-17*/bin/java 1165
sudo update-alternatives --install /usr/bin/javac javac /usr/lib/jvm/jdk-17*/bin/javac 1165
sudo update-alternatives --install /usr/bin/jar jar /usr/lib/jvm/jdk-17*/bin/jar 1165
sudo update-alternatives --install /usr/bin/javaws javaws /usr/lib/jvm/jdk-17*/bin/javaws 1165
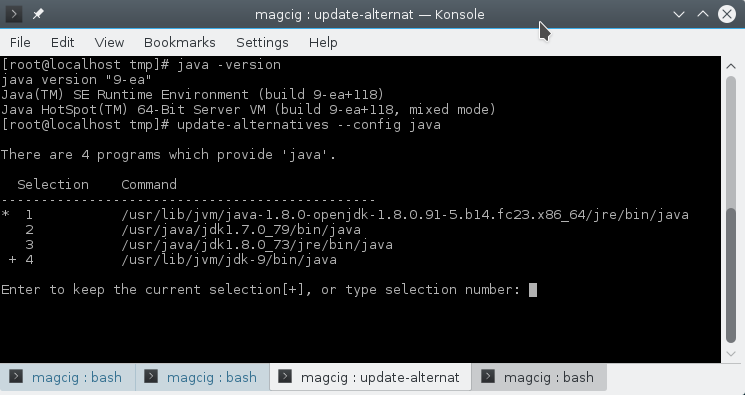
Checking or Setting the System Java Version in Use with
sudo update-alternatives --config java
And for the Java Compiler instead:
sudo update-alternatives --config javac
To Switch of Java Version Just Enter the Selection Number on First, Column. :)

-
5. Setting Up Env
(Optional) Setting JAVA_HOME User Environment Variable
And Edit the Bash environment Configuration filenano $HOME/.bashrc
Append:
export JAVA_HOME=/usr/lib/jvm/jdk-17[Release]
Replace [Release] with the actual one on the above Command.
Possibly to Check the JDK 17 exact PATH use in another window:ls /usr/lib/jvm/
Ctr+x to Save & Exit from nano Editor :)
Next to Load the New Bash Environment:bash
Finally, Test New Java JDK 17 Installation.
java -version
Contents