Installing
-
2. Downloading AMDGPU-Pro for Xubuntu
Download AMDGPU for Xubuntu GNU/Linux
Choose any of the latest Radeon Devices.
And then Grab the Latest available Release for Xubuntu 22.04+. -
4. Installing AMDGPU-Pro Installer
First, Access Target directory
Usually with:cd ~/Downloads
To Check it’s there List the contents with:
ls . | grep amdgpu
The grep Command refine the output List showing only the Entries matching the Keyword.
But if you are in Trouble to Find the Location on Terminal then See: How to Access Downloads Folder from Browser.Now to Set up AMDGPU Installer Run:
sudo apt install ./amdgpu*.deb
-
5. Installing AMDGPU-Pro Driver
Now to Install AMDGPU-Pro for Xubuntu
First, to check the multiple available options you should issue:amdgpu-install -h
You can Setup the Pro Version with the pro Flag for the Vulkan implementation.
So for instance to achieve a Multi Implementations setup the Command is like:amdgpu-install --usecase=graphics,opencl --opencl=rocr --vulkan=amdvlk,pro
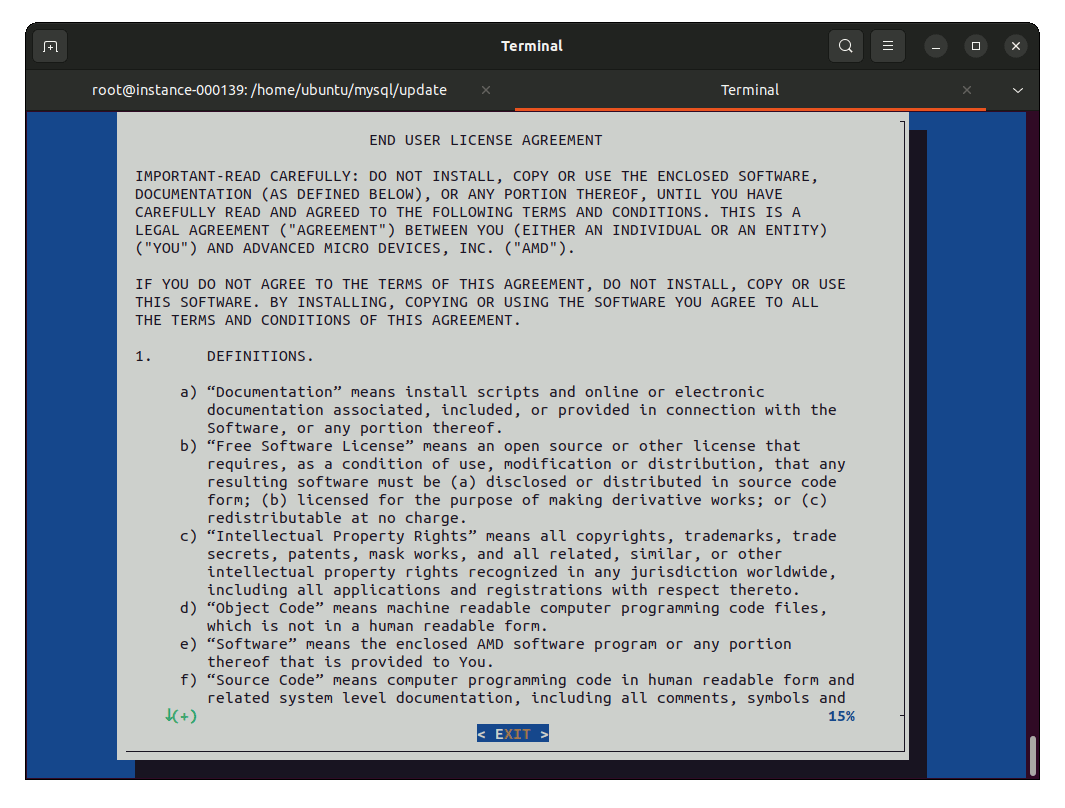
Agree to the License to achieve the Setup:

In case of Issue you have to Fix the Repos Manually!
Respectively Edit them with the nano Editor:sudo nano /etc/apt/sources.list.d/amdgpu.list
And Change “focal” in “jammy“!
Finally, Ctrl+x to Save & Exit from nano Editor.
The same for the other Repo:sudo nano /etc/apt/sources.list.d/rocm.list
Thanks to askubuntu.com.
-
6. Configuring for Use
Now to Configure AMDGPU-PRO Driver for Use
First, Add the Username to the “video” Group with:sudo usermod -a -G video $LOGNAME
Follow Editing the Grub Config File with GEdit (Or other Editors):
sudo gedit /etc/default/grub
Locate and Replace GRUB_CMDLINE_LINUX_DEFAULT=”quiet splash” with GRUB_CMDLINE_LINUX_DEFAULT=”quiet splash amdgpu.vm_fragment_size=9″.
Then Save & Exit.
Next to Rebuild the Grub Setup run:sudo update-grub
Finally, after the Setup is successfully achieved Reboot with:
sudo reboot
-
7. Testing AMDGPU-PRO
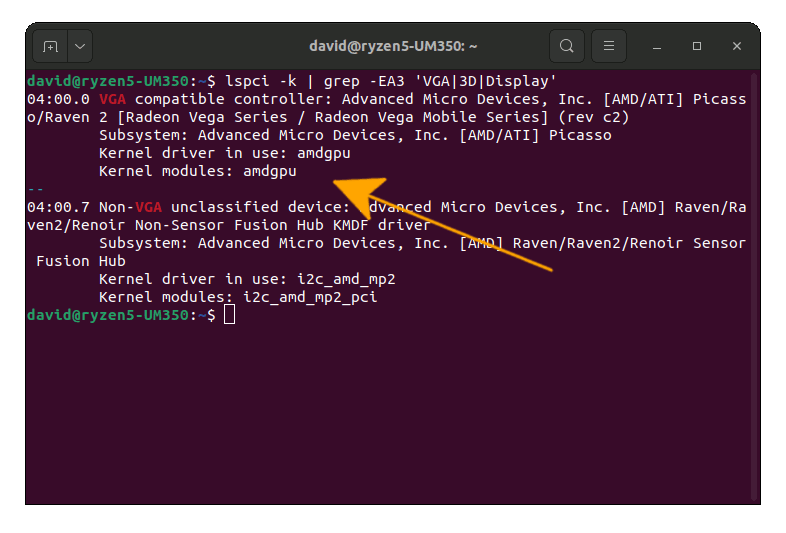
So to Check which is the Graphics Driver on Use
Issue:lspci -k | grep -EA3 'VGA|3D|Display'
And “amdgpu should be seen in the Output:

Last, in any case after you should Remove the AMD Open Source Driver:
sudo apt remove xserver-xorg-video-amdgpu
Contents