Installing Driver
[ad_slider autoplay=”true” interval=”8″ count=”5″]
-
4. Installing Brother MFC-J470DW Printer Driver
Then to Install Brother Printer Drivers
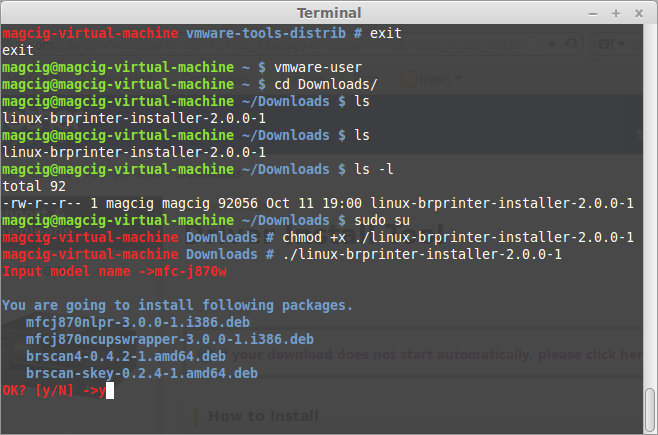
First, access the Target Folder:cd /tmp
And then give Execution Permission with:
chmod +x linux-brprinter-installer*
If Got “User is Not in Sudoers file” then see: How to Enable sudo
Now to Install it play:sudo ./linux-brprinter-installer*
In case of “CUPS is not installed” issue then to see How to Install it Here.
When Prompted Insert Your Brother Printer Model!br />

Then the Installer will Provide Automatically to Download and Install the Printer and potentially also the Scanner Drivers…
Especially relevant: in case of Issue try first to make the needed Directory with:sudo mkdir -p /var/spool/lpd
Again you can try to Grab all the .rpm Packages as explained before in the Download Step.
Then access the Target Folder, usually with:cd ~/Downloads
To Check it’s there List the contents with:
ls . | grep cupswrapper
The grep Command refine the output List showing only the Entries matching the Keyword.
But if yuo are in Trouble to Find it out on Terminal then See: How to Access Downloads Folder from Browser.
And last to Install them with:sudo yum install ./*br*.rpm ./*cupswrapper*.rpm ./*lpr*.rpm
Or in case of SUSE:
sudo zypper in ./*br*.rpm ./*cupswrapper*.rpm ./*lpr*.rpm
Next Run again the Installation Script as in the beginning!br />
Again following the CLI wizard, when Prompted about a Device URI:- For a USB Connection Simply Enter “n”!/li>
-
For a Network Shared Connection Setup Go to: http://localhost:631/printers/
Select the Printer
Select “Modify Printer”
Enter Your sudo Username & Pass
Select the Protocol and Continue…
For Help see Instructions on:
http://localhost:631/help/network.html
[ad_slider autoplay=”true” interval=”8″ count=”5″]
Contents