$schemamarkup = get_post_meta(get_the_ID(), 'schemamarkup', true); if(!empty($schemamarkup)) { echo $schemamarkup; }

How to Install Ventoy on Parrot OS – Step-by-step

September 15, 2023 | By the+gnu+linux+evangelist.

GNU/Linux Parrot Installing Ventoy – QuickStart Guide

[xyz-ihs snippet=”336AdTop”]

Hi! The Tutorial shows you Step-by-Step How to Install Ventoy USB Burning Bootable ISO Tool in Parrot GNU/Linux Desktop.

And Ventoy for Parrot Linux an Open Source Tool to create Bootable USB Drive for ISO/WIM/IMG/VHD(x)/EFI files.

With Ventoy, you don’t need to format the Disk over and over, you just need to Copy the Image Files to the USB drive and Boot them directly.

You can Copy many Files at a time and Ventoy will give you a Boot Menu to select them.

You can also Browse Image Files in Local Disks and Boot them.

Especially relevant: you just need to Install Ventoy Once, after that all the things needed is to Copy the ISO Files to the USB.

After you can also use it as a plain USB drive to Store Files and this will not affect Ventoy’s function.

How to Install Ventoy in Parrot Linux - Featured
  1. 1. Downloading Ventoy

    Download Ventoy Installer for Parrot GNU/Linux

    Get Ventoy tar.gz for Parrot
    [xyz-ihs snippet=”234Ad1″]
  2. 2. Extracting Ventoy

    Then Extract Ventoy into Home Directory
    (If you don’t intend to keep it on System use instead the /tmp Target)
    If it does Not Open automatically then Double-Click/Right-Click to Open with Archive Manager:

    Extracting Or from Command Line:
    tar xvzf ~/Downloads/ventoy*.tar.gz -C ~
    You can choose to Extract it in whatever other Location into the File System.
    Finally, if yuo are in Trouble to Find Out it on Terminal See: How to Access Downloads Folder from Browser.
[xyz-ihs snippet=”336Ad0″] [nextpage title=”CLI Setup”] [xyz-ihs snippet=”336Ad1″]
  1. 1. Terminal Getting-Started Guide

    How to QuickStart with Command Line on Parrot GNU/Linux:

    Console Parrot QuickStart Guide
    [xyz-ihs snippet=”234Ad1″]
  2. 2. Finding USB ID

    Now to Discover USB Drive ID/Path
    Run:

    lsblk
    And from the “SIZE” Column you should be able to Recognize it:
    Lsblk
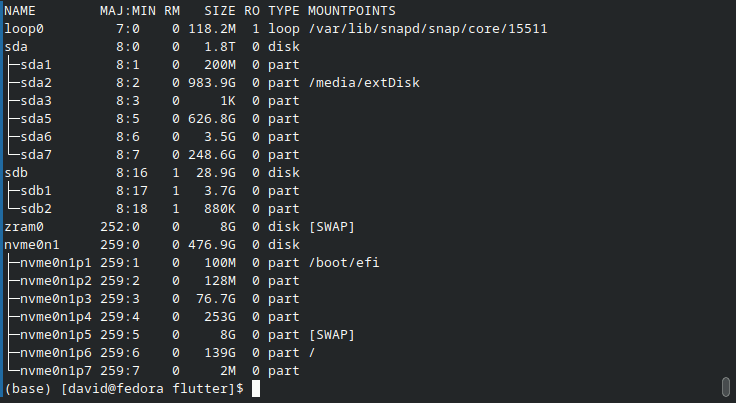
    Attention: take care of Remembering exactly its NAME!
  3. 3. Installing Ventoy

    Now to Install Ventoy on USB Drive
    First, Access the Target:

    cd ~/ventoy*
    And then play like:
    sudo sh Ventoy2Disk.sh -i /dev/[sdX]
    Replace [sdX] with your Disk Name/Id in the above Command.
    To Force the Setup use instead the “-I” Flag, and to Update it “-u”.
    ATTENTION: the USB Drive will be formatted and all the Data will be lost after install!
    For more insight see the Tool Help with:
    sh Ventoy2Disk.sh --help
    Then how I said on the Intro you can just Copy the Image Files to the Drive by Command Line or File Manager.
[xyz-ihs snippet=”336Ad0″] [nextpage title=”GUI Setup”] [xyz-ihs snippet=”336Ad1″]
  1. 1. Installing Ventoy

    So instead to Install Ventoy GUI Mode in USB Drive
    First, Access the Target:

    cd ~/ventoy*
    And then on Linux 64-bit play:
    ./VentoyGUI.x86_64
    (The installer is available also for: i386, arm64, and mips64el)
    The default run use the GTK, instead to run it with Qt5 as in KDE Plasma use the “–qt5” Flag.
    Now Choose your Device from the Drop-down:
    GUI
    And then .
    ATTENTION: the USB Drive will be formatted and all the Data will be lost after install!
    In a little while the Setup should be achieved.
    Then how I said on the Intro you can just Copy the Image Files to the Drive by Command Line or File Manager.