Installing
-
2. Setting Up Flatpak
How to Setup Flatpak on Parrot
First, to Check if it’s already there:
which flatpak
-
3. Installing VokoscreenNG
Then to Install VokoscreenNG App on Parrot
To Setup the Repo play:flatpak remote-add --if-not-exists flathub https://flathub.org/repo/flathub.flatpakrepo
For further Insight see the Flatpak Official Documentation.
And after:flatpak install flathub https://dl.flathub.org/repo/appstream/com.github.vkohaupt.vokoscreenNG.flatpakref
The Flatpak App Setup do Not need the sudo Command because then it Runs confined into a Sandbox.
Then Confirm the proposed Setup with ‘Enter’ and Wait patiently until the App is Downloaded, Build and Installed. -
4. Launching VokoscreenNG
Finally, Launch & Enjoy VokoscreenNG
Now, to Start from Shell simply:flatpak run com.github.vkohaupt.vokoscreenNG
Or Make Use of the desktop Launcher:

-
5. VokoscreenNG Getting Started Guide
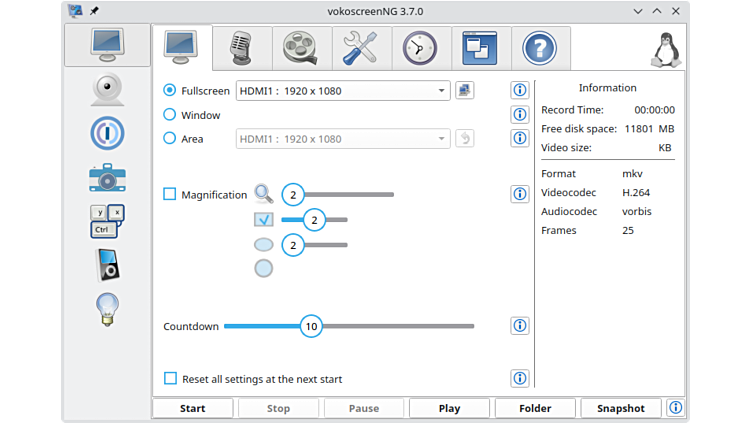
Now to Getting Started with VokoscreenNG Screencasting
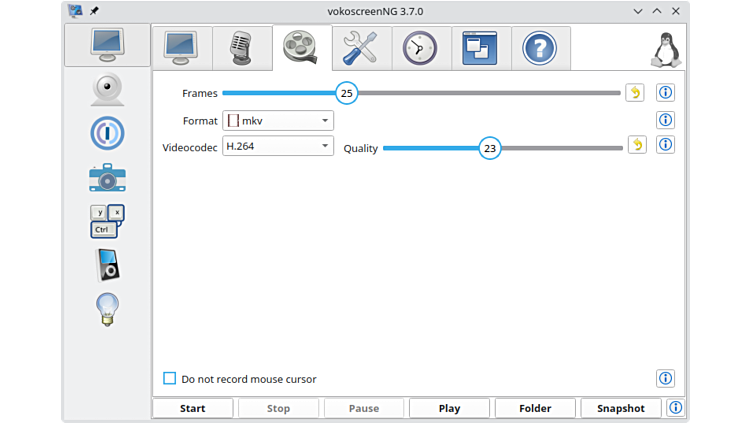
You can Choose between full Screen, Window, or Area:Then Format and Encoding:
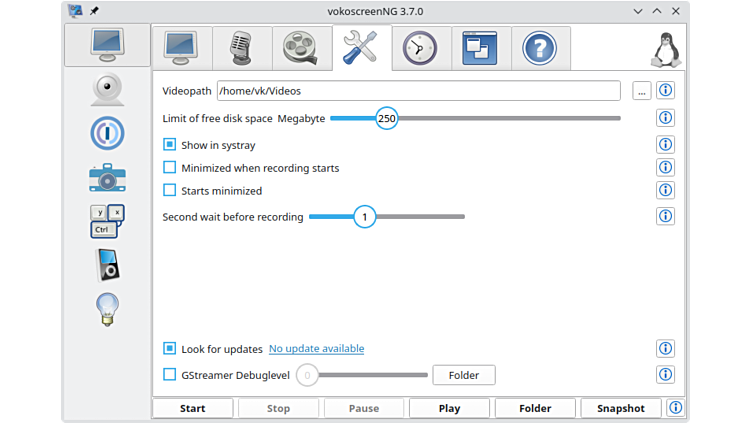
Again Set the Video output Path:
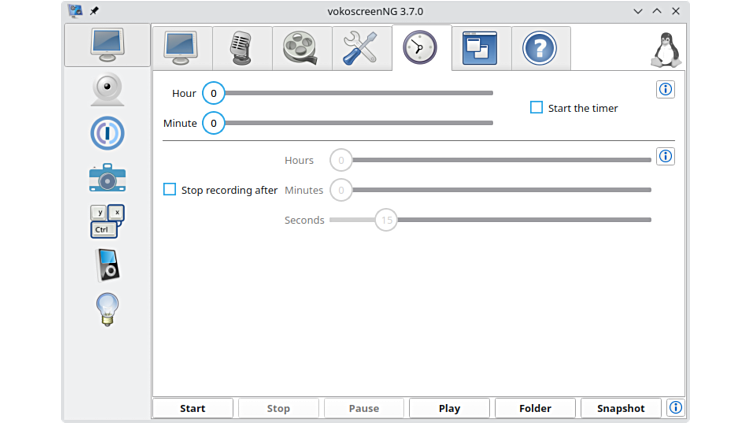
And choose a Scheduling and Recording Timer:
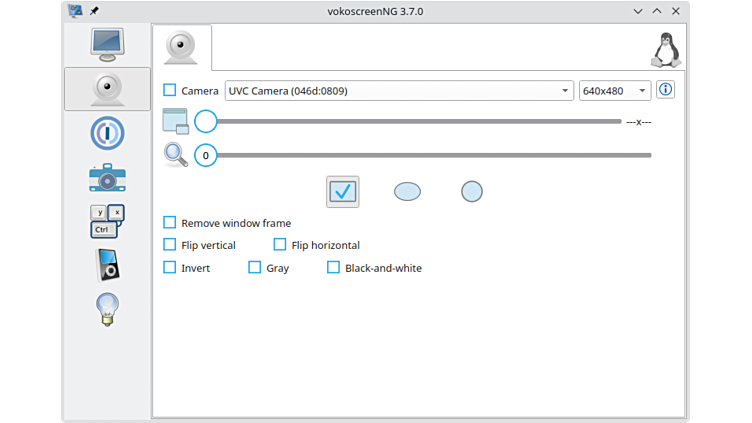
Next you can activate an external Camera:
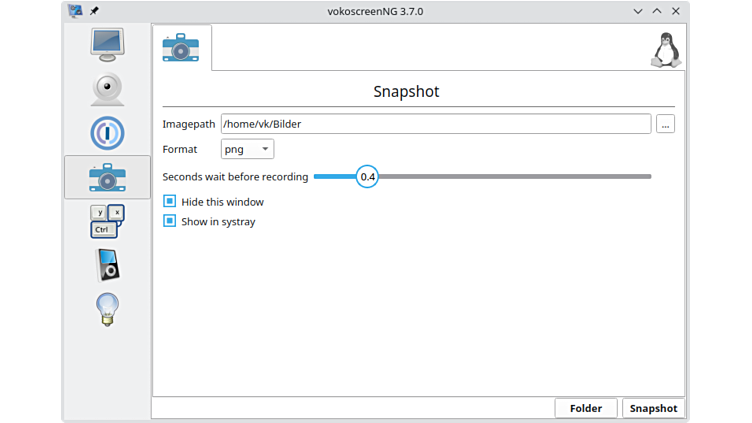
Last, you can use it also as a Screenshot App:
Contents