How to Install Owasp Asst
-
2. Installing NodeJS
How to Install NodeJS on GNU/Linux:
You can go for the Latest available LTS Version.
In case to Check if it’s already there:node --version
-
3. Setting NodeJs Version
Now to Install Supported Node.js Version
This to let ASST works without any problem.
So, Install the required Package with:sudo npm install n -g
And then Install and Set the Version:
sudo n 12.13.0
Next, Open a New Terminal Window and Check it:
node --version
To switch back to the Lastest Version:
sudo n latest
For Help type:
n --help
This because Node Modules are not frequently Updated.
And so using the latest Node.js Engine may require you to update ASST’s Modules. -
4. Installing ASST
Now to Install ASST into Web Server
First, possibly to Install Git:sudo apt install git
And then to Clone the Repo:
git clone https://github.com/OWASP/ASST.git
Next Replace it into the Web Server Target.
So in case of a XAMPP one:sudo mv ./ASST/ /opt/lampp/htdocs/
-
5. Configuring ASST
So to Configure ASST Files
First, Set the Scan Target Project Path:
(Here for simplicity with the nano Editor, but you can just use Anyone.)nano /opt/lampp/htdocs/ASST/config.js
Possibly amend the above Command in base to your Server Location.
Ctrl+w to Search for “DEFAULT_PROJECT_PATH_TO_SCAN“
Set an absolute Path as for instance: /opt/lampp/htdocs/wordpress
Finally, Ctrl+x to Save & Exit from nano Editor.Then Edit the PHP Configuration.
Set PHP Installation Location:sudo nano /opt/lampp/htdocs/ASST/config_php_lang.js
Search and Set “PHP_EXE_BIN_PATH“, for a Default XAMPP like:
PHP_EXE_BIN_PATH: "/opt/lampp/bin/php"
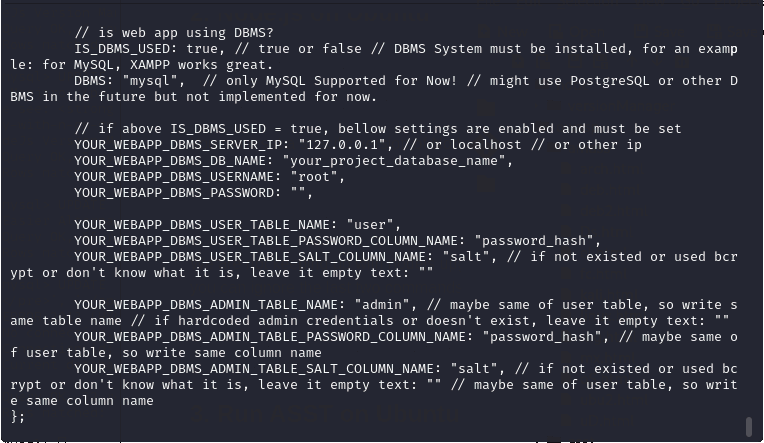
Last, if you use MySQL look into the File How to Configure it.
Here a Screenshot:
Else Set “IS_DBMS_USED” to “false.”
Contents