$schemamarkup = get_post_meta(get_the_ID(), 'schemamarkup', true); if(!empty($schemamarkup)) { echo $schemamarkup; }

How to Install i-SENSYS LBP162dw Printer on Kali

January 23, 2024 | By the+gnu+linux+evangelist.

GNU/Linux Kali Canon i-SENSYS LBP162dw Printer Setup – QuickStart Guide

Hi! The Tutorial shows you Step-by-Step How to Install Canon i-SENSYS LBP162dw Printer in Kali GNU/Linux Desktop.

And the Canon i-SENSYS LBP162dw Kali Setup it’s quick and easy because it only involves running a few Basic Shell Commands.

Especially relevant: after the Driver Installation to achieve the Printer Setup follow guidance to Add Printer!

The Canon i-SENSYS Printer Series use by default the UFRII Driver that is the 2nd version of UFR (Ultra Fast Render), non-standard rendering engine that is functionally similar to Postscript and PCL.

Possibly for more insight about How to Manage your Device see: Canon Printers Manuals Online.

Featured
  1. 1. Downloading Canon LBP162dw Driver

    Download Canon LBP162dw Kali Driver

    Canon LBP162dw Ufrii Driver
    If you are using Firefox then on Prompt Choose “Open with Archive Manager”:
    Firefox Prompt
    Or After try to Select the Package by the Downloads Button on Top Panel:
    Downloaded Packages
    Instead, on Google-Chrome simply try to Choose the Package on the Bottom Panel:
    Chrome Bottom Panel Downloads
    How to Install Chrome Browser on Kali.
[nextpage title=”Installing Driver”]
  1. 2. Terminal Getting-Started Guide

    How-to Quick-Start with Command Line on Kali GNU/Linux:

    Console Kali Linux QuickStart Guide
  2. 3. Extracting Canon LBP162dw Driver

    Then when needed Extract the Driver Package
    Possibly Double-Click/Right-Click on the File Manager and Open with Archive Manager:
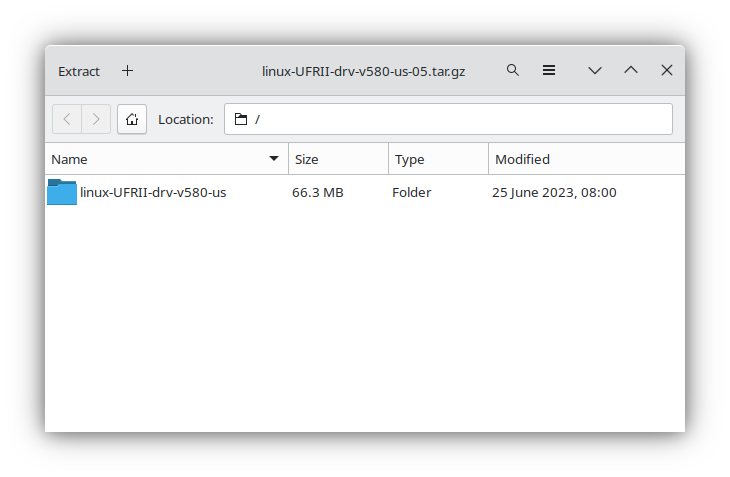
    Extraction
    Or from Shell simply like:
    tar xvzf ~/Downloads/linux-UFRII*tar.gz -C /tmp/
  3. 4. Installing Canon LBP162dw Driver

    Now to Install Canon LBP162dw Ufrii Driver:
    First, Change to the Target Directory:

    cd /tmp/linux-UFRII*

    And then Run the Installation Script with:

    sudo ./install.sh
    Give your Admin Pass to Start with the Installation Process…
    Simply Follow the Instructions on CLI.
    The Script should Find out the Needed Stuff Solving all the Packages Dependencies!
    Last, you are prompted to register your Printer on System:
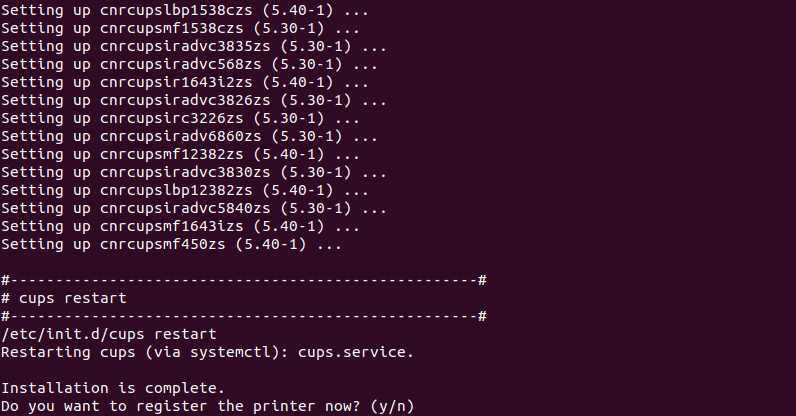
    Done
[nextpage title=”Adding Printer”]
  1. 5. Adding Printer

    How to Add Printer on Kali GNU/Linux

    Easy Kali Printer Setup