Step-by-Step Guide to Migrate from VirtualBox to KVM on GNU/Linux
Switch from VirtualBox to KVM to boost your performance and embrace Open Source.
This quick guide simplifies Linux virtualization with modern tools like KVM and QEMU.
Discover how to migrate virtual machines from VirtualBox to KVM on GNU/Linux in a few easy steps.
You can also use your Existing VirtualBox VMs in Virt-Manager by converting them following this Guide for VirtualBox VMs.
Why KVM is much Better and Faster for Linux VMs
KVM is faster because it integrates directly with the Linux kernel, providing high performance with minimal overhead.
Hardware virtualization support allows KVM to take advantage of Intel VT or AMD-V, offering better CPU utilization.
Low Latency is achieved with KVM’s ability to run VMs without significant delays, providing near-native performance.
Better resource allocation allows KVM to handle multiple VMs efficiently with flexible CPU, memory, and disk management.
Security is improved as KVM benefits from the Linux security features like SELinux, AppArmor, and seccomp.
Open-source and free, KVM provides a cost-effective solution with robust community support and frequent updates.
Wide compatibility ensures KVM works with various Linux distributions and supports both Linux and Windows guests.

1. Installing KVM
How to Get Started with KVM Virtualization on GNU/Linux
-
2. Running Virt-Manager
Now to Launch Virt-Manager UI
From Shell:virt-manager
Or instead make use of the desktop Launcher: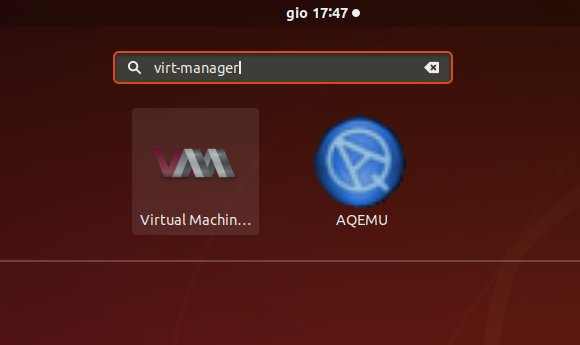
-
3. Creating Virt-Manager VM from ISO
Now to Create a Virtual Machine
(you can also use your existing VirtualBox VMs if applicable by following this Guide for VirtualBox VMs).
First, Choose “+” on Top Bar:In case of “No hypervisor options…” Issue try with a Restart: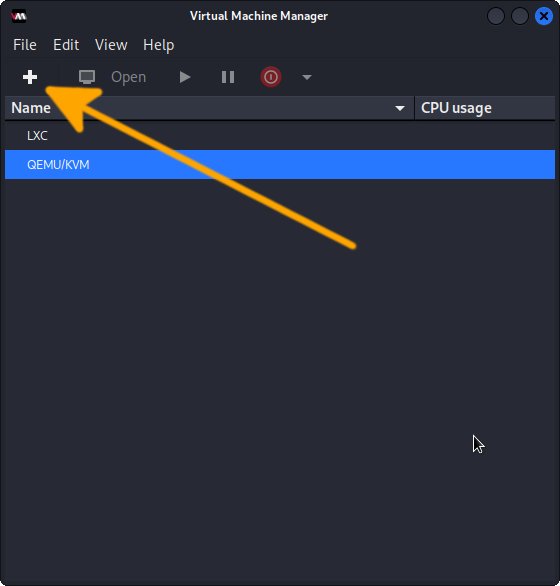
sudo reboot
Then confirm for Connection QEMU/KVM and Local Install ISO.
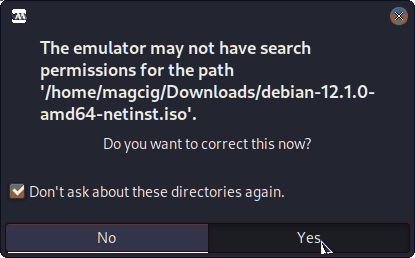
And then Browse for the Media Location:If prompted accept to Set Permission: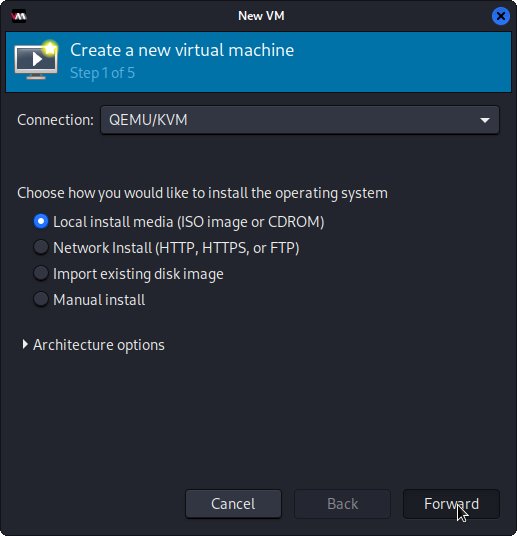
After Set Up RAM Size and CPU Cores:

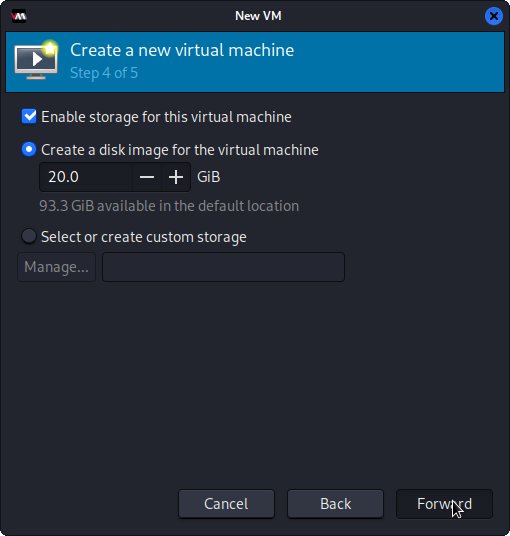
Again Set VM Disk Size:
Finally, Set VM Name:
Possibly enable the Virtual Network: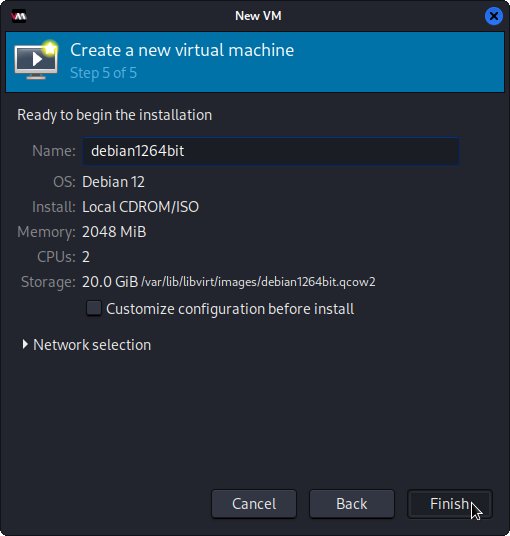 And finally, confirm with to Start for Installation!
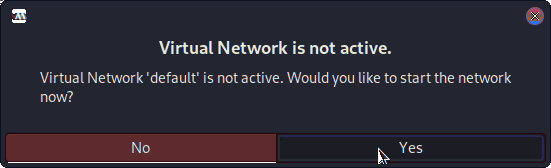
-
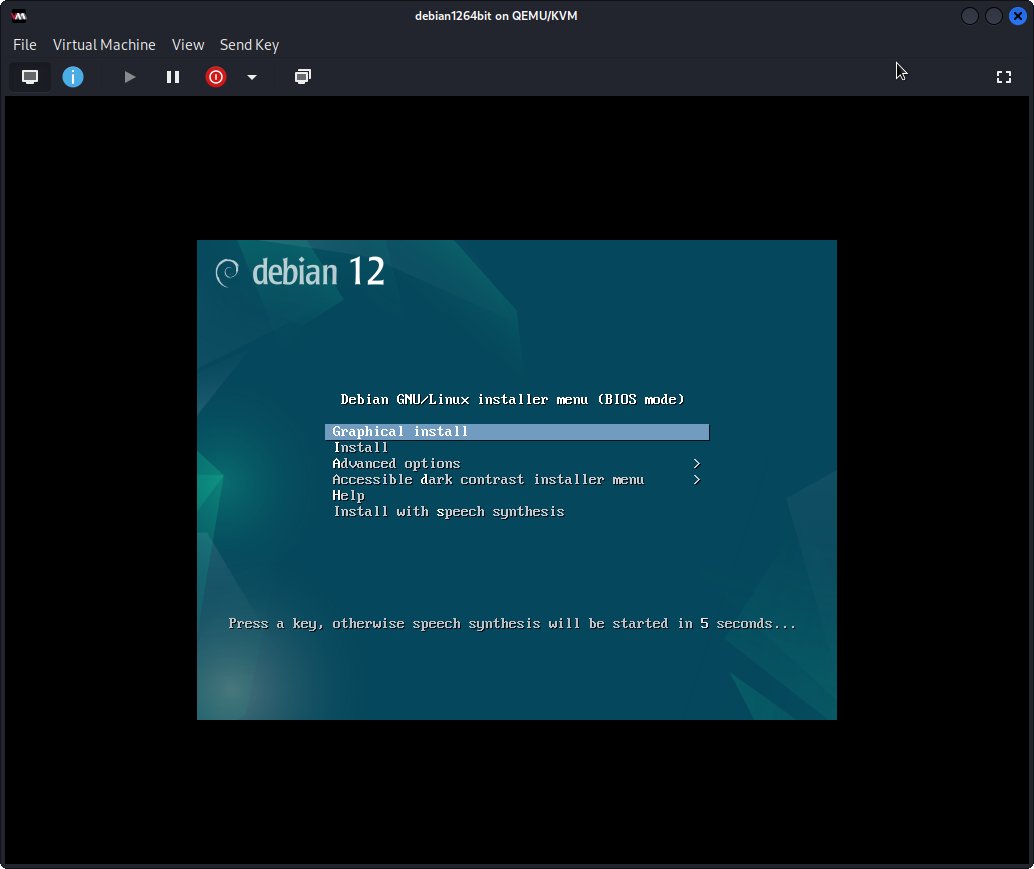
6. Launching Virtual Machine
Finally, Launch & Enjoy QEMU Virtual Machine.
So Now I’m truly Happy if My Guide could Help you to Quick Start with Virt-Manager on GNU/Linux!