GNU/Linux CentOS Stream 10 Installing uTorrent – Step by step Guide
How to Install uTorrent Bittorrent Server and Client on CentOS Stream 10 GNU/Linux desktop – Step by step Tutorial.
And uTorrent for CentOS 10 is the #1 BitTorrent Client on desktops Worldwide.
The Last uTorrent Release make use of the Latest OpenSSL 1.0+ Library with important Security Improvements.
uTorrent Client for CentOS Features:
- Tiny
- Easy
- Accessible
- Innovative
- Cuttin Edge
- Intelligent
So this Guide is valid also for all the others RHEL Based Distros like:
- Red Hat Enterprise Linux
- Oracle Enterprise Linux
- Rocky Linux
- AlmaLinux
Finally, the Installation result a little bit Intricate and Require some basic Skill but after the Result is Worthwhile! ;)

1. Launching Terminal
Open Terminal Window
(Press “Enter” to Execute Commands)In case first see: Terminal QuickStart Guide.
2. Downloading uTorrent
Download uTorrent Client+Server for Ubuntu 13.04
3. Extracting uTorrent
Then Extract uTorrent into /tmp
Possibly Double-Click/Right-Click and Open with Archive Manager: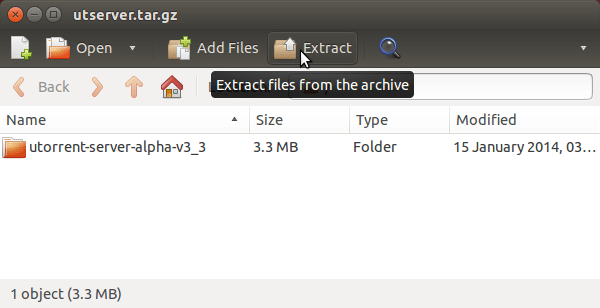 Or from Command Line:
tar xvzf ~/Downloads/utserver.tar.gz -C /tmp/
Again Extract uTorrent Web GUI
With:cd /tmp/utorrent* && unzip ./webui.zip
4. Installing uTorrent
Now to Install uTorrent
First, Set the SuperUser as Owner:sudo chown -R root:root /tmp/utorrent*
If Got “User is Not in Sudoers file” then see: How to Enable sudo
And then Switch contents:sudo mv /tmp/utorrent* /opt/utorrent
And Install/Update OpenSSL
Simply Running:sudo yum install openssl098e
Again make the needed Symlinks with:sudo ln -s /usr/lib64/libssl.so.0.9.8e /usr/lib64/libssl.so.0.9.8
sudo ln -s /usr/lib64/libcrypto.so.0.9.8e /usr/lib64/libcrypto.so.0.9.8
5. Launching uTorrent
Finally, to Start Up uTorrent Server
Execute:cd /opt/utorrent && sudo ./utserver
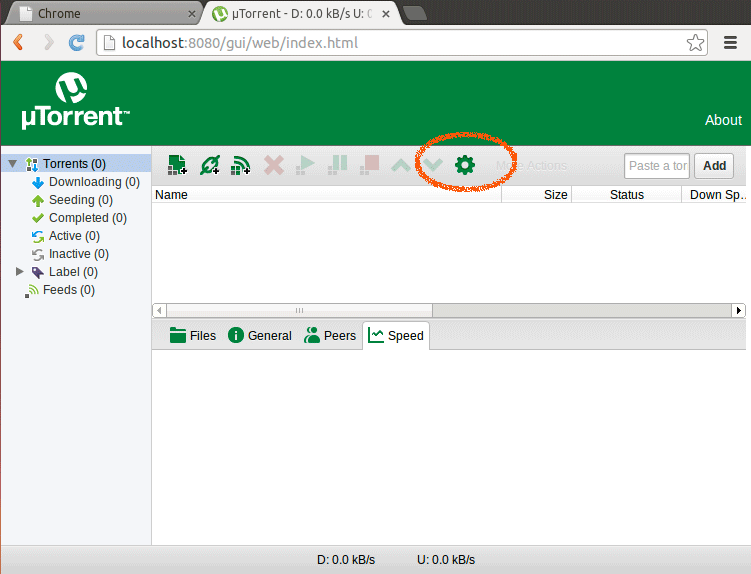
6. Connecting uTorrent
uTorrent WebGui Connection on Browser (Tested on Chrome)
Browse on:
localhost:8080/guiDefault Access:
user name: ‘admin’
pass: ”
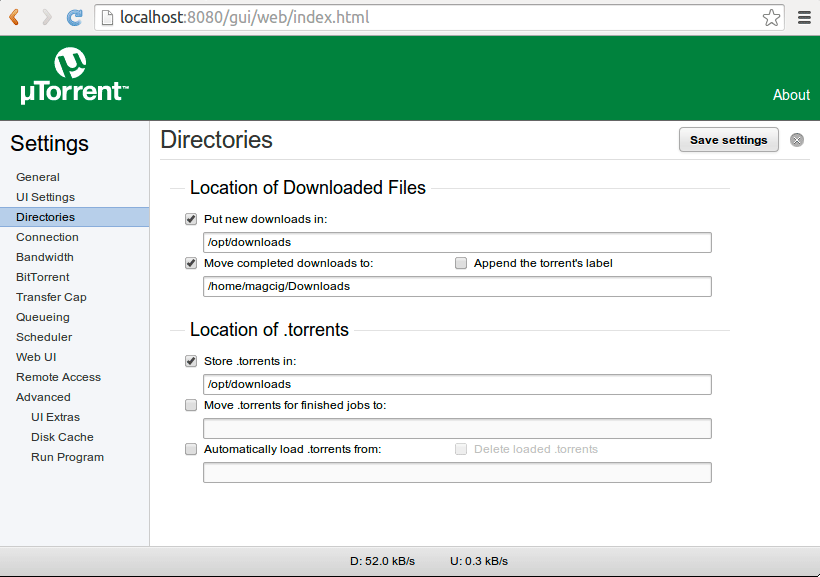
Use the Web UI to Make Changes to uTorrent Settings.
How to Create a uTorrent Launcher on CentOS desktop