$schemamarkup = get_post_meta(get_the_ID(), 'schemamarkup', true); if(!empty($schemamarkup)) { echo $schemamarkup; }

How to Install FreeBSD 9.0 KDE4 32bit Desktop on VMWare Fusion 4

August 1, 2012 | By Duchateaux.

The Guide shows you Step-by-Step How to Install a FreeBSD 9.0 KDE4 i386 Powered Desktop on VMware Fusion 4-5.

All Steps are Visually Shown but you need to Check if the Proposed Setup is Right for yours Needs…
During FreeBSD Installation Use the Space-Bar and Arrows to Select Components to Install and the Enter Key to Make a Selection a Menu or to Confirm Setup.
Take the Time of Reading and Understanding Getting a Clear Insight

On Guide Bottom you Find Links to youtube and Vimeo Video of Installation.

Howto Install VMware Tools on FreeBSD 9 Easy Visual-Guide.

Incandescent-FreeBSD
FreeBSD 9 KDE 4 Desktop
  1. Download FreeBSD 9.0 i386:

    Unix FreeBSD 9 i386.iso

    After Downloaded you can Directly Load the Iso into VMware as a Virtual DVD.

  2. Create a New Virtual Machine by Menu File >> New
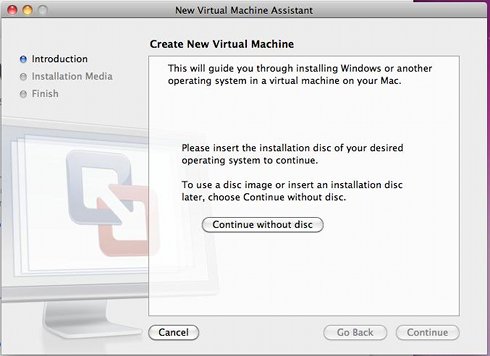
    Install FreeBSD 9 KDE 4 VMware Fusion 4 Create New Virtual Machine

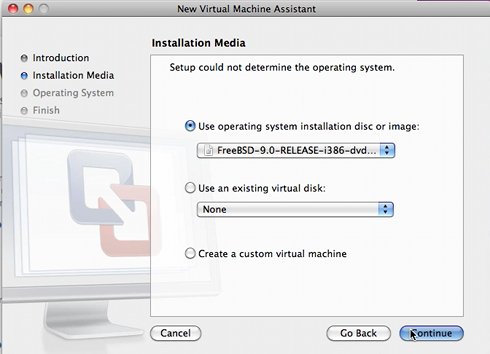
  3. Browse the FreeBSD 9 Iso Location
    Install FreeBSD 9 KDE 4 VMware Fusion 4 Browse FreeBSD Iso

  4. To Finalize Creation Click on Finish
    Install FreeBSD 9 KDE 4 VMware Fusion 4 Finish Machine Creation

  5. To Finalize Creation Click on Finish
    Install FreeBSD 9 KDE 4 VMware Fusion 4 Finish Machine Creation

  6. On Settings Menu Select Hard-Disk and Follow this Trace below to have a Issue-Free Virtual Disk Setup:
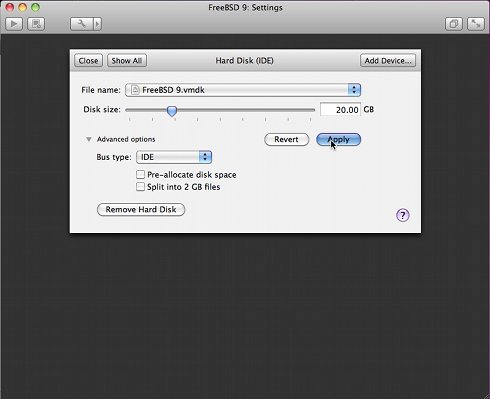
    Install FreeBSD 9 KDE 4 VMware Fusion 4 Issue-Free Virtual Disk Setup

  7. Select Memory to Set the RAM Memory
    Install FreeBSD 9 KDE 4 VMware Fusion 4 Memory Setup

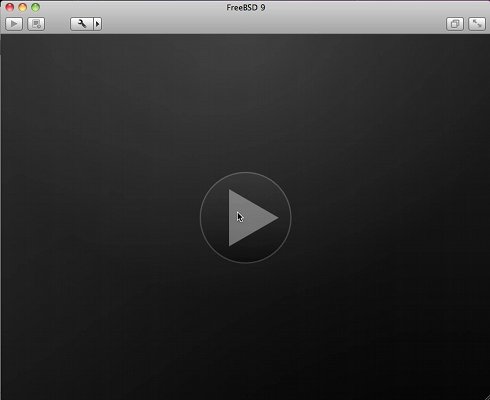
  8. Start the Virtual Machine:
    Install FreeBSD 9 KDE 4 VMware Fusion 4 Memory Setup

  9. At the Splash Screen type Enter to Start FreeBSD Installation
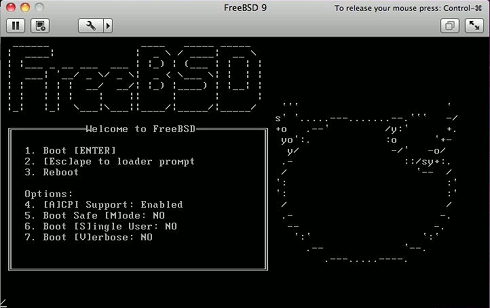
    Install FreeBSD 9 KDE 4 VMware Fusion 4 Start FreeBSD Installation

  10. Select Install:
    Install FreeBSD 9 KDE 4 Select Install

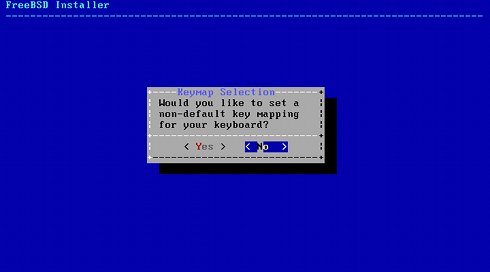
  11. Select Keyboard Layout:
    Install FreeBSD 9 KDE 4 Select Keyboard Layout

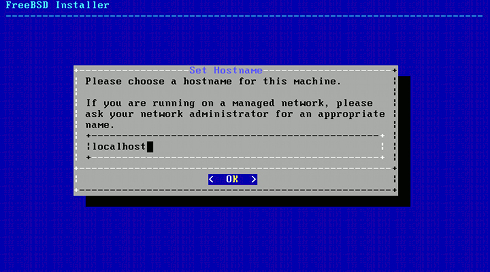
  12. Set Hostname and Click on Enter:
    Install FreeBSD 9 KDE 4 Set Hostname

  13. Select Distribution Components and Click on Enter:
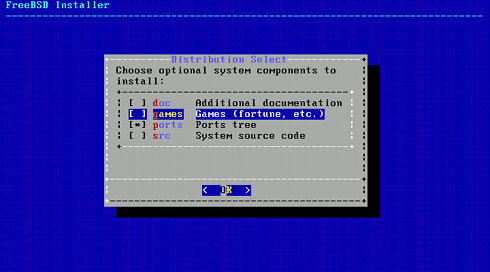
    Install FreeBSD 9 KDE 4 Select Distribution Components

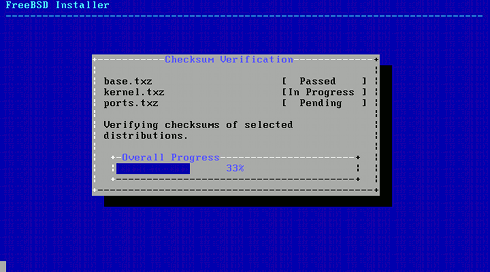
  14. Automatic Checksum Verification:
    Install FreeBSD 9 KDE 4 Checksum Verification

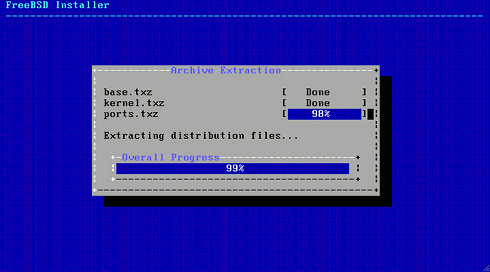
  15. Automatic Archive Extraction:
    Install FreeBSD 9 KDE 4 Archive Extraction

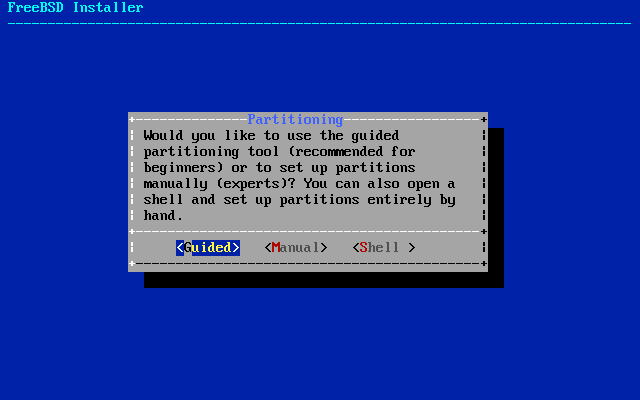
  16. Select Guided Partitioning Schema:
    Install FreeBSD 9 KDE 4 Select Partitioning Schema Guided

    Possibly Modify or Create the Partitions.
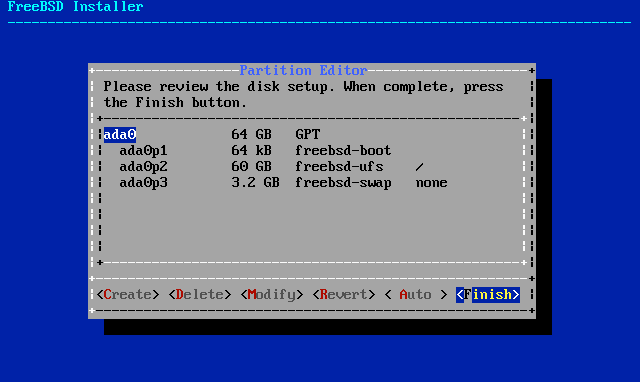
    Install FreeBSD 9 KDE 4 Select Partitioning Schema Review

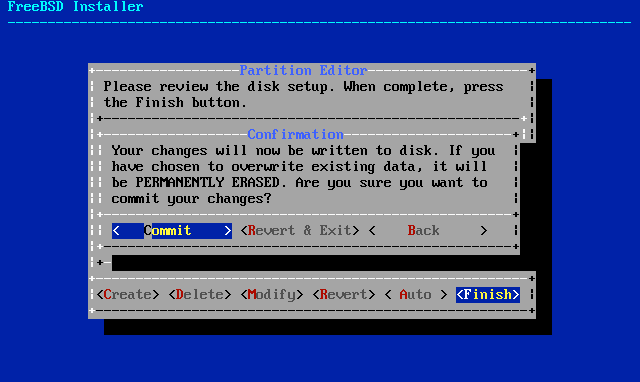
    Then Execute the Partitioning.

    Install FreeBSD 9 KDE 4 Select Partitioning Schema Guides

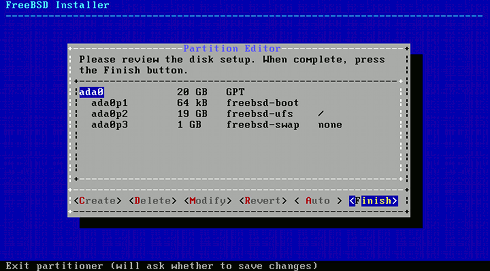
  17. Partition Editor:
    Install FreeBSD 9 KDE 4 Partition Editor

  18. Set the Root Password:
    Install FreeBSD 9 KDE 4 Set Root Password

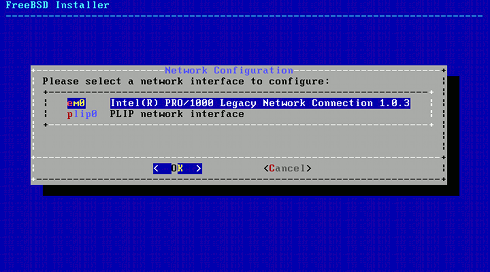
  19. Start Network Configuration Setup:
    Install FreeBSD 9 KDE 4 Start Network Configuration

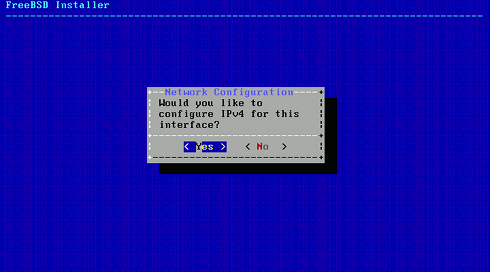
  20. Set IPv4 On:
    Install FreeBSD 9 KDE 4 Set IPv4 On

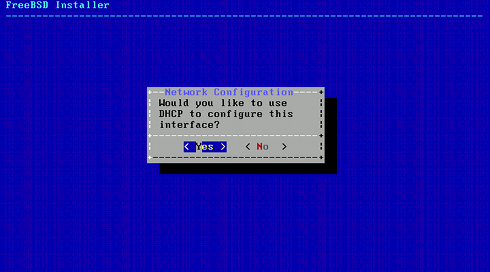
  21. Set DHCP On:
    Install FreeBSD 9 KDE 4 Set DHCP On

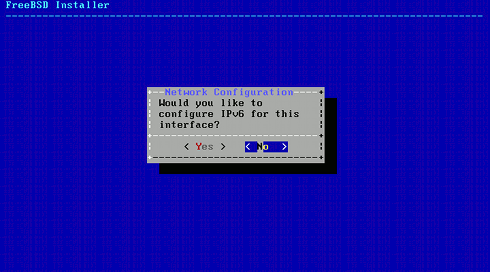
  22. Set IPv6 Off:
    Install FreeBSD 9 KDE 4 Set IPv6 Off
    If your Network Should be IPv6 Powered then Proceed to Turn it On…

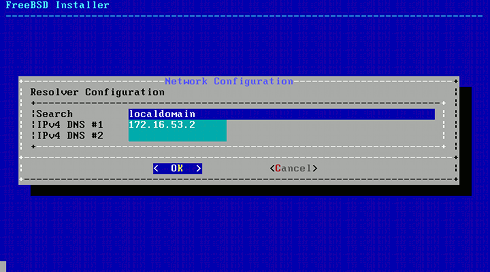
  23. Final Network Setup:
    Install FreeBSD 9 KDE 4 Final Network Setup

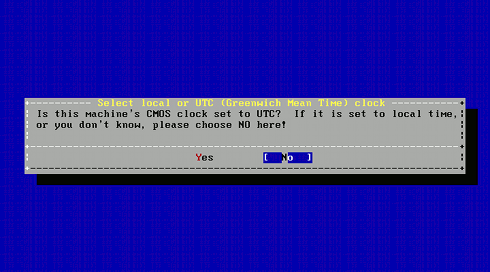
  24. Select Time:
    Install FreeBSD 9 KDE 4 Select Time

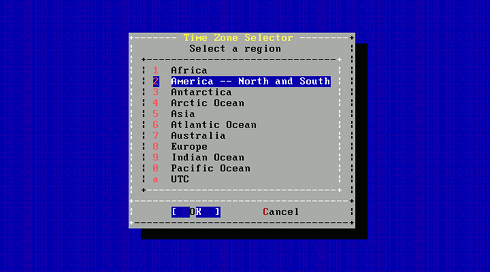
  25. Select Time Zone:
    Install FreeBSD 9 KDE 4 Select Time Zone

  26. For Big Countries Select Country Time Zone:
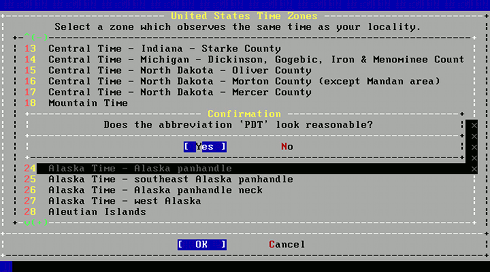
    Install FreeBSD 9 KDE 4 Select Country Time Zone

  27. Select Services to Start at Boot Time:
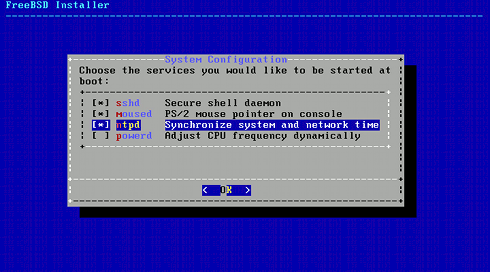
    Install FreeBSD 9 KDE 4 Select Services Start Boot Time

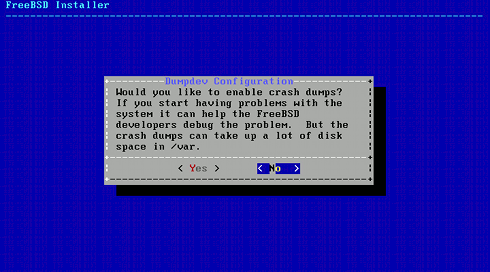
  28. Turn Dumpdev On or Off:
    Install FreeBSD 9 KDE 4 Dumpdev Configuration
    In Case your System is of Particular Importance then Turn Dumpdev On.

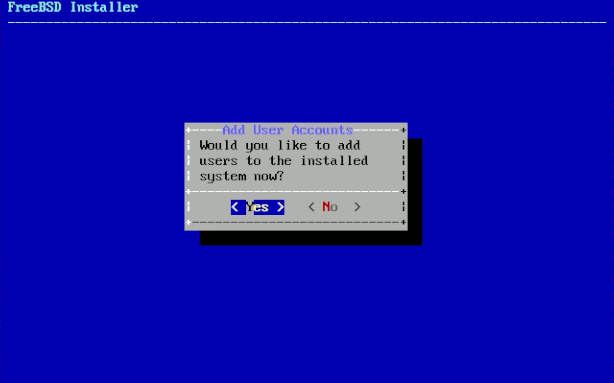
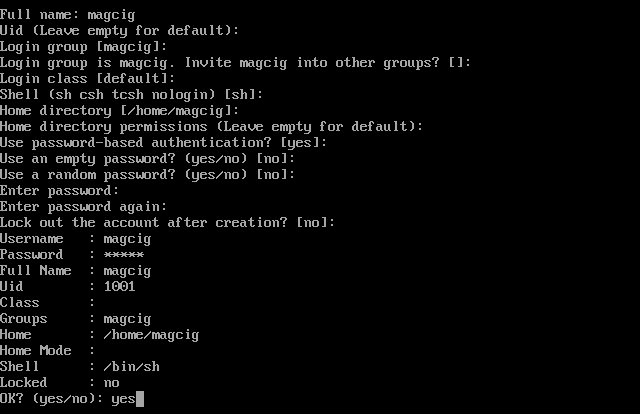
  29. Next Create At Least One Normal User

    In Fact this is Important For Booting Into the KDE4 Desktop!

    Install FreeBSD 9 KDE 4 Adding Normal User
    Install FreeBSD 9 KDE 4 Added Normal User

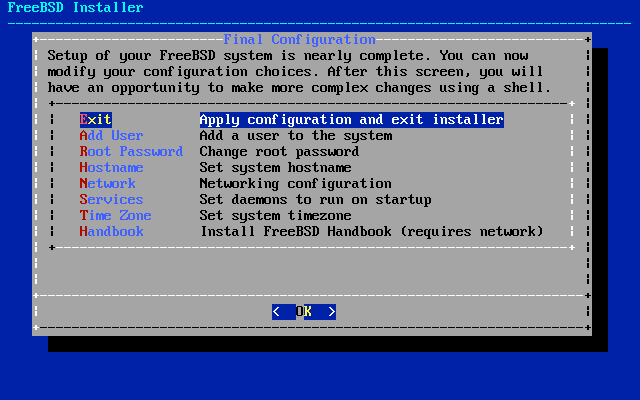
  30. Apply Changes and Exit:
    Install FreeBSD 9 KDE 4 Apply Changes and Exit

  31. Select Manual Configuration on Shell to Change Settings or Add Components:
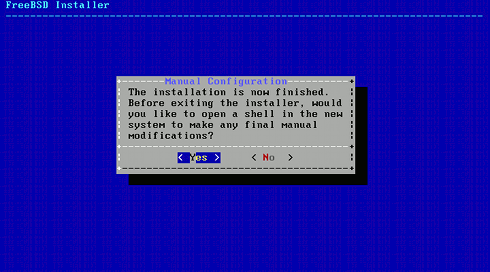
    Install FreeBSD 9 KDE 4 Manual Configuration Shell

  32. Install the nano Editor and then Start the Sysinstall Configuration:
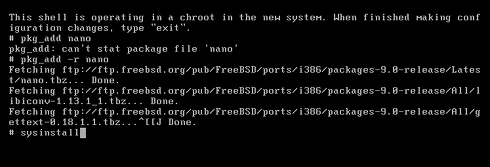
    Install FreeBSD 9 KDE 4 Install Nano Editor and Sysinstall Configuration
    The Two Command to Execute on Shell are:

    pkg_add -v -r nano

    After the nano has been Installed then Start Sysinstall:

    sysinstall

    The Sysinstall Text Configuration Tool will Show Up.

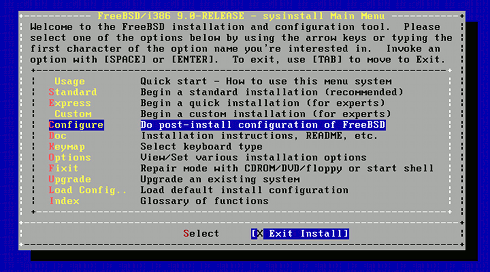
  33. Select Configure:
    Install FreeBSD 9 KDE 4 Select Configure

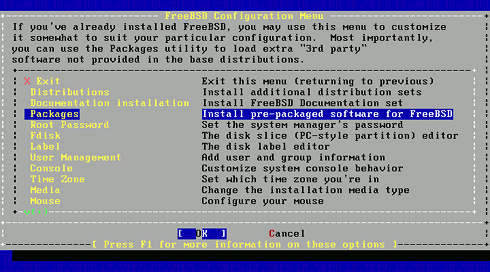
  34. Select Packages:
    Install FreeBSD 9 KDE 4 Select Packages

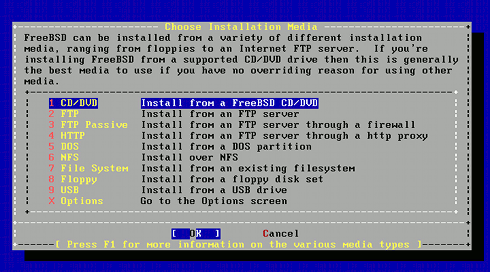
  35. Select CD/DVD:
    Install FreeBSD 9 KDE 4 Packages Installation Media
    The Other Possibilities are Not Investigated here But Remains an Available Possibility…

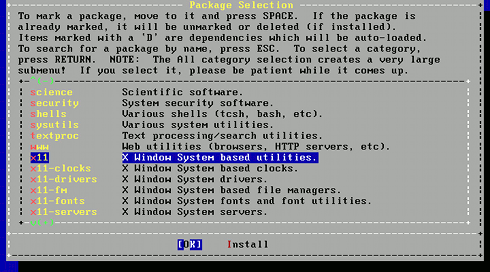
  36. Select the X11 Group:
    Install FreeBSD 9 KDE 4 Select X11 Packages Group

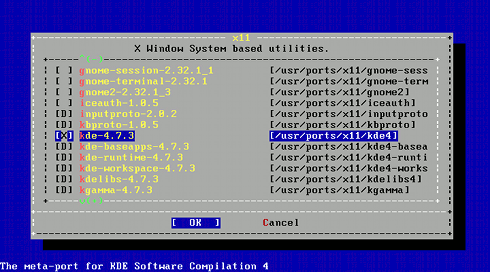
  37. Select the KDE 4 Package:
    Install FreeBSD 9 KDE 4 Select KDE 4 Group

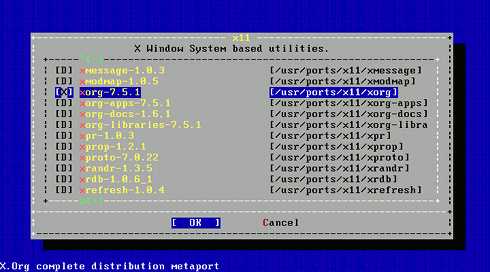
  38. Select the Xorg Package:
    Install FreeBSD 9 KDE 4 Select KDE 4 Group
    Latest Click on Enter to Finalize.

  39. Select Install with Tab and Then Confirm your Choice:
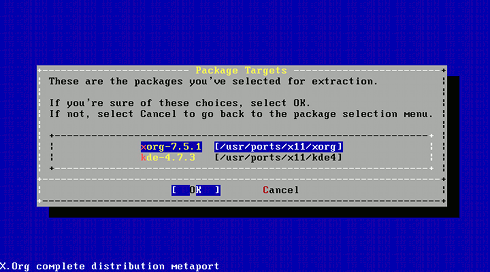
    Install FreeBSD 9 KDE 4 Confirm Packages Installation

  40. Now Wait Until Package Installation Achievement.

  41. Click the Tab Key and Enter to Exit:
    Install FreeBSD 9 KDE 4 Exit Sysinstall Menu

  42. Reboot to Activate the Nano Editor:
    Install FreeBSD 9 KDE 4 Reboot to Activate Nano Editor
    On Shell Execute:

    reboot

  43. After Rebooting on Shell Login as root

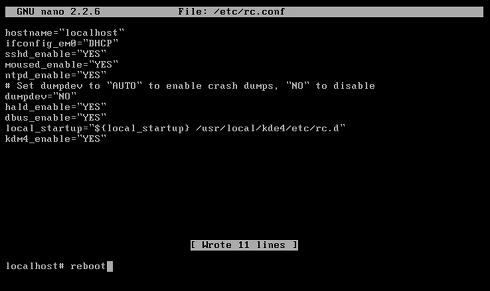
    Then Edit /etc/rc.conf to Enable KDE Login at Boot.

    After Rebooting on Shell Login as root and Edit /etc/rc.conf:

    nano /etc/rc.conf
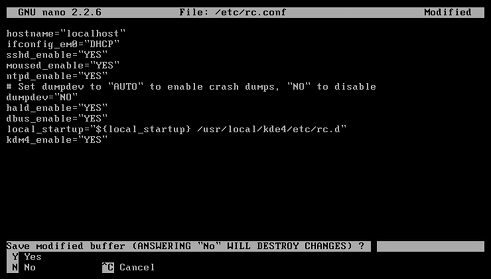
    Install FreeBSD 9 KDE 4 Enable KDE Manager
    Below the Content to Insert inside the rc.conf:

    dbus_enable="YES"
    hald_enable="YES"
    kdm4_enable="YES"
    local_startup="${local_startup} /usr/local/kde4/etc/rc.d"
  44. Final Reboot to Start-Up your Magically Powered KDE4 FreeBSD 9.0 Unix Desktop:
    Install FreeBSD 9 KDE 4 Reboot Into KDE 4

  45. Now you Should View the KDE 4 Login Screen:)
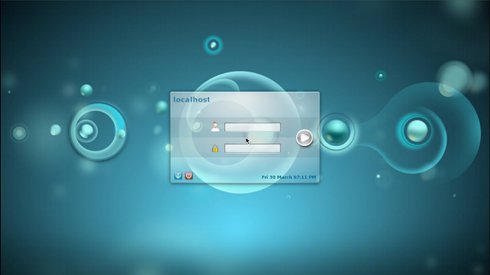
    Install FreeBSD 9 KDE 4 Login Screen

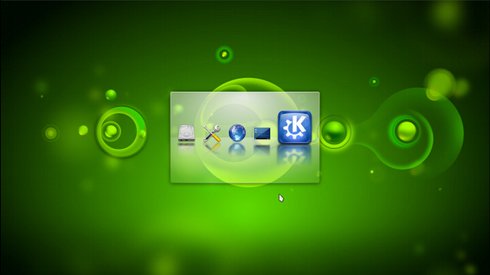
  46. Wait a Bit for KDE 4 Loading:)
    Install FreeBSD 9 KDE 4 Loading

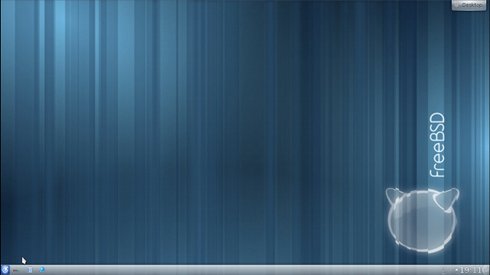
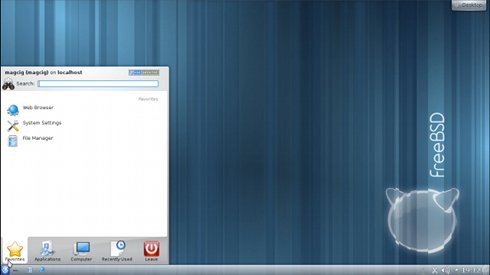
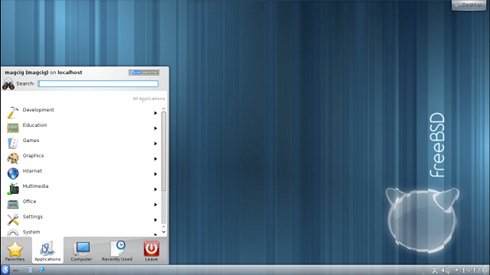
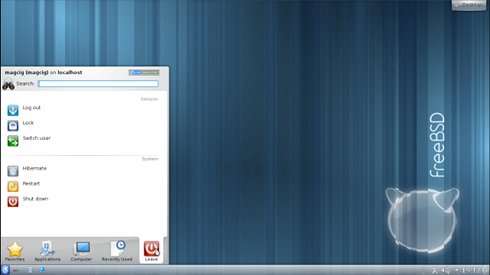
Pictures of the KDE 4 Desktop on FreeBSD :9
FreeBSD 9 KDE 4 VMware Fusion 4 Desktop 1
FreeBSD 9 KDE 4 VMware Fusion 4 Desktop 2
FreeBSD 9 KDE 4 VMware Fusion 4 Desktop 3
FreeBSD 9 KDE 4 VMware Fusion 4 Desktop 4

A FreeBSD Useful Guide contained here: