Getting-Started with Command Line on Xubuntu Linux
The Tutorial shows you How to Quick Start with the Command Line Console Terminal for Xubuntu 14.04 Trusty Tahr LTS Linux.
This is Just a ‘Quick and Dirty’ Introduction to the Command Line by Example on Linux Command Line Console Terminal.
The Tutorial is Step-by-Step and you Can Just Getting-Started Following and Executing each Command without any Harm for your System :)
After all only ‘Practice Makes the Master‘; so Do Not try to Getting-Started too Hard but Just ‘Take it Easy!‘ ;)
The Commands are Intended for Execution the Default Bash Linux Shell but Most should Works also for the Bourne, C, TC and Korn Shells…

-
First, Initiation is to Open a Command Line Terminal Session
Press: Ctrl+Alt+t
Or: Cmd/Win and Search ‘terminal’
Press “Enter” to Execute Commands on Console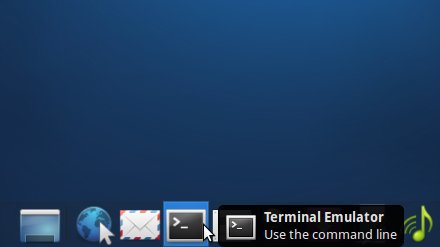
-
To List a Directory Content (Directories and Files included)
ls /[path]
For Example to List the Content of the Root Directory:
ls /
Or to List the Content of the Home Directory:
ls $HOME
-
Next practice the Change of Directory
Change to the Root Directory:cd /
[Again find out how “cd” is an Abridgement for “Changing Directory“]
Then Go to /usr/bin:cd /usr/bin
Now to Navigate Back to the Parent use the “..” option.
So non to Return to the Root of the Directory Tree you may play:cd ../..
(It’s like to say: ‘One Step Back and then One Step Back’ again)
Finally, to Return Home is simple as:cd
Then to Verify you are in that Location Use:
pwd
[In this case the “pwd” Command is a Shortcut for “Print Working Directory“]
Hey Congratulations! you achieved the First, Step-by-step Walk into the Linux Directory Tree! :) - The System’s Directory Tree Root: /
- The root User’s Directory: /root
- The root User: the SuperAdmin that can Execute Any Command
-
Again experiment the Creative powers
With a test Directory like:mkdir $HOME/livingroom
[See here again how “mkdir” is an Abbreviation for “Making Directory“].
How you should have already understood, $HOME and ‘~‘ are both synonymous of your’s Home Folder.
And the Home Directory is where your User Contents are Stored by Default.Moreover, to enhance your Memorization and Fun I rightly Use some Metaphoric term. So here you can Immagine a directory like a Room into your Home :)
Try Making Multiple Directories at once with:
mkdir $HOME/bedroom $HOME/bathroom $HOME/garden
Try to use the “ls” Command to Check your creative Work:)
ls ~
Finally, use the ‘touch‘ Command to Make a New Empty File:
touch $HOME/livingroom/box
And how you could already have perceived, in my creative Examples I make use of the following Mnemonic Linking:
-
Directory -> Spatial Entity
-
File -> Thing
And so in the Previous Command to an “Empty File” corresponds a natively “Empty Thing” like a “box”, or otherwise you may take it as a simple Label/Name ;)
-
Especially relevant, about the Shell Terminology, there are 3 different Entities named as “Root”:
-
5. Copying Stuff
Experiment How to Copy Directories and Files.
-
To Copy a Single File:
* As in the other cases here ‘cp‘ is the Abbreviation for ‘Copy‘ *cp $HOME/livingroom/box $HOME/bedroom/
You see how in this Example we copied our ‘box’ from the ‘livingroom’ to the ‘bedroom.’ :)
Now verify the correctness of the operation Listing your’s bedroom contents:
ls $HOME/bedroom/
And the Output will exactly display as:
box
-
Now for Instance to Copy a Single Directory inside to another do:
cp -r $HOME/livingroom $HOME/garden
List the ‘garden’ contents:
ls $HOME/garden
And you’ll Find:
livingroom
Now you have also a ‘livingroom’ copy into your ‘garden’ O:
Moreover, to Copy-Duplicate-Rename a Directory:
First, to be sure you are again into the $HOME area:
cd
And then Make a newly duplicated room do:
cp -r ./livingroom ./room
Finally, to Copy-Displace-Rename at the same time:
cp -r $HOME/livingroom $HOME/bedroom/wardrobe
By the way with this “magically crazy” Command we have trasformed our ‘livingroom’ into a ‘wardrobe’ inside to the ‘bedroom’ :))
-
-
6. Moving Stuff
Next Experiments the Dynamics of Files and Directories
And in this Moving dimension Files or Directories are taken as the Same.
[Again find out here how the “mv” Command is a Contraction of “Moving“]
So now for instance Make and Empty ‘bottle’:touch ~/livingroom/bottle
And then we Displace it in another Room:
mv ~/livingroom/bottle ~/bedroom/
Then verify Listing the ‘bedroom’ contents:
ls ~/bedroom/
And what you Find? The:
bottle
Also if only an empty one, sorry :))
Again you can Move & Rename at the same time like:
mv ~/bedroom/bottle ~/bathroom/can
Again we have “magically changed” an empty “bottle” inside the “bedroom” in an empty “can” inside to the “bathroom”. :))
And as I said in the introduction the Command for Directories works the Same!
So now again like “Alice in the Wonderland” we Reshape the Folder “livingroom” in the “garden” into a “teapot” in the bedroom! :}}mv ~/garden/livingroom ~/bedroom/teapot
Patiently Verify it with:
ls ~/bedroom/teapot
Finding What?
Simple :) Emptiness! :}
-
7. Annihilating
Finally, we try investigating our Magical Destroying Powers
Deleting Directories and Files!Especially Releant: in a Working Environment you should Triple Check the Commands Before Execution…
Because in the Shell Environment there’s No Trash Bin and so the stuff is directly Annihilated!!![And as you may have already wittily perceived, here “Removing” is just Resumed in “rm“]
-
How Removing Files.
First, we Wipe Out the ‘box’ in the ‘livingroom’ with:
rm $HOME/livingroom/box
Check it with:
ls $HOME/livingroom/
Now we try the same for Multiple Entities…
First, we Make a Copy of the ‘can’ into then ‘bathroom’ in a ‘jar’ into the ‘bedroom’, Magically as before… :)) with:cp $HOME/bathroom/can $HOME/bedroom/jar
And now how to brutally Get Rid of Both? Simply like that:
rm $HOME/bathroom/can $HOME/bedroom/jar
-
How Removing Directories.
Now we Start to furiously Destroying our nice Home… [[[:
First, we Raze the ‘livingroom’:rm -rf $HOME/livingroom
“-rf” is a combination of Flags. “r” for Recursively and “f” for Forced
And finally, finally, we simply Desert All-in-one the Remaining Habitats:rm -rf ~/bathroom ~/bedroom ~/garden
Sorry, we have Turned our Home into Empty Space, but What a JOKE! {{{:
-
-
8. Getting Admin Power
Last How to Get the Admin Super-Powers.
To Login as SuperUser:
sudo su
If Got “User is Not in Sudoers file” then see: How to Enable sudo
Then to Logout:exit
To Protect your System from the potential Damage of an Hazardous Crazy Command Execution the Logout should be executed every Time your Setup is Achieved!
Finally, to Execute a Single Command as SuperUser:sudo su -c 'myCommand'
Or:
sudo myCommand
So for instance to List the Protected root Directory try to run:
sudo ls /root
-
How to Set Permissions on Xubuntu File System
Here is achieved the ‘Quick&Dirty’ Initiation to the Xubuntu Linux Command Line Sphere :)
I’ll be Back Very Soon to Show the Basics of the Apt Software Packages and Repository Administration Commands!