Getting-Started with Oracle 11g Database for Linux Mint 17.1 LTS
Hi! The Tutorial shows you Step-by-Step and Visually How to Install and Getting-Started on Oracle 11g R2 Database for Linux Mint 17.1 Rebecca LTS Amd64 GNU Mate/Cinnamon/Kde/Xfce Desktop.
Especially relevant: Ubuntu-like Systems are Not in the List of Oracle 11g Database Supported OS So you should Be Careful and Use it at most for Development and Not As Production Database Server!
The Guide Includes All the Essentials Commands and Basic Screenshots of the Installation Process.
The Process is somewhat Extended and Advanced so it Demand some Basic Command Line Practice and Confidence.
Now Relax and Take the Time of Reading, Understanding and Executing Carefully the Instructions Contained here.

-
Download the Oracle 11g R2 Database for Linux:
Oracle 11g R2 .zip for Linux
The Link Contains the List of Oracle 11g r2 Database Releases. -
Open a Terminal Shell Emulator
(Press “Enter” to Execute Commands)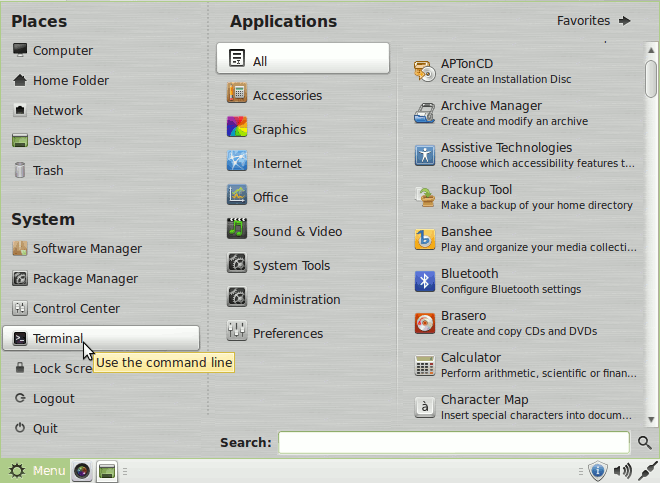
In case first see: Terminal QuickStart Guide.
-
Login as Root User
sudo su
If Got “User is Not in Sudoers file” then see: How to Enable sudo
-
Make Network Configuration
-
Get hostname:
hostname
-
Get IP:
/sbin/ifconfig
You will Find It Under the lo >> inet Section.
-
Check if Hostname is Already into the Enabled Hosts File.
cat /etc/hosts
If It’s Not Present then Insert it with:
nano /etc/hosts
Insert:
[myIP] [myHostname]
Example: ‘127.0.0.1 localhost.localdomain’
Ctrl+Shift+v to Paste Content on nano
Ctrl+x to Save and Exit from nano Editor :) -
Grant Connection to X Server
xhost +myIP
Example: # xhost +127.0.0.1
-
-
Install Prerequisite Packages
apt-get update
apt-get install alien autoconf automake autotools-dev binutils doxygen /nelfutils expat gawk gcc gcc-multilib g++-multilib libstdc++6:i386 ksh less libtiff4
libtiff4-dev lib32z1 libaio1 libaio-dev libc6-dev libc6-dev-i386 libc6-i386
libelf-dev libltdl-dev libmotif4 libodbcinstq4-1 libodbcinstq4-1:i386
libpthread-stubs0 libpth-dev libstdc++5 lsb-cxx make
pdksh openssh-server rlwrap rpm sysstat unixodbc unixodbc-dev x11-utils
zlibc libglapi-mesa:i386 libglu1-mesa:i386 libqt4-opengl:i386
libpthread-workqueue0 libpthread-workqueue-dev libzthread-2.3-2 libzthread-dev
libpthread-stubs0-dev
How to Install libtiff4, libtiff4-dev and libpthread-stubs0: Here.
-
Make Symlinks to Binaries and Libraries
Linking Binaries
ln -s /usr/bin/awk /bin/awk
ln -s /usr/bin/rpm /bin/rpm
ln -s /usr/bin/basename /bin/basename
Linking Libraries
ln -s /usr/lib/x86_64-linux-gnu /usr/lib64
cd /lib64
ln -s /lib/x86_64-linux-gnu/libgcc_s.so.1 .
-
Add Groups and User
groupadd -g 502 oinstall
groupadd -g 503 dba
groupadd -g 504 oper
groupadd -g 505 asmadmin
useradd -u 502 -g oinstall -G dba,asmadmin,oper -s /bin/bash -m oracle
passwd oracle
Take Note of the oracle User Pass :)
-
Make Target Directories
mkdir -p /u01/app/oracle/product/11.2.0/
chown -R oracle:oinstall /u01
chmod -R 775 /u01
-
Parameters Configuration SetUp
-
Edit /etc/sysctl.conf file.
nano /etc/sysctl.conf
Then hit Ctrl+x to Save and Exit from nano Editor
Add or amend the following lines
#### Oracle 11g Kernel Parameters ####
fs.suid_dumpable = 1
fs.aio-max-nr = 1048576
fs.file-max = 6815744
kernel.shmall = 818227
kernel.shmmax = 4189323264
kernel.shmmni = 4096
kernel.panic_on_oops = 1
# semaphores: semmsl, semmns, semopm, semmni
kernel.sem = 250 32000 100 128
net.ipv4.ip_local_port_range = 9000 65500
net.core.rmem_default=262144
net.core.rmem_max=4194304
net.core.wmem_default=262144
net.core.wmem_max=1048576
The Values of ‘shmall’ and ‘shmmax’ Need to be Customized following your System Memory Size.
Here above is a Valid Setup for a 8Gb RAM Size!
If you need to Change first Check your Phisical Memory Size with:cat /proc/meminfo | grep MemTotal
Then ‘shmall’ should be Set as:
[RamKb] / 10
And instead ‘shmmax’ as:
[RamKb] * 1024 / 2
For further Instructions See Oracle Documentation…
If Exists then Comment out these lines below that Gives an Error#net.bridge.bridge-nf-call-ip6tables = 0 #net.bridge.bridge-nf-call-iptables = 0 #net.bridge.bridge-nf-call-arptables = 0
-
Edit /etc/security/limits.conf file.
nano /etc/security/limits.conf
Add the following lines
#### oracle User Settings 4 Oracle 11g ####/noracle soft nproc 2047/noracle hard nproc 16384/noracle soft nofile 1024/noracle hard nofile 65536/noracle soft stack 10240
-
Load the New Kernel Parameters
/sbin/sysctl -p
-
-
Unzip, Set oracle as Owner and Relocate database
cd /home/[myUser]/Downloads
unzip linux_11gR2_database_1of2.zip
unzip linux_11gR2_database_2of2.zip
chown -R oracle:oinstall database
mv database /tmp
-
Add Paths to oracle’s .bashrc
Login as Oraclesu oracle
Edit .bashrc file
nano ~/.bashrc
Insert:
# Oracle Settings
TMP=/tmp; export TMP
TMPDIR=$TMP; export TMPDIR
ORACLE_HOSTNAME=[HOSTNAME]; export ORACLE_HOSTNAME
ORACLE_UNQNAME=DB11G; export ORACLE_UNQNAME
ORACLE_BASE=/u01/app/oracle; export ORACLE_BASE
ORACLE_HOME=$ORACLE_BASE/product/11.2.0/dbhome_1; export ORACLE_HOME
ORACLE_SID=[DBSID]; export ORACLE_SID
PATH=/usr/sbin:$PATH; export PATH
PATH=$ORACLE_HOME/bin:$PATH; export PATH
LD_LIBRARY_PATH=$ORACLE_HOME/lib:/lib:/usr/lib:/usr/lib64; export LD_LIBRARY_PATH
CLASSPATH=$ORACLE_HOME/jlib:$ORACLE_HOME/rdbms/jlib; export CLASSPATH
Replace [HOSTNAME] with IP and [DBSID] with SID Name
In this Example Respectively:-
HOSTNAME = 127.0.0.1
-
DBSID = SID
Load New .bashrc Settings
bash
-
-
Install the Oracle 11g Software
cd /tmp/database
chmod -R +x /tmp/database
./runInstaller
If Got Display Not Set Look
-
Oracle Base: /u01/app/oracle
-
Software Location: /u01/app/oracle/product/11.2.0/dbhome_1
-
Solving Errors in invoking target ‘install’ & ‘agent nmhs’

-
Execute Scripts
Right Before the End of Process a Pop-Up Window will Show the Path to Two Configuration Scripts you Need to Execute on Terminal!
Next Oracle Should Confirm you of the Successful Installation Achivement.)
. -
How to Create an Oracle 11g Database Instance
On the first screen Just Leave eMail Blank and Un-Check the Demand of Security Update Support then Click on Next
Then Confirm on Warning and Follow.
On “Select Installation Option” Select “Install database software only” and Click on Next
.
On Step 3 Leave Default “Single instance database installation” and Click on Next
.
On Step 4 Select your Language and Click on Next
.
On Step 5 Leave Default Enterprise Edition and Click on Next
On “Installation Location” Set All As Here Below and Click on Next
These are the Same Settings Inserted into the .bashrc File…
On “Create Inventory” if you Setup the Path on .bashrc Like Here Leave Default and Click on Next
.
On “Operating System Groups” if you Setup the Path on .bashrc Like Here Leave Default and Click on Next
.
On “Prerequisite Checks” you will Get Easily a “Warning Message” about some Missing Requirements
Just Check: “Ignore All” and Follow Up with Installation…
Check Ignore All and Follow…
On the “Summary” Click on “Save Response File” to Take Note of Settings and then Click on Finish
.
The Installation Product Procedure should Start…
On a Localhost for Example you Should Access the Enterprise Manager by the Address:
https://127.0.0.1:1158/em
And you can Login with:
Username: SYS
Password: oracleDatabasePassword
From the Drop-down below Select >> Connect as SYSDBA
You Should be able to Access the Database by the Enterprise Manager!
How Managing, Start & Stop Oracle 11g R2 Database by SQLPlus Commands
How to Getting-Started with SQLPlus for Oracle 11g DB
Oracle 11g Database Troubleshooting Guides
Enjoy this “Step by Step” Clear Installation and Getting Started…
Good Luck! :)