Install Epson WF 2010 Linux Mint Driver
Hi! The Tutorial shows you Step-by-Step How to Download and Install Epson WF 2010 Linux Mint Driver.
To Get the Epson WorkForce 2010 Linux Mint Printer Installed you need to Download and Install the Epson Proprietary Driver.
Finally, using the Epson Printer Utility Software, you can Check Ink Levels, View Error and other Status… on EPSON WF-2010 Series Printers.

-
Download Epson WF-2010 Series Printers Driver in Linux Mint
Get the Epson Printer WF-2010 Series Driver in Mint.
-
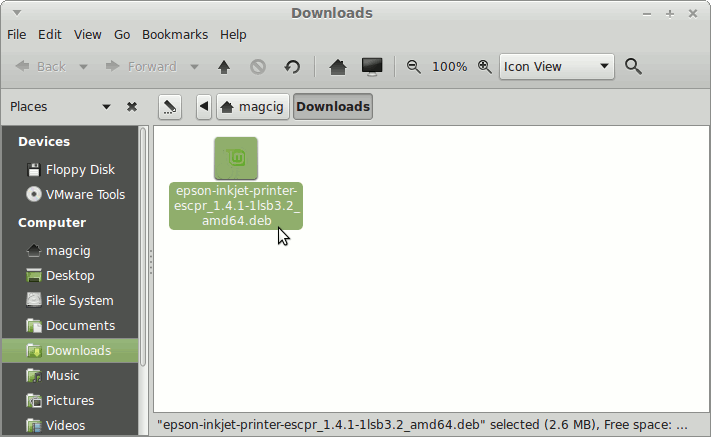
Open Home > Downloads Folder

-
Double-Click on All the Printer Driver Packages.
-
Click on Install to Start Epson Drivers Installation.
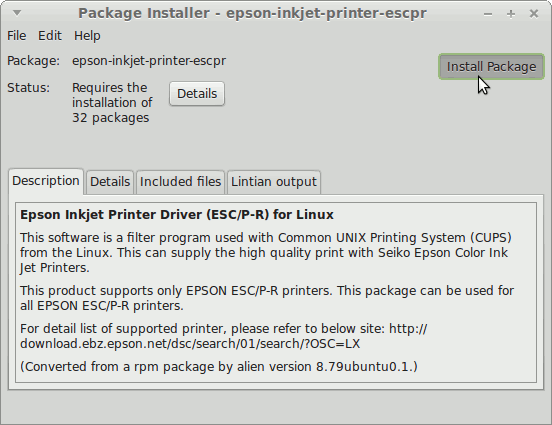
If you Get an Error about a Missing “lsb” Package just Doesn’t Care about it… -
Download Epson WF-2010 Printer Utility for Linux Mint
Get the Epson Printer WF-2010 Series Utility for Mint.
-
Follow the Same Process as for the Driver
-
Finally, Go to Add Printer
First, Launch the Printer Configure App
On Mate/Cinnamon Simply Start Typing ‘printer’.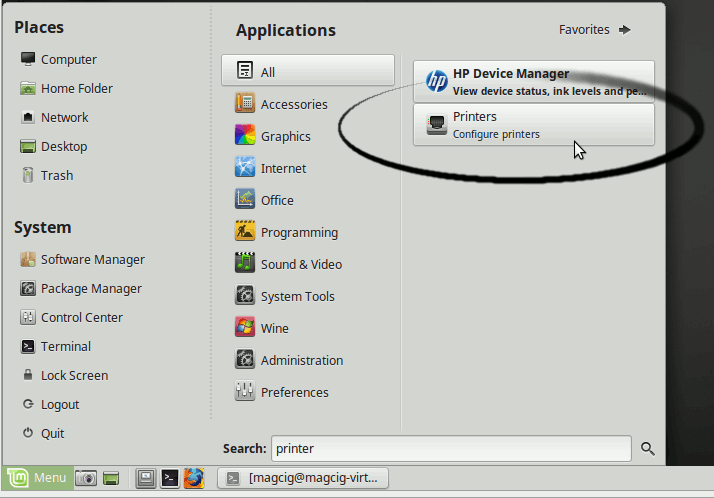
Next Choose Add
And Follow with the Wizard’s Setup…
How to Install Google-Chrome for Mint:
Setup Google-Chrome for Mint.
How to Install Adobe Reader for Mint
Setup Adobe Reader for Mint.
