Ubuntu 17.04 KVM Install
Hi! The Tutorial shows you Step-by-Step How to Install KVM on Ubuntu 17.04 Zesty GNU/Linux Desktop/Server.
And KVM for Ubuntu Zesty is a full Virtualization Solution for Linux on x86 Hardware containing Virtualization Extensions (Intel VT or AMD-V).
Moreover, KVM consists of a Loadable Kernel Module, kvm.ko, that provides the Core Virtualization Infrastructure and a Processor Specific Module, kvm-intel.ko or kvm-amd.ko.
Using KVM, one can Run Multiple Virtual Machines Running Unmodified Linux or Windows Images. Each Virtual Machine has private Virtualized Hardware: a Network Card, Disk, Graphics Adapter, etc.
Especially relevant: a 64-bit System it’s not required but strongly Recommended.
Finally, the guide includes instructions on How to Getting-Started with QEMU KVM Virtualization on Ubuntu.

-
1. Accessing Shell
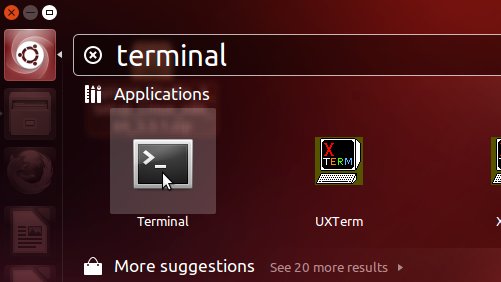
Open a Shell session
Ctrl+Alt+t on Desktop
Or Login into Server Shell
(Press “Enter” to Execute Commands)
-
2. Pre-Installation Checks
Then Check if KVM Can be Installed
With:egrep -c '(vmx|svm)' /proc/cpuinfo
If in Output > 0 then your Processor support Hardware Virtualization!
Make sure virtualization is enabled in BIOS: Enable Intel VT/AMD-V Guide!
Now again, first Install needed Tool with:sudo apt install cpu-checker
And then Verify it:
kvm-ok
If it’s Good you will see:
INFO: /dev/kvm exists
KVM acceleration can be used
Finally, if the answer is negative you can still use KVM but only in a Slow mode…
-
3. Installing KVM
Now you are Ready to Install KVM on Ubuntu System
sudo apt update
sudo apt install qemu qemu-system qemu-kvm libvirt-bin ubuntu-vm-builder bridge-utils
Following Ubuntu Documentation about KVM related Packages:
- libvirt-bin provides libvirtd which you need to administer qemu and kvm instances using libvirt
- qemu & qemu-kvm (kvm in Karmic and earlier) are the backend
- ubuntu-vm-builder powerful command line tool for building virtual machines
- bridge-utils provides a bridge from your network to the virtual machines
-
4. Adding User to Group
Next Add User to libvirt Group
First, you need to Make the Group:sudo addgroup libvirtd
And then Add User with:
sudo adduser `id -un` libvirtd
This because only the Users of this Group can Run Virtual Machines.
Then Relogin to Enable this Setup! -
5. Verifing KVM Installation
Finally, Test Installation.
Simply performing:
virsh list --all
And in the Output you should find:
Id    Name                           State
----------------------------------------------------
This because still no VMs has been made.
-
6. Starting Libvirt Daemon
Again to Start Libvirtd Daemon.
sudo service libvirtd start
And to Enable it on Boot:
sudo update-rc.d libvirtd enable
-
7. Creating and Running KVM VMs
KVM Virtualization Getting-Started Guide