Android Studio Installation in Kali

May 23, 2018 | By the+gnu+linux+evangelist.

Android Studio Kali Linux Installation Guide

Hi! The Tutorial shows you Step-by-Step How to Install Android Studio IDE in Kali 64-bit GNU/Linux Desktop.

First, the Android Studio for Kali is the Official IDE for Android Application Development, based on IntelliJ IDEA.

Especially relevant: the Android App Development Requires a working Oracle Java JDK Installation for Kali.

Android Studio Fedora 39 Installation – Step-by-step

Again about the Android Studio IDE main Features are:

  • Flexible Gradle-based build system
  • Build variants and multiple apk file generation
  • Code templates to help you build common app features
  • Rich layout editor with support for drag and drop theme editing
  • Lint tools to catch performance, usability, version compatibility, and other problems
  • ProGuard and app-signing capabilities
  • Built-in support for Google Cloud Platform, making it easy to integrate Google Cloud Messaging and App Engine
  1. 1. Launching Shell Emulator

    Open a Terminal window
    (Press “Enter” to Execute Commands)
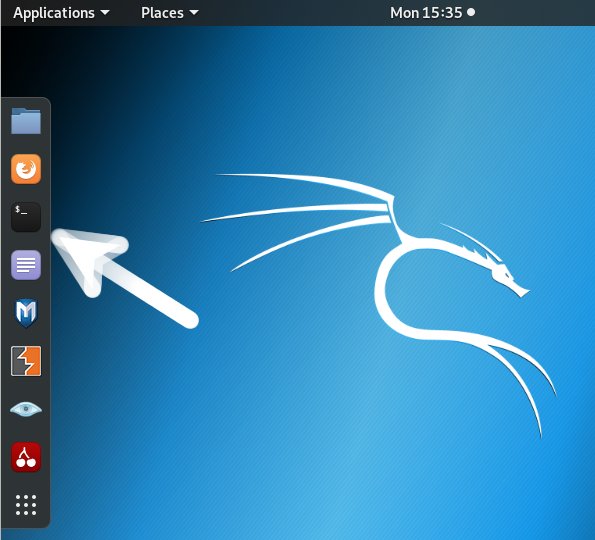
    Android Studio Kali Linux Installation Guide - Open Terminal Shell Emulator
  2. 2. Downloading Android Studio for Kali

    Download Android Studio IDE for Kali

    Android Studio IDE tar.gz Linux

    If possible Select directly “Open with Archive Manager”!

  3. 3. Extracting Android Studio IDE

    Then Double-Click on Android Archive
    Extract into /tmp

    Android Studio Kali Linux Installation Guide - extraction
  4. 4. Installing Dependencies

    This for 64-bit Systems only, Install Required Packages.

    sudo apt-get install lib32z1 lib32ncurses* lib32stdc++6
  • 5. Installing Oracle JDK

    How to Install Required Oracle Java JDK on Kali Linux

    Install Oracle JDK for Kali
  • 6. Relocating Android Studio

    Again to Relocate Android Studio IDE
    For a System wide installation we Set the superUser as Holder

    sudo chown -R root:root /tmp/android-studio

    If Got “User is Not in Sudoers file” then see: How to Enable sudo
    Then Move the Android Studio contents into the /opt Directory

    sudo mv /tmp/android-studio /opt/
  • 7. Amending User’s Path

    And to Make the Android SDK Command-line Accessible
    Amend the User’s Path like:

    nano ~/.bashrc

    Append:

    /nexport PATH=~/Android/sdk/platformtools:~/Android/sdk/tools:/opt/android-studio/bin:$PATH
    

    Ctrl+x to Save & Exit from nano editor :)

  • 8. Getting-Started Guide

    Getting-Started with Android App Development

    Android Studio Quick Start Guide
  • 9. Running Android Studio IDE

    Finally, Launch & Enjoy Andoid Studio:
    First, Launch it from Terminal with:

    studio.sh

    And on the First, Configuration a Desktop Launcher it’s Automatically Created!
    Android Studio Kali Linux Installation Guide - Launcher
    Wait until Android Studio Download the SDK Tools and the others Needed Components…
    Android Studio Kali Linux Installation Guide - Config Wizard

  • Android Studio Kali Linux Installation Guide - Config Wizard

    So Now I’m truly Happy if My Guide could Help you to Install Android Studio on Kali Linux!


    QuickChic Theme • Powered by WordPress