GNU/Linux MX 19 Installing KeePass – QuickStart Guide
[xyz-ihs snippet=”336AdTop”]Hi! The Tutorial shows you Step-by-Step How to Install KeePass 2 in MX GNU/Linux 19 Desktop.
And KeePass for MX Linux 19 is a Free Open Source Password Manager, which Helps you to Manage your Passwords in a Secure Way.
Then you can put All your Passwords in One Database, which is Locked with One Master Key or a Key File.
So you only have to Remember One Single Master Password or Select the Key File to Unlock the whole Database.
Finally, the KeePass Features:
- Strong Security
- Multiple User Keys
- Portable and No Installation Required, Accessibility
- Export To TXT, HTML, XML and CSV Files
- Import From Many File Formats
- Easy Database Transfer
- Support of Password Groups
- Time Fields and Entry Attachments
- Auto-Type, Global Auto-Type Hot Key and Drag&Drop
- Intuitive and Secure Clipboard Handling
- Searching and Sorting
- Multi-Language Support
- Strong Random Password Generator
- Plugin Architecture
- Open Source!
1. Terminal QuickStart
How to QuickStart with Command Line on MX GNU/Linux
Bash Shell MX QuickStart Guide[xyz-ihs snippet=”234Ad1″]First, Update the Apt Repo Sources with:
sudo apt update
Authenticate with the User Admin Pass.
If Got “User is Not in Sudoers file” then see: How to Enable sudo.
2. Installing
Next to Install KeePass
Simply play:sudo apt install keepass2
Authenticate with the User Admin Pass.
If Got “User is Not in Sudoers file” then see: How to Enable sudo.
3. Launching
Now, to Start KeePass UI
From Command Line execute:keepass
Or Use the Desktop Launcher:Here above on the GNOME 3 Desktop.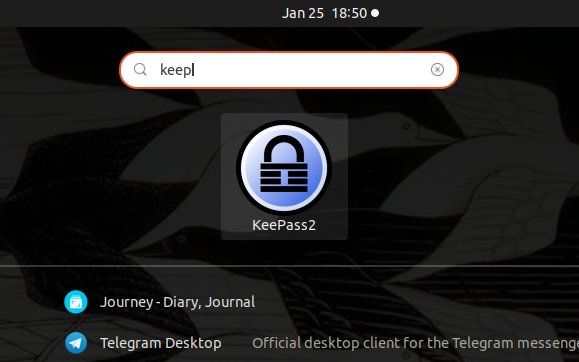
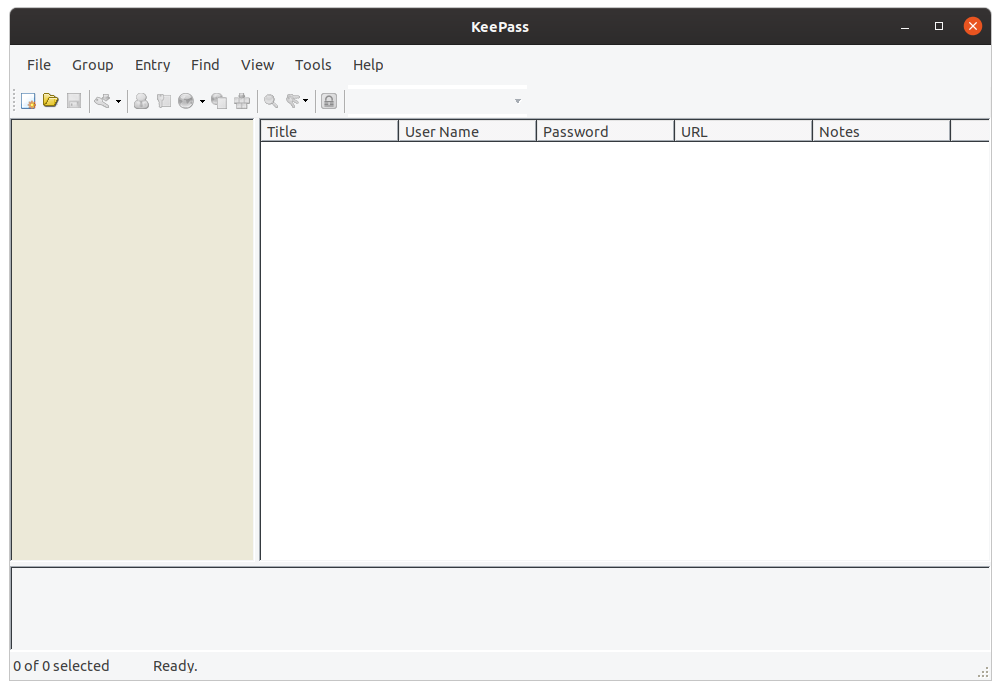
4. Getting-Started Guide
Getting-Started with KeePass 2 on GNU/Linux
So Now I’m truly Happy if My Guide could Help you to Quick-Start with KeePass on MX Linux 19!