GNU/Linux Ubuntu 20.04 Epson L375 Printer Setup – QuickStart Guide
Hi! The Tutorial shows you Step-by-Step How to Install Epson EcoTank L375 Printer/Scanner in Ubuntu 20.04 Focal LTS GNU/Linux Desktop.
And to Install Epson L375 Printer in Ubuntu Focal you need to Setup the Proprietary Driver.
Especially relevant: after the Driver Setup to achieve the Printer Setup follow the included instructions to Add Printer.
Moreover, using the Epson Printer Utility Software, you can Check Ink Levels, View Error and other Status…
Finally, the guide includes also instructions on How to Getting-Started Epson L375 Scanning on Ubuntu.
-
1. Launching Terminal
Open a Terminal window
Ctrl+Alt+t on Desktop
(Press “Enter” to Execute Commands).In case first see: Terminal QuickStart Guide.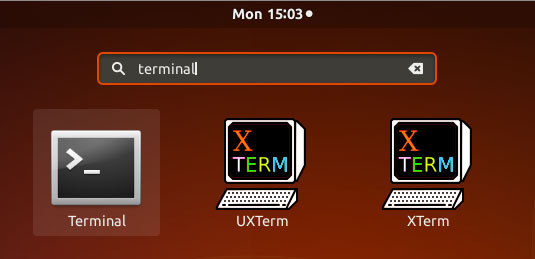
-
2. Updating Ubuntu Repo
Then Update Ubuntu Focal Repositories:
sudo apt update
Authenticate with the User Admin Pass.
If Got “User is Not in Sudoers file” then see: How to Enable sudo. -
3. Downloading Epson L375 Driver for Ubuntu
Download Ubuntu Epson L375 Driver
On Firefox prompt if possible Select directly “Open with Ubuntu Software Center”!
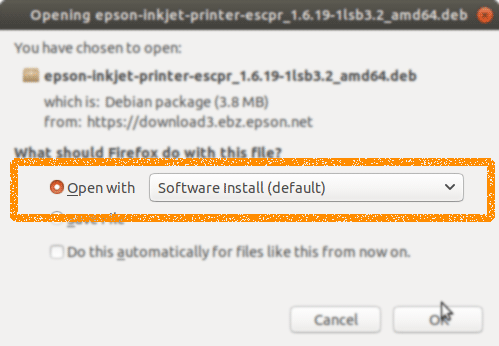
Or with Chrome Click on Bottom’s Button, otherwise Double-Click on it in the File Manager…
Contents