Setting Up
-
2. Installing Dependencies
Then to Install Required Software
Simply play:yay -S --noconfirm ofono
And again:
yay -S --noconfirm phonesim
How to Install Yay for Arch GNU/Linux
On Prompt try simply to Hit “Enter” and follow with the Default Choices.
Possibly to Accept the License Agreement Hit “q”.
In case of any Issue and for further insight see: AUR oFono. -
3. Loading Bluetooth Kernel Module
Now try to Load Bluetooth USB Kernel Module
With:sudo modprobe btusb
And then Restart Bluetooth Service:
sudo systemctl restart bluetooth
-
4. Configuring
Next to Configure Apple AirPods Bluetooth backend
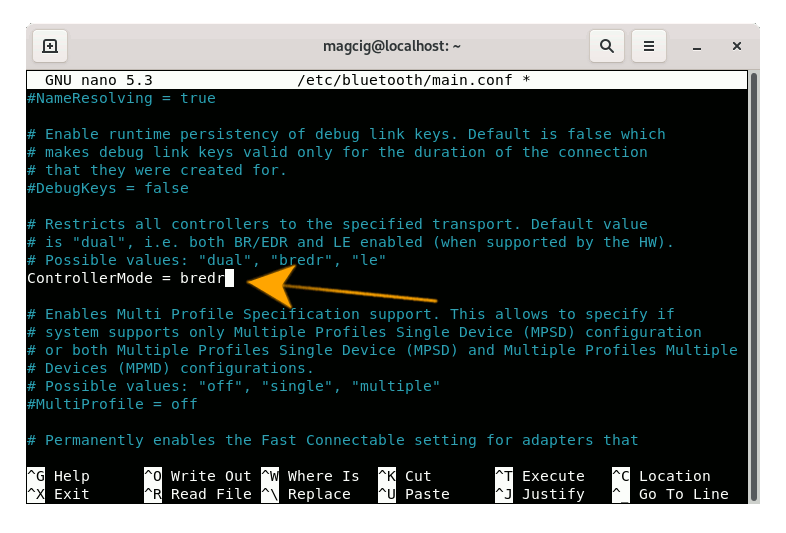
First, you can try with this set up:sudo nano /etc/bluetooth/main.conf
Set the “ControllerMode” in “bredr” or possibly “dual”:

Ctrl+w to Search.
And Ctrl+x to Save & Exit from nano Editor!
Now Restart the Bluetooth Service:sudo /etc/init.d/bluetooth restart
Next you can test Pairing the Device and if is Not working then proceed with the further instructions below.
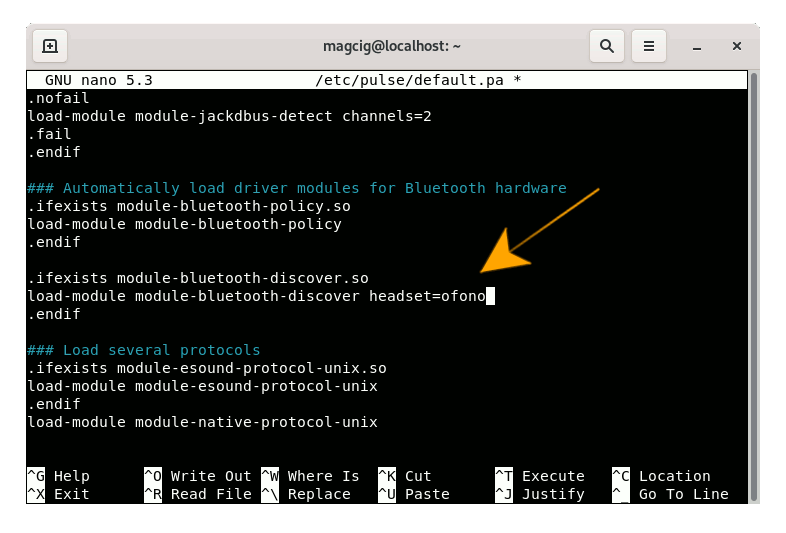
So another possible solution is editing the oFono Configuration:sudo nano /etc/pulse/default.pa
Search for “load-module module-bluetooth-discover” and Change the line as:
load-module module-bluetooth-discover headset=ofono
Save it ad Exit as on the former Instruction.

Then Add the User “pulse” to the Group “bluetooth” as:
sudo usermod -aG bluetooth pulse
Follow Granting the neede Permissions editing:
/etc/dbus-1/system.d/ofono.conf
Search for “</busconfig>” and right before it Insert:
<policy user="pulse">
<allow send_destination="org.ofono"/>
</policy>
Save & Exit.
Again configure also Phonesim editing the File:/etc/ofono/phonesim.conf
And appending:
[phonesim]
Driver=phonesim
Address=127.0.0.1
Port=12345
Save it and Exit again.
Now Restart oFono Service with:sudo systemctl restart ofono.service
And again Phonesim:
ofono-phonesim -p 12345 /usr/share/phonesim/default.xml
Eventually to Test the Phonesim set up use this workflow:
cd /tmp
git clone git://git.kernel.org/pub/scm/network/ofono/ofono.git
cd ofono/test
./list-modems
Contents