GNU/Linux Voyager Installing GParted Guide
Hi! The Tutorial shows you Step-by-Step How to Install GParted in Voyager GNU/Linux Desktop.
And GParted for Voyager Linux uses libparted to Detect and Manipulate Devices and Partition Tables, and moreover, Add several Filesystem Tools to provide Support for Filesystems Not Included in libparted.
So with GParted you can Resize, Copy, and Move Partitions without Data loss, enabling you to:
- Grow or shrink your C: drive
- Create space for new operating systems
- Attempt data rescue from lost partitions
GParted provides a powerful yet user-friendly interface, making complex partitioning tasks accessible even to less experienced users.
Finally, this guide includes detailed instructions about to Getting-Started with GParted on Voyager.

1. Launching Terminal
1. Launching Terminal
Open a Terminal Shell emulator window
(Press “Enter” to Execute Commands)Or Right-Click anywhere on Desktop or File Manager and Choose “Terminal”: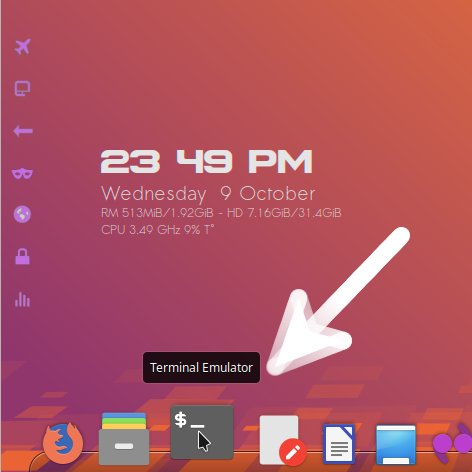 And Update Apt Repository:
sudo apt update
Authenticate with the User Admin Pass.
If Got “User is Not in Sudoers file” then see: How to Enable sudo.
Contents